Xen VPS 手动安装Ubuntu 12.04.01 LTS 小记

最近在某网站买了Xen的VPS,由于有些原因需要将系统从Win换成Ubuntu。但是由于没有提供现成的安装模板,所以只好联系了管理员帮我挂了一个镜像自己装。

在安装过程中出现了一个小问题:网络始终无法设置。如果先装好系统再用ifconfig想启用网卡的话,会出现

SIOCSIFFAGS:Cannot assign request address

的错误。网上搜了一下也没有看到我这个情况可用的解法,只好自己尝试。

经过试验,发现进入Xen的VPS控制面板,将虚拟网卡从Realtek8139改为IntelE1000,并将网络仿真器从ioemu更改为netfront之后,该问题得到解决。

然后由于管理员挂载的是Alternate版本的镜像,所以安装的时候把桌面环境神马的都装上了。上网找了一下找到了删除桌面环境的shell语句,记录一下。

sudo apt-get -y –auto-remove purge unity
sudo apt-get -y –auto-remove purge unity-commonp
sudo apt-get -y –auto-remove purge unity-lens*
sudo apt-get -y –auto-remove purge unity-services
sudo apt-get -y –auto-remove purge unity-asset-pool


How to Install Java on Linux

Java allows you run cross-platform applications that can run on Mac OS-X, Linux, and Windows (among other OSs) without modification. Here’s how to install it on a GNU/Linux machine.

Steps

Manual Non-RPM Method

This is the generic method that also works with GNU/Linux clones that do not support RPM. It does not require administrator rights and allows installing multiple Java versions on the same computer.

  1. 1.Download the JDK.[1].
    • Click on the “Download” link under Java Platform (JDK) 7u4.
    • Accept the license and continue.
  2. 2.Select the right download. Under the “Product/File Description” you should pick your corresponding Linux option. For example, if you’re running Linux x86 (32-bit), you need to choose the corresponding “*.tar.gz” version.

    2943-21

  3. 3.Download the file as a .gz. Save it to your GNU/Linux machine.
  4. 4.Switch to the directory where you saved the file. You do not need to be a root and only must have the write access to the folder where you wish to install Java. If your administrator is not supportive, you may need to place Java into your home folder or (even better) on some shared network location
  5. 5.Uncompress the file. For example, you could do this in your home folder. Uncompressing will create a folder called “jdk1.7.0_04”. Java is now installed.
    • The installed Java jre is rather independent and can be easily moved into another place just by copying all its files.
    • You can install multiple different jre’s this way: they coexist together and can be used if some software requires the older version to run.
  6. 6.Launch Java. The Java executable you need to launch is located in a subfolder, called “bin.” This way of installation will not configure a default Java command for you — you must do this manually or always include the full path in your startup script.

Manual RPM Method

This seems like a “more civilized” way to install Java because it allows the installer to check the dependencies on some system libraries that may be missing. However, it does not support versioning easily and may fail even in some systems that do support RPMs. (Though the current Java installations are rather self-dependent and the required minimal requirements are usually satisfied anyway.)

  1. 1.Download the JDK.[2].
    • Click on the “Download” link under Java Platform (JDK) 7u4.
    • Accept the license and continue.
  2. 2.Select the right download. Under the “Product/File Description” you should pick your corresponding Linux option. For example, if you’re running Linux x86 (32-bit), you need to choose the corresponding “*.rpm” version, for example “jdk-7u4-linux-i586.rpm”.

    2943-2

  3. 3.Download the .rpm file. Save it to your GNU/Linux machine.
  4. 4.Log in as root and switch to the directory where you saved the file. Or, become root by running su and entering the super-user password.
  5. 5.Install the rpm file by executing ‘rpm -ivh filename.rpm’, where filename is the name of your .rpm file. (Such as jdk-7u4-linux-i586.rpm).
    • You may receive a message telling that program “rpm” is not installed.
    • If that is the case the program “rpm” is not installed. You need to install it writing: sudo apt-get install rpm. Enter your password, and you’re finished.
  6. 6.Create symbolic links. If you want to be able to execute this version of Java interpretor or compiler from any directory on your GNU/Linux system, you will have to create a few symbolic links:
    • sudo ln -s -v jdk1.7.0_04/bin/java /usr/bin/java
    • sudo ln -s -v jdk1.7.0_04/bin/javac /usr/bin/javac
    • Note that by installing using this method there could be dependencies that fail. It is better to use the package installer that handles all dependencies for you, since you will not be able to use Java correctly until the dependencies are resolved.

Ubuntu Method Using a GUI Package Manager

  1. 1.Open a package manager. You can use Synaptic or Adept Manager.
  2. 2.Install Open JDK. Java JDK and JRE are not available for installation through GUI Package Manager. You’ll need to install Open JDK instead.
    • Perform a search for openjdk-7-jdk.
    • Select openjdk-7-jdk for installation. Depending on the package manager, you may be asked if you wish to install the required dependencies or it will automatically select them without confirmation. For example, the openjdk-7-jre was already selected by Synaptic Package Manager. If you want to use Java as a plug-in in your browser, then also select to install icedtea-7-plugin.
  3. 3.Apply the changes. Click the button to apply the changes. Depending on the package manager, a pop-up window may appear asking for you to confirm the changes.
  4. 4.Wait for Java to install.

Ubuntu Method Using a Console

  1. 1.Enter one of the following commands into your console program:
    • sudo apt-get install openjdk-7-jdk openjdk-7-jre (if you don’t want the browser plug-in)
    • sudo apt-get install openjdk-7-jdk openjdk-7-jre icedtea-7-plugin (if you do need the plug-in)
    • apt-get automatically takes care of the dependencies and lists the changes for confirmation.
  2. 2.Enter y to confirm the installation.

Ubuntu OpenJDK Method Using a Console

  1. 1.Ubuntu no longer supports the Sun Java package in favor of OpenJDK.
  2. 2.Enter one of the following into your console program:
    • If you do not want the browser plugin, sudo apt-get install openjdk-6-jre.
    • If you do want the browser plugin, sudo apt-get install openjdk-6-jre icedtea6-plugin
    • If you’re working on a server without graphics, and want an environment just for running server applications (e.e. Tomcat or Glassfish), sudo apt-get install –no-install-recommends openjdk-6-jre-headless
    • If you need the full JDK (for writing Java programs): sudo apt-get install openjdk-6-jdk
    • apt-get automatically takes care of the dependencies and lists the changes for confirmation.
  3. 3.Enter y to confirm the installation.

Tips

  • It’s much easier to install from the repositories than from the download on Oracle’s site.
  • Even though it might be unfamiliar to you, using the console method is actually easier than the GUI method.
  • If you find how-to specific for your distribution we recommend using it because in some distributions, Java can be included in the software repositories (which you can benefit from).
  • On Red Hat 8.0 Linux, one could start a Nautilus file manager, desending to the directory, and click on the name of the rpm filename and activate the installation process. This does not work any more in Fedora Core 4 (other FC versions not tested). In reality, if you do this you will get a (warning) message saying that the file name indicates the file is not executable while the content of the file is of the type “executable”.
  • Another tip to follow progress of the rpm install is to use ‘rpm -ivv … ‘ which turns on theverbose output and gives you more info on the install as it progresses. You can do the same thing with other rpm actions to get rpm to be more verbose about what is going on.

Sources and Citations

  1.  www.oracle.com/technetwork/java/javase/downloads/index.html
  2.  www.oracle.com/technetwork/java/javase/downloads/index.html

ubuntu下svn服务器的安装配置

1.SubVersion服务安装

1
2
sudo apt-get install subversion
sudo apt-get install libapache2-svn

2.服务器配置 
2.1相关用户、组的设定
将自己和“www-data”(Apache 用户)加入组subversion中

1
2
sudo addgroup subversion
sudo usermod -G subversion -a www-data

看下结果:

1
 cat /etc/group|grep subversion

这里注意,需要注销然后再登录以便您能够成为 subversion 组的一员,然后就可以执行签入文件(Check in,也称提交文件)的操作了
仓库位置我们就放在/home/svn下吧:

1
sudo mkdir /home/svn

2.2配置subversion
编辑/etc/subversion/config 文件,修改相关设置

1
2
3
4
5
6
7
8
9
10
11
12
13
14
15
16
17
18
19
20
21
22
23
24
25
26
27
28
29
30
31
32
33
34
### Section for configuring miscelleneous Subversion options.
[miscellany]
global-ignores = *.o *.lo *.la *.al .libs *.so *.so.[0-9]* *.a *.pyc *.pyo *.rej *~ #*# .#* .*.swp .DS_Store
### Set mime-types-file to a MIME type registry file, used to
### provide hints to Subversion’s MIME type auto-detection
### algorithm.
# mime-types-file = /path/to/mime.types

### Set enable-auto-props to ‘yes’ to enable automatic properties
### for ‘svn add’ and ‘svn import’, it defaults to ‘no’.
### Automatic properties are defined in the section ‘auto-props’.
enable-auto-props = yes

### Section for configuring automatic properties.
[auto-props]
### The format of the entries is:
###   file-name-pattern = propname[=value][;propname[=value]…]
### The file-name-pattern can contain wildcards (such as ‘*’ and
### ‘?’).  All entries which match (case-insensitively) will be
### applied to the file.  Note that auto-props functionality
### must be enabled, which is typically done by setting the
### ‘enable-auto-props’ option.
*.c = svn:eol-style=native
*.cpp = svn:eol-style=native
*.h = svn:eol-style=native
*.dsp = svn:eol-style=CRLF
*.dsw = svn:eol-style=CRLF
*.sh = svn:eol-style=native;svn:executable
*.txt = svn:eol-style=native
*.png = svn:mime-type=image/png
*.jpg = svn:mime-type=image/jpeg
Makefile = svn:eol-style=native
*.php = svn:keywords=Id Rev Date URL Revision Author

global-ignores是提交时忽略的文件类型,启用auto-props后,让subversion自动添加Id,Revision等keywords
这样就可以使用svn的keywords了。特别是eclipse里就方便多了。设置一下就可以使用
$$Id$$、$$Reversion $$、$$Date $$、$$Author$$ 、$$URL$$作为注释模板的内容,方便极了。

如果在客户端访问subversion版本库时出现这个错误:
svnserve.conf:102: Option expected
为什么会出现这个错误呢,就是因为subversion读取配置文件svnserve.conf时,无法识别有前置空格的配置文件。
要避免出现这个错误,应该在去掉这些行前的#时,也要顺手去掉前面的空格。

3.apache mod_dav_svn 配置
通过 WebDAV 协议访问(http://) 
关于WebDAV :

WebDAV (Web-based Distributed Authoring and Versioning) 一种基于 HTTP 1.1协议的通信协议.它扩展了HTTP 1.1,在GET、POST、HEAD等几个HTTP标准方法以外添加了一些新的方法,使应用程序可直接对Web Server直接读写,并支持写文件锁定(Locking)及解锁(Unlock),还可以支持文件的版本控制。

编辑 /etc/apache2/mods-available/dav_svn.conf :

1
2
3
4
5
6
7
8
9
10
11
12
13
14
15
16
17
18
19
20
21
22
23
24
25
26
27
28
29
30
31
32
33
34
35
36
37
38
39
40
41
42
43
44
45
46
47
root@hywd:/etc/apache2/mods-available# cat dav_svn.conf
# dav_svn.conf – Example Subversion/Apache configuration
#
# For details and further options see the Apache user manual and
# the Subversion book.
#
# NOTE: for a setup with multiple vhosts, you will want to do this
# configuration in /etc/apache2/sites-available/*, not here.

#
# URL controls how the repository appears to the outside world.
# In this example clients access the repository as http://hostname/svn/
# Note, a literal /svn should NOT exist in your document root.

#enable the repository
DAV svn

# Set this to the path to your repository
#SVNPath /home/svn/vod
# Alternatively, use SVNParentPath if you have multiple repositories under
# under a single directory (/var/lib/svn/repo1, /var/lib/svn/repo2, …).
# You need either SVNPath and SVNParentPath, but not both.
#用这个,以便放多个repository
SVNParentPath /home/svn

# Basic Authentication is repository-wide.  It is not secure unless
# you are using https.  See the ‘htpasswd’ command to create and
# manage the password file – and the documentation for the
# ‘auth_basic’ and ‘authn_file’ modules, which you will need for this
# (enable them with ‘a2enmod’).
AuthType Basic
AuthName “Subversion Repository”
#指定基本用户验证的密码文件存放位置
AuthUserFile /etc/subversion/dav_svn.passwd

# To enable authorization via mod_authz_svn
#mod_authz_svn配置文件的位置
AuthzSVNAccessFile /etc/subversion/dav_svn.authz

# The following three lines allow anonymous read, but make
# committers authenticate themselves.  It requires the ‘authz_user’
# module (enable it with ‘a2enmod’).
#
Require valid-user
#

重启 Apache 2 Web 服务器

1
sudo /etc/init.d/apache2 restart

4.创建 SVN 文件仓库

1
2
3
4
5
6
7
cd /home/svn
sudo mkdir myproject
#更改版本库所属用户、组
sudo chown -R root:subversion myproject
sudo svnadmin create /home/svn/myproject
#赋予组成员对所有新加入文件仓库的文件拥有相应的权限:
sudo chmod -R g+rws myproject

5.密码文件dav_svn.passwd的创建

1
sudo htpasswd -c /etc/subversion/dav_svn.passwd user_name

它会提示你输入密码,当您输入了密码,该用户就建立了。“-c”选项表示创建新的/etc/subversion/dav_svn.passwd 文件,所以user_name所指的用户将是文件中唯一的用户。如果要添加其他用户,则去掉“-c”选项即可:
sudo htpasswd /etc/subversion/dav_svn.passwd other_user_name

6.授权配置文件dav_svn.authz
这里我指定了两个组:管理员组和测试组,指定了两个仓库(vod 、 ThinkPHP 和ftpuserms)的权限 。
vod仓库下管理员组设置为读写权限,测试组只有读的权限
ThinkPHP仓库下管理员组设置为读写权限,测试组只有读的权限
定义ftpuserms储存库下test目录的访问权限:
禁止所有用户访问,星号代表所有用户,权限为空代表没有任何权限
打开test3用户的读权限,打开administrator组的读写权限

1
2
3
4
5
6
7
8
9
10
11
12
13
14
15
16
[groups]
administrator=admin,yuan
tester=test1,test2,test3

[vod:/]
@administrator=rw
tester=r

[ThinkPHP:/]
@administrator=rw
tester=r

[ftpuserms:/test]
@administrator=rw
*=
test3=r

启动SVN服务器:

1
killall svnserve; svnserve -d -r /home/svn/

您可以通过下面的命令来访问文件仓库:

1
svn co http://hostname/svn/myproject myproject –username user_name –password passwd

创建目录试试:

1
svn mkdir “http://localhost/svn/vod/branches” “http://localhost/svn/vod/tags” “http://localhost/svn/vod/trunk” -m “create a new project vod” –username vod –password passwd

createfold

auth

如果在Check in的时候遇到如下错误:
Can’t open ‘/home/svn/myproject/db/txn-current-lock’: Permission denied
查看txn-current-lock文件的权限和用户以及组信息,应该类似于:

1
ls -l /home/svn/myproject/db/txn-current-lock

-rw-rwSr– 1 root subversion 0 2009-06-18 15:33 txn-current-lock

除了权限以外,用户及其组如果不对,则仍然会遇到上述问题,可以再次运行命令:

1
sudo chown -R root:subversion myproject

参考文章:
http://www.blogjava.net/rain1102/archive/2009/02/23/256338.html
http://bbs.iusesvn.com/thread-6-1-1.html
http://snowolf.javaeye.com/blog/740347
http://wiki.ubuntu.org.cn/index.php?title=SubVersion&variant=zh-cn#.E9.80.9A.E8.BF.87_WebDAV_.E5.8D.8F.E8.AE.AE.E8.AE.BF.E9.97.AE.28http:.2F.2F.29

28个Unix/Linux的命令行神器

下面是Kristóf Kovács收集的28个Unix/Linux下的28个命令行下的工具(原文链接),有一些是大家熟悉的,有一些是非常有用的,有一些是不为人知的。这些工具都非常不错,希望每个人都知道。本篇文章还在Hacker News上被讨论,你可以过去看看。我以作者的原文中加入了官网链接和一些说明。

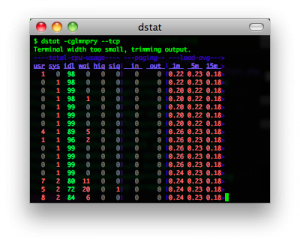
dstat & sar

iostat, vmstat, ifstat 三合一的工具,用来查看系统性能(我在《性能调优攻略》中提到过那三个xxstat工具)。

官方网站:http://dag.wieers.com/rpm/packages/dstat/

你可以这样使用:

1
alias dstat='dstat -cdlmnpsy'

dstat_screenshot

slurm

查看网络流量的一个工具

官方网站:  Simple Linux Utility for Resource Management


slurm_screenshot


vim & emacs

真正程序员的代码编辑器。

vim_screenshot


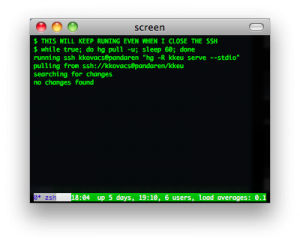
screen, dtach, tmux, byobu

你是不是经常需要 SSH 或者 telent 远程登录到 Linux 服务器?你是不是经常为一些长时间运行的任务而头疼,比如系统备份、ftp 传输等等。通常情况下我们都是为每一个这样的任务开一个远程终端窗口,因为他们执行的时间太长了。必须等待它执行完毕,在此期间可不能关掉窗口或者断开连接,否则这个任务就会被杀掉,一切半途而废了。

Screen是一个可以在多个进程之间多路复用一个物理终端的窗口管理器。Screen中有会话的概念,用户可以在一个screen会话中创建多个screen窗口,在每一个screen窗口中就像操作一个真实的telnet/SSH连接窗口那样。请参看IBM DeveloperWorks的这篇文章《使用 screen 管理你的远程会话

gnu_screen_screenshot1

dtach 是用来模拟screen的detach的功能的小工具,其可以让你随意地attach到各种会话上 。下图为dtach+dvtm的样子。
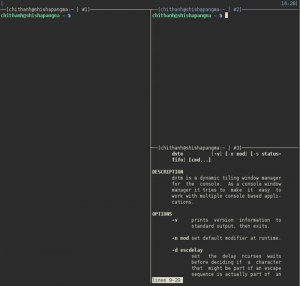
dtach+dvtm

tmux是一个优秀的终端复用软件,类似GNU Screen,但来自于OpenBSD,采用BSD授权。使用它最直观的好处就是,通过一个终端登录远程主机并运行tmux后,在其中可以开启多个控制台而无需再“浪费”多余的终端来连接这台远程主机;当然其功能远不止于此。与screen相比的优点:可以横向和纵向分割窗口,且窗格可以自由移动和调整大小。可在多个缓冲区进行复制和粘贴,支持跨窗口搜索;非正常断线后不需重新detach;……  有人说——与tmux相比,screen简直弱爆了

tmux3

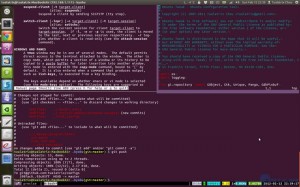
byobu是Ubuntu开发的,在Screen的基础上进行包装,使其更加易用的一个工具。最新的Byobu,已经是基于Tmux作为后端了。可通过“byobu-tmux”这个命令行前端来接受各种与tmux一模一样的参数来控制它。Byobu的细节做的非常好,效果图如下:byobu-tmux
 

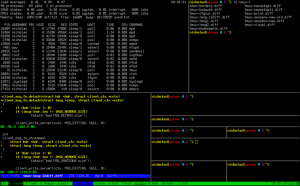
multitail

MultiTail是个用来实现同时监控多个文档、类似tail命令的功能的软件。他和tail的区别就是他会在控制台中打开多个窗口,这样使同时监控多个日志文档成为可能。他还可以看log文件的统计,合并log文件,过滤log文件,分屏,……。

官网:http://www.vanheusden.com/multitail/

multitail_screenshot


tpp

终端下的PPT,要是在某某大会上用这个演示PPT,就太TMD的Geek了。

官网:http://www.ngolde.de/tpp.html

tpp_screenshot1


xargs & parallel

Executes tasks from input (even multithread).

xargs 是一个比较古老的命令,有简单的并行功能,这个不说了。对于GNU parallel ( online manpage )来说,它不仅能够处理本机上多执行绪,还能分散至远端电脑协助处理。而使用GNU parallel前,要先确定本机有安装GNU parallel / ssh / rsync,远端电脑也要安装ssh。

xargs_screenshot


duplicity & rsyncrypto

Duplicity是使用rsync算法加密的高效率备份软件,Duplicity支持目录加密生产和格式上传到远程或本地文件服务器。

rsyncrypto 就是 rsync + encryption。对于rsync的算法可参看酷壳的rsync核心算法

Encrypting backup tools.

duplicity_screenshot


nethack & slash’em

NetHackWiki),20年历史的古老电脑游戏。没有声音,没有漂亮的界面,不过这个游戏真的很有意思。网上有个家伙说:如果你一生只做一件事情,那么玩NetHack。这句话很惹眼,但也让人觉得这个游戏很复杂不容易上手。其实,这个游戏很虽然很复杂,却容易上手。虽然玩通关很难,但上手很容易。NetHack上有许多复杂的规则,”the DevTeam thinks of everything”(开发团队想到了所有的事情)。各种各样的怪物,各种各样的武器….,有许多spoilers文件来说明其规则。除了每次开始随机生成的地图,每次玩游戏,你也都会碰到奇怪的事情: 因为喝了一种药水,变成了机器人;因为踢坏了商店的门被要求高价赔偿;你的狗为你偷来了商店的东西….. 这有点象人生,你不能完全了解这个世界,但你仍然可以选择自己的面对方式。

网上有许多文章所这是最好的电脑游戏或最好的电脑游戏之一。也许是因为它开放的源代码让人赞赏,古老的历史让人宽容,复杂的规则让人敬畏。虽然它不是当前流行的游戏,但它比任何一个当前流行的游戏都更有可能再经受20年的考验。

Slash’EM 也是一个基于NetHack的经典游戏。

nethack_screenshot1


lftp

利用lftp命令行ftp工具进行网站数据的增量备份,镜像,就像使用rsync一样。

lftp_screenshot


ack

ack是一个perl脚本,是grep的一个可选替换品。其可以对匹配字符有高亮显示。是为程序员专门设计的,默认递归搜索,省提供多种文件类型供选。

ack_screenshot


calcurse & remind + wyrd

calcurse是一个命令行下的日历和日程软件。remind + wyrd也很类似。关于日历,我不得不提一个Linux的Cycle日历,也是一个神器,呵呵。

calcurse_screenshot


newsbeuter & rsstail

newsbeuter 和 rsstail 是命令行下RSS的阅读工具。

newsbeuter_screenshot


powertop

做个环保的程序员,看看自己的电脑里哪些程序费电。PowerTOP 是一个让 Intel 平台的笔记本电脑节省电源的 Linux 工具。此工具由 Intel 公司发布。它可以帮助用户找出那些耗电量大的程序,通过修复或者关闭那些应用程序或进程,从而为用户节省电源。

powertop_screenshot


htop & iotop

htop 和 iotop  用来查看进程,内存和IO负载。

htop_screenshot

ttyrec & ipbt

ttyrec 是一个 tty 控制台录制程序,其所录制的数据文件可以使用与之配套的 ttyplay 播放。不管是你在 tty 中的各种操作,还是在 tty 中耳熟能详的软件,都可进行录制。

ipbt 是一个用来回放 ttyrec 所录制的控制台输入过程的工具。

与此类似的还有Shelr 和 termrec 

ipbt_screenshot


rsync

通过SSH进行文件同步的经典工具(核心算法

rsync_screenshot


mtr

MTR – traceroute 2.0,其是把 traceroute 和 ping 集成在一块的一个小工具 用于诊断网络。

mtr_screenshot


socat & netpipes

socat是一个多功能的网络工具,名字来由是” Socket CAT”,可以看作是netcat的N倍加强版。

netpipes 和socat一样,主要是用来在命令行来进行socket操作的命令,这样你就可以在Shell脚本下行进socket网络通讯了。

socat_screenshot


iftop & iptraf

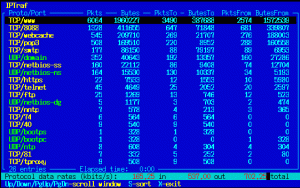
iftopiptraf可以用来查看当前网络链接的一些流量情况。

iftop_screenshot

iptraf-tcpudp2


siege & tsung

Siege是一个压力测试和评测工具,设计用于WEB开发这评估应用在压力下的承受能力:可以根据配置对一个WEB站点进行多用户的并发访问,记录每个用户所有请求过程的相应时间,并在一定数量的并发访问下重复进行。

Tsung 是一个压力测试工具,可以测试包括HTTP, WebDAV, PostgreSQL, MySQL, LDAP, and XMPP/Jabber等服务器。针对 HTTP 测试,Tsung 支持 HTTP 1.0/1.1 ,包含一个代理模式的会话记录、支持 GET、POST 和 PUT 以及 DELETE 方法,支持 Cookie 和基本的 WWW 认证,同时还支持 SSL。

参看:十个免费的Web压力测试工具

siege_screenshot


ledger

ledger 一个命令行下记帐的小工具。

ledger_screenshot


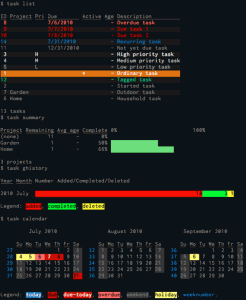
taskwarrior

TaskWarrior 是一个基于命令行的 TODO 列表管理工具。主要功能包括:标签、彩色表格输出、报表和图形、大量的命令、底层API、多用户文件锁等功能。
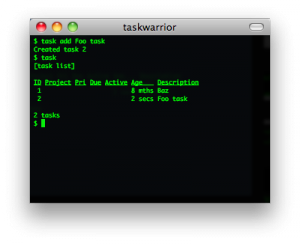
taskwarrior_screenshot

下图是TaskWarrior 2.0的界面:

TaskWarrior2.0


curl

cURL是一个利用URL语法在命令行下工作的文件传输工具,1997年首次发行。它支持文件上传和下载,所以是综合传输工具,但按传统,习惯称cURL为下载工具。cURL还包含了用于程序开发的libcurl。cURL支援的通訊協定有FTP、FTPS、HTTP、HTTPS、TFTP、SFTP、Gopher、SCP、Telnet、DICT、FILE、LDAP、LDAPS、IMAP、POP3、SMTP和RTSP。

curl_screenshot


rtorrent & aria2

rTorrent 是一个非常简洁、优秀、非常轻量的BT客户端. 它使用了 ncurses 库以 C++ 编写, 因此它完全基于文本并在终端中运行. 将 rTorrent 用在安装有 GNU Screen 和 Secure Shell 的低端系统上作为远程的 BT 客户端是非常理想的。

aria2 是 Linux 下一个不错的高速下载工具。由于它具有分段下载引擎,所以支持从多个地址或者从一个地址的多个连接来下载同一个文件。这样自然就大大加快了文件的下载速度。aria2 也具有断点续传功能,这使你随时能够恢复已经中断的文件下载。除了支持一般的 http(s) 和 ftp 协议外,aria2 还支持 BitTorrent 协议。这意味着,你也可以使用 aria2 来下载 torrent 文件。

 rtorrent_screenshot

ttytter & earthquake

TTYtter 是一个Perl写的命令行上发Twitter的工具,可以进行所有其他平台客户端能进行的事情,当然,支持中文。脚本控、CLI控、终端控、Perl控的最愛。

Earthquake也是一个命令行上的Twitter客户端。

ttytter_screenshot

earthquake1


vifm & ranger

Vifm 基于ncurses的文件管理器,DOS风格,用键盘操作。
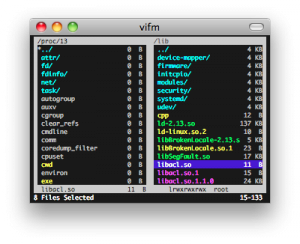
vifm_screenshot1

Ranger用 Python 完成,默认为使用 Vim 风格的按键绑定,比如 hjkl(上下左右),dd(剪切),yy(复制)等等。功能很全,扩展/可配置性也非常不错。类似MacOS X下Finder(文件管理器)的多列文件管理方式。支持多标签页。实时预览文本文件和目录。

ranger

cowsay & sl

cowsay  不说了,如下所示,哈哈哈。还有xcowsay,你可以自己搜一搜。
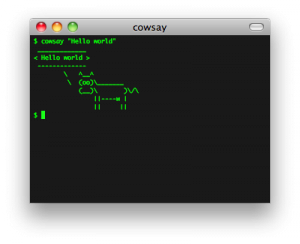
cowsay_screenshot

sl是什么?ls?,呵呵,你会经常把ls 打成sl吗?如果是的话,这个东西可以让你娱乐一下,你会看到一辆火车呼啸而过~~,相当拉风。你可以使用sudo apt-get install sl 安装。

sl

最后,再介绍一个命令中linuxlogo,你可以使用 sudo apt-get install linuxlogo来安装,然后,就可以使用linuxlogo -L
来看一下各种Linux的logo了
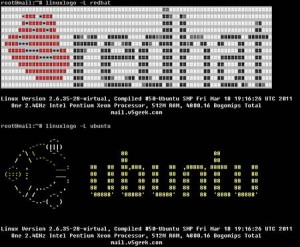
linuxlogo

(全文完)

100个常用的VIM命令

Basics


:e filename Open filename for edition
:w Save file
:q Exit Vim
:w! Exit Vim without saving

Search


/word Search word from top to bottom
?word Search word from bottom to top
/jo[ha]n Search john or joan
/\< the Search the, theatre or then
/the\> Search the or breathe
/\< the\> Search the
/\< ¦.\> Search all words of 4 letters
/\/ Search fred but not alfred or frederick
/fred\|joe Search fred or joe
/\<\d\d\d\d\> Search exactly 4 digits
/^\n\{3} Find 3 empty lines
:bufdo /searchstr/ Search in all open files

Replace


:%s/old/new/g Replace all occurences of old by new in file
:%s/old/new/gw Replace all occurences with confirmation
:2,35s/old/new/g Replace all occurences between lines 2 and 35
:5,$s/old/new/g Replace all occurences from line 5 to EOF
:%s/^/hello/g Replace the begining of each line by hello
:%s/$/Harry/g Replace the end of each line by Harry
:%s/onward/forward/gi Replace onward by forward, case unsensitive
:%s/ *$//g Delete all white spaces
:g/string/d Delete all lines containing string
:v/string/d Delete all lines containing which didn’t containstring
:s/Bill/Steve/ Replace the first occurence of Bill by Steve in current line
:s/Bill/Steve/g Replace Bill by Steve in current line
:%s/Bill/Steve/g Replace Bill by Steve in all the file
:%s/\r//g Delete DOS carriage returns (^M)
:%s/\r/\r/g Transform DOS carriage returns in returns
:%s#<[^>]\+>##g Delete HTML tags but keeps text
:%s/^\(.*\)\n\1$/\1/ Delete lines which appears twice
Ctrl+a Increment number under the cursor
Ctrl+x Decrement number under cursor
ggVGg? Change text to Rot13

Case


Vu Lowercase line
VU Uppercase line
g~~ Invert case
vEU Switch word to uppercase
vE~ Modify word case
ggguG Set all text to lowercase
:set ignorecase Ignore case in searches
:set smartcase Ignore case in searches excepted if an uppercase letter is used
:%s/\<./\u&/g Sets first letter of each word to uppercase
:%s/\<./\l&/g Sets first letter of each word to lowercase
:%s/.*/\u& Sets first letter of each line to uppercase
:%s/.*/\l& Sets first letter of each line to lowercase

Read/Write files


:1,10 w outfile Saves lines 1 to 10 in outfile
:1,10 w >> outfile Appends lines 1 to 10 to outfile
:r infile Insert the content of infile
:23r infile Insert the content of infile under line 23

File explorer


:e . Open integrated file explorer
:Sex Split window and open integrated file explorer
:browse e Graphical file explorer
:ls List buffers
:cd .. Move to parent directory
:args List files
:args *.php Open file list
:grep expression *.php Returns a list of .php files contening expression
gf Open file name under cursor

Interact with Unix


:!pwd Execute the pwd unix command, then returns to Vi
!!pwd Execute the pwd unix command and insert output in file
:sh Temporary returns to Unix
$exit Retourns to Vi

Alignment


:%!fmt Align all lines
!}fmt Align all lines at the current position
5!!fmt Align the next 5 lines

Tabs


:tabnew Creates a new tab
gt Show next tab
:tabfirst Show first tab
:tablast Show last tab
:tabm n(position) Rearrange tabs
:tabdo %s/foo/bar/g Execute a command in all tabs
:tab ball Puts all open files in tabs

Window spliting


:e filename Edit filename in current window
:split filename Split the window and open filename
ctrl-w up arrow Puts cursor in top window
ctrl-w ctrl-w Puts cursor in next window
ctrl-w_ Maximise current window
ctrl-w= Gives the same size to all windows
10 ctrl-w+ Add 10 lines to current window
:vsplit file Split window vertically
:sview file Same as :split in readonly mode
:hide Close current window
:­nly Close all windows, excepted current
:b 2 Open #2 in this window

Auto-completion


Ctrl+n Ctrl+p (in insert mode) Complete word
Ctrl+x Ctrl+l Complete line
:set dictionary=dict Define dict as a dictionnary
Ctrl+x Ctrl+k Complete with dictionnary

Marks


mk Marks current position as k
˜k Moves cursor to mark k
d™k Delete all until mark k

Abbreviations


:ab mail mail@provider.org Define mail as abbreviation of mail@provider.org

Text indent


:set autoindent Turn on auto-indent
:set smartindent Turn on intelligent auto-indent
:set shiftwidth=4 Defines 4 spaces as indent size
ctrl-t, ctrl-d Indent/un-indent in insert mode
>> Indent
<< Un-indent

Syntax highlighting


:syntax on Turn on syntax highlighting
:syntax off Turn off syntax highlighting
:set syntax=perl Force syntax highlighting

删除 Ubuntu Linux 系统旧内核的方法

  使用Ubuntu一段时间后,就会发觉由于自动升级,系统里安装了很多内核。像我,竟然安装了下面那么多,这个造成了漫长的启动列表。必须删掉一些不用的。

  首先就是使用如下命令,列出所有安装的内核,下表中,带有image的就是内核文件。从中选择要卸载的包,用apt-get来卸载:

[tc@ibm:~]$ dpkg --get-selections|grep linux
libselinux1 install
linux-386 install
linux-image-2.6.15-23-386 install
linux-image-2.6.15-27-386 install
linux-image-2.6.15-27-686 install
linux-image-2.6.15-28-386 install
linux-image-2.6.15-28-686 deinstall
linux-image-386 install
linux-kernel-headers install
linux-restricted-modules-2.6.15-23-386 install
linux-restricted-modules-2.6.15-27-386 install
linux-restricted-modules-2.6.15-27-686 install
linux-restricted-modules-2.6.15-28-386 install
linux-restricted-modules-2.6.15-28-686 deinstall
linux-restricted-modules-386 install
linux-restricted-modules-common install
linux-sound-base install
util-linux install

  具体的卸载方法为

sudo apt-get remove linux-image-2.6.15-23-386

  这样就可以实现自动删除内核文件了,还可以释放磁盘空间。

  另外还要记录一个命令。

uname -a

  使用这个命令可以查看当前系统使用的内核。

Ubuntu server 安装与配置lnmp并安装wordpress

Ubuntu 10.04.1 LTS下安装与配置LNMP环境,所谓的LNMP就是Linux+Nginx+Mysql+PHP.

1.首先安装nginx

root@lnmp:/home/windonly# apt-get install nginx
root@lnmp:/home/windonly# service nginx start

目前官方源提供的版本是:0.7.65,通过访问80端口可以测试是否安装成功。

2.安装MySql

通过执行apt-get install mysql-server命令后自动下载mysql,然后安装提示配置好mysql root密码。


3.安装PHP5+php5-fpm

由于目前的官方的源里面没有php5-fpm的包,我们需要下载源代码编译,后面Google发现已经有人提供了镜像源,该镜像源需要验证KEY,不过我们可以无视它继续安装。

在 /etc/apt/sources.list 中加入
deb http://ppa.launchpad.net/jdub/devel/ubuntu maverick main
deb http://ppa.launchpad.net/brianmercer/php/ubuntu lucid main
deb-src http://ppa.launchpad.net/brianmercer/php/ubuntu lucid main

然后执行:
apt-get update

然后安装 php5-fpm
apt-get install php5-fpm 
service php5-fpm start

修改nginx配置文件来完成配置:

root@lnmp:/home/windonly# vi /etc/nginx/sites-enabled/default 

server {
        listen   80 ;
        listen   [::]:80 default ipv6only=on;   ## enable for ipv6
        server_name  localhost;

        #access_log  /var/log/nginx/localhost.access.log;

        index index.php index.htm index.html;
        root /var/www;
        expires 7d;
        location ~ \.php$ {
                fastcgi_pass 127.0.0.1:9000;
                fastcgi_index index.php;
                fastcgi_param APPLICATION_ENV production;
                include fcgi.conf;
                expires off;
        }
}

再配置fcgi.conf:
root@lnmp:/home/windonly# vi /etc/nginx/fcgi.conf 

fastcgi_param  GATEWAY_INTERFACE  CGI/1.1;
fastcgi_param  SERVER_SOFTWARE    nginx;

fastcgi_param  QUERY_STRING       $query_string;
fastcgi_param  REQUEST_METHOD     $request_method;
fastcgi_param  CONTENT_TYPE       $content_type;
fastcgi_param  CONTENT_LENGTH     $content_length;

fastcgi_param  SCRIPT_FILENAME    $document_root$fastcgi_script_name;
fastcgi_param  SCRIPT_NAME        $fastcgi_script_name;
fastcgi_param  REQUEST_URI        $request_uri;
fastcgi_param  DOCUMENT_URI       $document_uri;
fastcgi_param  DOCUMENT_ROOT      $document_root;
fastcgi_param  SERVER_PROTOCOL    $server_protocol;

fastcgi_param  REMOTE_ADDR        $remote_addr;
fastcgi_param  REMOTE_PORT        $remote_port;
fastcgi_param  SERVER_ADDR        $server_addr;
fastcgi_param  SERVER_PORT        $server_port;
fastcgi_param  SERVER_NAME        $server_name;

# PHP only, required if PHP was built with enable-force-cgi-redirect
fastcgi_param  REDIRECT_STATUS    200;

完成之后通过:
root@lnmp:/home/windonly# nginx -t
the configuration file /etc/nginx/nginx.conf syntax is ok
configuration file /etc/nginx/nginx.conf test is successful

来测试配置文件是否正确。
最后通过 service nginx reload 重启nginx

通过:
vi /var/www/index.php

然后访问这个页面来测试是否配置成功了。
4.配置PHP和MySql

通过 apt-get install php5-mysql 安装PHP访问MySql模块,需要重启下php5-fpm使其生效。

5.安装Wordpress

首先现在最新版本的wordpress: wget http://cn.wordpress.org/wordpress-3.0.1-zh_CN.zip 并解压(如果服务器上没装unzip就通过apt-get install unzip安装),先创建数据库:

mysql> create database myblog;
Query OK, 1 row affected (0.00 sec)

mysql> create user 'myblog'@'localhost' identified by 'myblog';
Query OK, 0 rows affected (0.00 sec)

mysql> grant all on myblog.* to 'myblog'@'localhost';
Query OK, 0 rows affected (0.00 sec)

然后就可以通过web页面安装与配置wordpress了。

6.如何实现Wordpress静态链接
windonly@linux:~$ sudo vi /etc/nginx/sites-enabled/default 

加入以下配置:

location / {
        index index.html index.php;
        if (-d $request_filename){
                rewrite ^/(.*)([^/])$ $1$2/ permanent;
        }
        if (-f $request_filename/index.php){
                rewrite (.*) $1/wordpress/index.php;
        }
        if (!-f $request_filename){
                rewrite (.*) /wordpress/index.php;
        }
}

然后重启nginx既可。

7.结束语

至此整个LNMP配置已经完成,虽然网上有很多一键包,但是只有通过自己手工配置一次才能熟悉整个配置流程,方便后期维护和优化。一直很纠结要不要去买一个VPS,每年1600的费用也是一笔相当大的开销啊。


#安装 eAccelerator
wget http://bart.eaccelerator.net/source/0.9.6.1/eaccelerator-0.9.6.1.tar.bz2
tar xvjf eaccelerator-0.9.6.1.tar.bz2
cd eaccelerator-0.9.6.1
cp control.php /var/www/control.php
sudo chown www:www /var/www/control.php
sudo phpize
sudo ./configure –enable-eaccelerator=shared
sudo make
sudo make install
sudo vi /etc/php5/fpm/php.ini

extension_dir = “/usr/lib/php5/20090626+lfs/”
extension = eaccelerator.so
eaccelerator.shm_size=”16″
eaccelerator.cache_dir=”/tmp/eaccelerator”
eaccelerator.enable=”1″
eaccelerator.optimizer=”1″
eaccelerator.check_mtime=”1″
eaccelerator.debug=”0″
eaccelerator.filter=””
eaccelerator.shm_max=”0″
eaccelerator.shm_ttl=”0″
eaccelerator.shm_prune_period=”0″
eaccelerator.shm_only=”0″
eaccelerator.compress=”1″
eaccelerator.compress_level=”9″
eaccelerator.allowed_admin_path=”/var/www/control.php”

#配置文件目录
/etc/nginx/nginx.conf
/etc/nginx/sites-enabled/default
/etc/php5/fpm/php.ini
/etc/php5/fpm/pool.d/www.conf