Linux下关于subversion权限配置问题

我们在Linux下安装svn时,会发现这么一个问题,所有配置svn的过程自己都认为成功了,为什么一到客户端访问就会出现这样的提示呢:

Authorization failed

其实这个是权限配置的问题,说白了就是目录没配置对,并且你也没访问对。其实svn的配置不是很难,难的是你怎么用你清晰的思路去理解,以下说一下我是怎么进行配置的:

Subversion启动时候一定要注意应该启动哪个目录,这个细节将直接影响到你最后将给予目录权限的配置文件authz上面。

1、启动: svnserve –d –r /

这样的话在authz里就该:

[test:/] //可以访问test目录下所有文件(test是我在/根下建立的一个文件夹)

086php = rw //具有读写权限

? = r // 除了上面的用户,其他用户只有读的权限

客户端访问应该是这样:

IP test 例:svn://192.168.0.1/test

例如我想访问svn://192.168.0.1 下的所有目录,那么我们就得需要更新svn运行的目录,以及authz文件了。(test是我的仓库)

2、启动:svnserve –d –r /test

Authz文件内容:

[/]

086php = rw

这样你就可以直接访问svn://192.168.0.1目录下的所有文件,其实也就是我的仓库test下的所目录

3、如果你想访问test下的一个目录的话:

启动:svnserve –d –r /

Authz:

[test:/其他目录]

086php = rw

以后访问地址将:svn://192.168.0.1/目录

4、启动:svnserve –d –r /test

Authz:

[/其他目录即可,无需加test仓库名]

086php = r

访问地址变成了:

svn://192.168.0.1/其他目录

ubuntu下svn服务器的安装配置

1.SubVersion服务安装

1
2
sudo apt-get install subversion
sudo apt-get install libapache2-svn

2.服务器配置 
2.1相关用户、组的设定
将自己和“www-data”(Apache 用户)加入组subversion中

1
2
sudo addgroup subversion
sudo usermod -G subversion -a www-data

看下结果:

1
 cat /etc/group|grep subversion

这里注意,需要注销然后再登录以便您能够成为 subversion 组的一员,然后就可以执行签入文件(Check in,也称提交文件)的操作了
仓库位置我们就放在/home/svn下吧:

1
sudo mkdir /home/svn

2.2配置subversion
编辑/etc/subversion/config 文件,修改相关设置

1
2
3
4
5
6
7
8
9
10
11
12
13
14
15
16
17
18
19
20
21
22
23
24
25
26
27
28
29
30
31
32
33
34
### Section for configuring miscelleneous Subversion options.
[miscellany]
global-ignores = *.o *.lo *.la *.al .libs *.so *.so.[0-9]* *.a *.pyc *.pyo *.rej *~ #*# .#* .*.swp .DS_Store
### Set mime-types-file to a MIME type registry file, used to
### provide hints to Subversion’s MIME type auto-detection
### algorithm.
# mime-types-file = /path/to/mime.types

### Set enable-auto-props to ‘yes’ to enable automatic properties
### for ‘svn add’ and ‘svn import’, it defaults to ‘no’.
### Automatic properties are defined in the section ‘auto-props’.
enable-auto-props = yes

### Section for configuring automatic properties.
[auto-props]
### The format of the entries is:
###   file-name-pattern = propname[=value][;propname[=value]…]
### The file-name-pattern can contain wildcards (such as ‘*’ and
### ‘?’).  All entries which match (case-insensitively) will be
### applied to the file.  Note that auto-props functionality
### must be enabled, which is typically done by setting the
### ‘enable-auto-props’ option.
*.c = svn:eol-style=native
*.cpp = svn:eol-style=native
*.h = svn:eol-style=native
*.dsp = svn:eol-style=CRLF
*.dsw = svn:eol-style=CRLF
*.sh = svn:eol-style=native;svn:executable
*.txt = svn:eol-style=native
*.png = svn:mime-type=image/png
*.jpg = svn:mime-type=image/jpeg
Makefile = svn:eol-style=native
*.php = svn:keywords=Id Rev Date URL Revision Author

global-ignores是提交时忽略的文件类型,启用auto-props后,让subversion自动添加Id,Revision等keywords
这样就可以使用svn的keywords了。特别是eclipse里就方便多了。设置一下就可以使用
$$Id$$、$$Reversion $$、$$Date $$、$$Author$$ 、$$URL$$作为注释模板的内容,方便极了。

如果在客户端访问subversion版本库时出现这个错误:
svnserve.conf:102: Option expected
为什么会出现这个错误呢,就是因为subversion读取配置文件svnserve.conf时,无法识别有前置空格的配置文件。
要避免出现这个错误,应该在去掉这些行前的#时,也要顺手去掉前面的空格。

3.apache mod_dav_svn 配置
通过 WebDAV 协议访问(http://) 
关于WebDAV :

WebDAV (Web-based Distributed Authoring and Versioning) 一种基于 HTTP 1.1协议的通信协议.它扩展了HTTP 1.1,在GET、POST、HEAD等几个HTTP标准方法以外添加了一些新的方法,使应用程序可直接对Web Server直接读写,并支持写文件锁定(Locking)及解锁(Unlock),还可以支持文件的版本控制。

编辑 /etc/apache2/mods-available/dav_svn.conf :

1
2
3
4
5
6
7
8
9
10
11
12
13
14
15
16
17
18
19
20
21
22
23
24
25
26
27
28
29
30
31
32
33
34
35
36
37
38
39
40
41
42
43
44
45
46
47
root@hywd:/etc/apache2/mods-available# cat dav_svn.conf
# dav_svn.conf – Example Subversion/Apache configuration
#
# For details and further options see the Apache user manual and
# the Subversion book.
#
# NOTE: for a setup with multiple vhosts, you will want to do this
# configuration in /etc/apache2/sites-available/*, not here.

#
# URL controls how the repository appears to the outside world.
# In this example clients access the repository as http://hostname/svn/
# Note, a literal /svn should NOT exist in your document root.

#enable the repository
DAV svn

# Set this to the path to your repository
#SVNPath /home/svn/vod
# Alternatively, use SVNParentPath if you have multiple repositories under
# under a single directory (/var/lib/svn/repo1, /var/lib/svn/repo2, …).
# You need either SVNPath and SVNParentPath, but not both.
#用这个,以便放多个repository
SVNParentPath /home/svn

# Basic Authentication is repository-wide.  It is not secure unless
# you are using https.  See the ‘htpasswd’ command to create and
# manage the password file – and the documentation for the
# ‘auth_basic’ and ‘authn_file’ modules, which you will need for this
# (enable them with ‘a2enmod’).
AuthType Basic
AuthName “Subversion Repository”
#指定基本用户验证的密码文件存放位置
AuthUserFile /etc/subversion/dav_svn.passwd

# To enable authorization via mod_authz_svn
#mod_authz_svn配置文件的位置
AuthzSVNAccessFile /etc/subversion/dav_svn.authz

# The following three lines allow anonymous read, but make
# committers authenticate themselves.  It requires the ‘authz_user’
# module (enable it with ‘a2enmod’).
#
Require valid-user
#

重启 Apache 2 Web 服务器

1
sudo /etc/init.d/apache2 restart

4.创建 SVN 文件仓库

1
2
3
4
5
6
7
cd /home/svn
sudo mkdir myproject
#更改版本库所属用户、组
sudo chown -R root:subversion myproject
sudo svnadmin create /home/svn/myproject
#赋予组成员对所有新加入文件仓库的文件拥有相应的权限:
sudo chmod -R g+rws myproject

5.密码文件dav_svn.passwd的创建

1
sudo htpasswd -c /etc/subversion/dav_svn.passwd user_name

它会提示你输入密码,当您输入了密码,该用户就建立了。“-c”选项表示创建新的/etc/subversion/dav_svn.passwd 文件,所以user_name所指的用户将是文件中唯一的用户。如果要添加其他用户,则去掉“-c”选项即可:
sudo htpasswd /etc/subversion/dav_svn.passwd other_user_name

6.授权配置文件dav_svn.authz
这里我指定了两个组:管理员组和测试组,指定了两个仓库(vod 、 ThinkPHP 和ftpuserms)的权限 。
vod仓库下管理员组设置为读写权限,测试组只有读的权限
ThinkPHP仓库下管理员组设置为读写权限,测试组只有读的权限
定义ftpuserms储存库下test目录的访问权限:
禁止所有用户访问,星号代表所有用户,权限为空代表没有任何权限
打开test3用户的读权限,打开administrator组的读写权限

1
2
3
4
5
6
7
8
9
10
11
12
13
14
15
16
[groups]
administrator=admin,yuan
tester=test1,test2,test3

[vod:/]
@administrator=rw
tester=r

[ThinkPHP:/]
@administrator=rw
tester=r

[ftpuserms:/test]
@administrator=rw
*=
test3=r

启动SVN服务器:

1
killall svnserve; svnserve -d -r /home/svn/

您可以通过下面的命令来访问文件仓库:

1
svn co http://hostname/svn/myproject myproject –username user_name –password passwd

创建目录试试:

1
svn mkdir “http://localhost/svn/vod/branches” “http://localhost/svn/vod/tags” “http://localhost/svn/vod/trunk” -m “create a new project vod” –username vod –password passwd

createfold

auth

如果在Check in的时候遇到如下错误:
Can’t open ‘/home/svn/myproject/db/txn-current-lock’: Permission denied
查看txn-current-lock文件的权限和用户以及组信息,应该类似于:

1
ls -l /home/svn/myproject/db/txn-current-lock

-rw-rwSr– 1 root subversion 0 2009-06-18 15:33 txn-current-lock

除了权限以外,用户及其组如果不对,则仍然会遇到上述问题,可以再次运行命令:

1
sudo chown -R root:subversion myproject

参考文章:
http://www.blogjava.net/rain1102/archive/2009/02/23/256338.html
http://bbs.iusesvn.com/thread-6-1-1.html
http://snowolf.javaeye.com/blog/740347
http://wiki.ubuntu.org.cn/index.php?title=SubVersion&variant=zh-cn#.E9.80.9A.E8.BF.87_WebDAV_.E5.8D.8F.E8.AE.AE.E8.AE.BF.E9.97.AE.28http:.2F.2F.29

28个Unix/Linux的命令行神器

下面是Kristóf Kovács收集的28个Unix/Linux下的28个命令行下的工具(原文链接),有一些是大家熟悉的,有一些是非常有用的,有一些是不为人知的。这些工具都非常不错,希望每个人都知道。本篇文章还在Hacker News上被讨论,你可以过去看看。我以作者的原文中加入了官网链接和一些说明。

dstat & sar

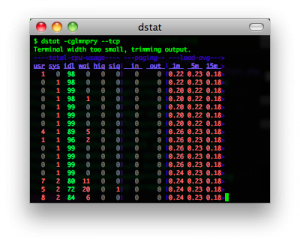
iostat, vmstat, ifstat 三合一的工具,用来查看系统性能(我在《性能调优攻略》中提到过那三个xxstat工具)。

官方网站:http://dag.wieers.com/rpm/packages/dstat/

你可以这样使用:

1
alias dstat='dstat -cdlmnpsy'

dstat_screenshot

slurm

查看网络流量的一个工具

官方网站:  Simple Linux Utility for Resource Management


slurm_screenshot


vim & emacs

真正程序员的代码编辑器。

vim_screenshot


screen, dtach, tmux, byobu

你是不是经常需要 SSH 或者 telent 远程登录到 Linux 服务器?你是不是经常为一些长时间运行的任务而头疼,比如系统备份、ftp 传输等等。通常情况下我们都是为每一个这样的任务开一个远程终端窗口,因为他们执行的时间太长了。必须等待它执行完毕,在此期间可不能关掉窗口或者断开连接,否则这个任务就会被杀掉,一切半途而废了。

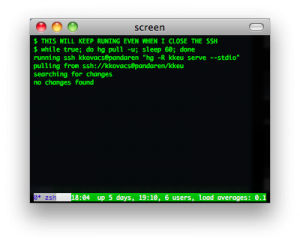
Screen是一个可以在多个进程之间多路复用一个物理终端的窗口管理器。Screen中有会话的概念,用户可以在一个screen会话中创建多个screen窗口,在每一个screen窗口中就像操作一个真实的telnet/SSH连接窗口那样。请参看IBM DeveloperWorks的这篇文章《使用 screen 管理你的远程会话

gnu_screen_screenshot1

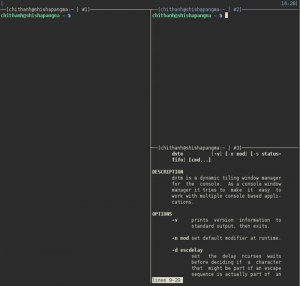
dtach 是用来模拟screen的detach的功能的小工具,其可以让你随意地attach到各种会话上 。下图为dtach+dvtm的样子。

dtach+dvtm

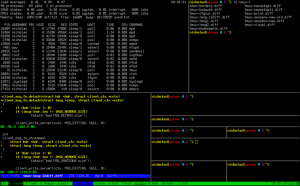
tmux是一个优秀的终端复用软件,类似GNU Screen,但来自于OpenBSD,采用BSD授权。使用它最直观的好处就是,通过一个终端登录远程主机并运行tmux后,在其中可以开启多个控制台而无需再“浪费”多余的终端来连接这台远程主机;当然其功能远不止于此。与screen相比的优点:可以横向和纵向分割窗口,且窗格可以自由移动和调整大小。可在多个缓冲区进行复制和粘贴,支持跨窗口搜索;非正常断线后不需重新detach;……  有人说——与tmux相比,screen简直弱爆了

tmux3

byobu是Ubuntu开发的,在Screen的基础上进行包装,使其更加易用的一个工具。最新的Byobu,已经是基于Tmux作为后端了。可通过“byobu-tmux”这个命令行前端来接受各种与tmux一模一样的参数来控制它。Byobu的细节做的非常好,效果图如下:byobu-tmux


multitail

MultiTail是个用来实现同时监控多个文档、类似tail命令的功能的软件。他和tail的区别就是他会在控制台中打开多个窗口,这样使同时监控多个日志文档成为可能。他还可以看log文件的统计,合并log文件,过滤log文件,分屏,……。

官网:http://www.vanheusden.com/multitail/

multitail_screenshot


tpp

终端下的PPT,要是在某某大会上用这个演示PPT,就太TMD的Geek了。

官网:http://www.ngolde.de/tpp.html

tpp_screenshot1


xargs & parallel

Executes tasks from input (even multithread).

xargs 是一个比较古老的命令,有简单的并行功能,这个不说了。对于GNU parallel ( online manpage )来说,它不仅能够处理本机上多执行绪,还能分散至远端电脑协助处理。而使用GNU parallel前,要先确定本机有安装GNU parallel / ssh / rsync,远端电脑也要安装ssh。

xargs_screenshot


duplicity & rsyncrypto

Duplicity是使用rsync算法加密的高效率备份软件,Duplicity支持目录加密生产和格式上传到远程或本地文件服务器。

rsyncrypto 就是 rsync + encryption。对于rsync的算法可参看酷壳的rsync核心算法

Encrypting backup tools.

duplicity_screenshot


nethack & slash’em

NetHackWiki),20年历史的古老电脑游戏。没有声音,没有漂亮的界面,不过这个游戏真的很有意思。网上有个家伙说:如果你一生只做一件事情,那么玩NetHack。这句话很惹眼,但也让人觉得这个游戏很复杂不容易上手。其实,这个游戏很虽然很复杂,却容易上手。虽然玩通关很难,但上手很容易。NetHack上有许多复杂的规则,”the DevTeam thinks of everything”(开发团队想到了所有的事情)。各种各样的怪物,各种各样的武器….,有许多spoilers文件来说明其规则。除了每次开始随机生成的地图,每次玩游戏,你也都会碰到奇怪的事情: 因为喝了一种药水,变成了机器人;因为踢坏了商店的门被要求高价赔偿;你的狗为你偷来了商店的东西….. 这有点象人生,你不能完全了解这个世界,但你仍然可以选择自己的面对方式。

网上有许多文章所这是最好的电脑游戏或最好的电脑游戏之一。也许是因为它开放的源代码让人赞赏,古老的历史让人宽容,复杂的规则让人敬畏。虽然它不是当前流行的游戏,但它比任何一个当前流行的游戏都更有可能再经受20年的考验。

Slash’EM 也是一个基于NetHack的经典游戏。

nethack_screenshot1


lftp

利用lftp命令行ftp工具进行网站数据的增量备份,镜像,就像使用rsync一样。

lftp_screenshot


ack

ack是一个perl脚本,是grep的一个可选替换品。其可以对匹配字符有高亮显示。是为程序员专门设计的,默认递归搜索,省提供多种文件类型供选。

ack_screenshot


calcurse & remind + wyrd

calcurse是一个命令行下的日历和日程软件。remind + wyrd也很类似。关于日历,我不得不提一个Linux的Cycle日历,也是一个神器,呵呵。

calcurse_screenshot


newsbeuter & rsstail

newsbeuter 和 rsstail 是命令行下RSS的阅读工具。

newsbeuter_screenshot


powertop

做个环保的程序员,看看自己的电脑里哪些程序费电。PowerTOP 是一个让 Intel 平台的笔记本电脑节省电源的 Linux 工具。此工具由 Intel 公司发布。它可以帮助用户找出那些耗电量大的程序,通过修复或者关闭那些应用程序或进程,从而为用户节省电源。

powertop_screenshot


htop & iotop

htop 和 iotop  用来查看进程,内存和IO负载。

htop_screenshot

ttyrec & ipbt

ttyrec 是一个 tty 控制台录制程序,其所录制的数据文件可以使用与之配套的 ttyplay 播放。不管是你在 tty 中的各种操作,还是在 tty 中耳熟能详的软件,都可进行录制。

ipbt 是一个用来回放 ttyrec 所录制的控制台输入过程的工具。

与此类似的还有Shelr 和 termrec 

ipbt_screenshot


rsync

通过SSH进行文件同步的经典工具(核心算法

rsync_screenshot


mtr

MTR – traceroute 2.0,其是把 traceroute 和 ping 集成在一块的一个小工具 用于诊断网络。

mtr_screenshot


socat & netpipes

socat是一个多功能的网络工具,名字来由是” Socket CAT”,可以看作是netcat的N倍加强版。

netpipes 和socat一样,主要是用来在命令行来进行socket操作的命令,这样你就可以在Shell脚本下行进socket网络通讯了。

socat_screenshot


iftop & iptraf

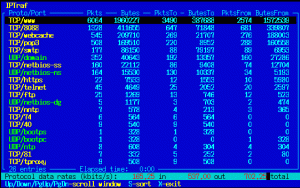
iftopiptraf可以用来查看当前网络链接的一些流量情况。

iftop_screenshot

iptraf-tcpudp2


siege & tsung

Siege是一个压力测试和评测工具,设计用于WEB开发这评估应用在压力下的承受能力:可以根据配置对一个WEB站点进行多用户的并发访问,记录每个用户所有请求过程的相应时间,并在一定数量的并发访问下重复进行。

Tsung 是一个压力测试工具,可以测试包括HTTP, WebDAV, PostgreSQL, MySQL, LDAP, and XMPP/Jabber等服务器。针对 HTTP 测试,Tsung 支持 HTTP 1.0/1.1 ,包含一个代理模式的会话记录、支持 GET、POST 和 PUT 以及 DELETE 方法,支持 Cookie 和基本的 WWW 认证,同时还支持 SSL。

参看:十个免费的Web压力测试工具

siege_screenshot


ledger

ledger 一个命令行下记帐的小工具。

ledger_screenshot


taskwarrior

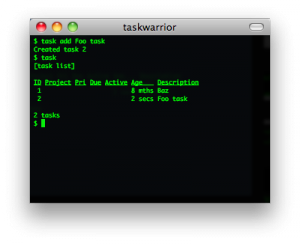
TaskWarrior 是一个基于命令行的 TODO 列表管理工具。主要功能包括:标签、彩色表格输出、报表和图形、大量的命令、底层API、多用户文件锁等功能。

taskwarrior_screenshot

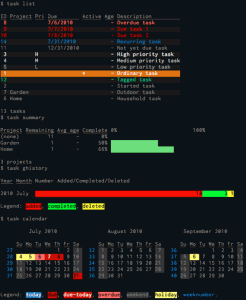
下图是TaskWarrior 2.0的界面:

TaskWarrior2.0


curl

cURL是一个利用URL语法在命令行下工作的文件传输工具,1997年首次发行。它支持文件上传和下载,所以是综合传输工具,但按传统,习惯称cURL为下载工具。cURL还包含了用于程序开发的libcurl。cURL支援的通訊協定有FTP、FTPS、HTTP、HTTPS、TFTP、SFTP、Gopher、SCP、Telnet、DICT、FILE、LDAP、LDAPS、IMAP、POP3、SMTP和RTSP。

curl_screenshot


rtorrent & aria2

rTorrent 是一个非常简洁、优秀、非常轻量的BT客户端. 它使用了 ncurses 库以 C++ 编写, 因此它完全基于文本并在终端中运行. 将 rTorrent 用在安装有 GNU Screen 和 Secure Shell 的低端系统上作为远程的 BT 客户端是非常理想的。

aria2 是 Linux 下一个不错的高速下载工具。由于它具有分段下载引擎,所以支持从多个地址或者从一个地址的多个连接来下载同一个文件。这样自然就大大加快了文件的下载速度。aria2 也具有断点续传功能,这使你随时能够恢复已经中断的文件下载。除了支持一般的 http(s) 和 ftp 协议外,aria2 还支持 BitTorrent 协议。这意味着,你也可以使用 aria2 来下载 torrent 文件。

 rtorrent_screenshot

ttytter & earthquake

TTYtter 是一个Perl写的命令行上发Twitter的工具,可以进行所有其他平台客户端能进行的事情,当然,支持中文。脚本控、CLI控、终端控、Perl控的最愛。

Earthquake也是一个命令行上的Twitter客户端。

ttytter_screenshot

earthquake1


vifm & ranger

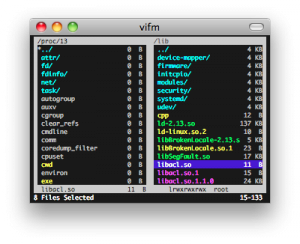
Vifm 基于ncurses的文件管理器,DOS风格,用键盘操作。

vifm_screenshot1

Ranger用 Python 完成,默认为使用 Vim 风格的按键绑定,比如 hjkl(上下左右),dd(剪切),yy(复制)等等。功能很全,扩展/可配置性也非常不错。类似MacOS X下Finder(文件管理器)的多列文件管理方式。支持多标签页。实时预览文本文件和目录。

ranger

cowsay & sl

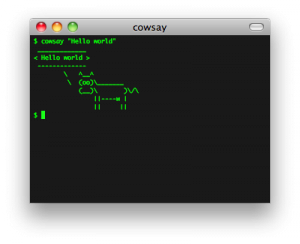
cowsay  不说了,如下所示,哈哈哈。还有xcowsay,你可以自己搜一搜。

cowsay_screenshot

sl是什么?ls?,呵呵,你会经常把ls 打成sl吗?如果是的话,这个东西可以让你娱乐一下,你会看到一辆火车呼啸而过~~,相当拉风。你可以使用sudo apt-get install sl 安装。

sl

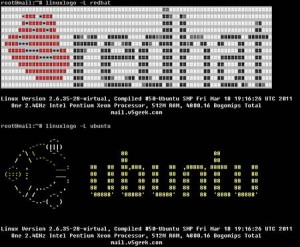
最后,再介绍一个命令中linuxlogo,你可以使用 sudo apt-get install linuxlogo来安装,然后,就可以使用linuxlogo -L
来看一下各种Linux的logo了

linuxlogo

(全文完)

HTML5 Canvas Graphing Solutions Every Web Developers Must Know

Canvas element as part of HTML5 has been creating a buzz all throughout the web standards community since its introduction, mainly because there are underlying question regarding its capability to change the
future of the web. But for some, it is an opportunity to them to start already on experimenting and developing a application that is based on HTML5.

HTML5 Canvas elements provide an important role for developing drawing objects dynamically such as visualizing information or data in a graph. With HTML5 canvas element it is easily to draw a two dimensional objects or drawing with the help of Javascript. Of course, these would work on any web hosting of your choice

For today’s post we’ve collected amazing library, demos and experiments that uses HTML5 canvas element that produces a charting and graphing solutions. We also added links for further readings and a step by step HTML5 tutorials on creating charts and graphs.

If you have a HTML5 graphs examples or spotted a HTML5 graphs that is not included on our list, feel free to put it on our comment section below.

Don’t forget to subscribe to our RSS-feed and follow us on Twitter — for recent updates.

You may also want to read the related posts below.

1. Visualize

preview_55_1

– Visualize uses a technique with the use of Javascript to get contents or data from a well-structured HTML table, and generate it with the use of  native HTML5 canvas drawing ability to transform them into a chart or graph visualization.

2. rGraph

preview_55_2

– rGraph is a HTML5 canvas graph library. It uses features that became available in HTML5 (specifically, the CANVAS tag) to produce a wide variety of graph types: bar chart, bi-polar chart (also known as an age frequency chart), donut chart, funnel chart, gantt chart, horizontal bar chart, LED display, line graph, meter, odometer, pie chart, progress bar, rose chart, scatter graph and traditional radar chart.

3. iGrapher

preview_55_3

– iGrapher is a free web-based financial market visualisation tool for charting, analysis and prediction of different stock, currency and commodity markets. It uses canvas to draw the graphs of financial data.

4. Function Plotter

preview_55_4

– A function plotter application is created by Ed Mackey, which plots 2D maths functions on to a graph using canvas.

5. Building HTML5 Canvas Bar Graph

preview_55_5

– Simple test for building a bar chart using HTML5 Canvas element and Javascript.

6. HTML5 Graph Slider

preview_55_6

– A dynamic graph viewer that can accept data via javascript and update the graphs on the fly.

7. Graph.tk

preview_55_7

– Graph.tk is an online and open-source graphing utillity. It runs in any modern browser that supports the canvas element. It plots functions, and displays them with style.

8. Ticker Plot

preview_55_8

– Ticker plot is an opensource project that uses the canvas element for plotting the charts of ticker symbols and mouse events on canvas for panning and drawing trendlines.

9. HumbleFinance

preview_55_9

– Similar to the Google Finance Flash charting tool, HumbleFinance is a opensource project which uses HTML5 canvas element to generate data.

10. Charting HTML5

preview_55_10

– A quick HTML5 canvas experiment to see what it offers for rendering charts.

11. Graphr

preview_55_11

– Graphr is a JavaScript calculator with the basic features every graphing calculator should have.This script was written by Richard Ye, using HTML5 and the canvas element.

12. Snazzy Animated Pie Chart with HTML5 and jQuery

preview_55_12

– An interactive pie chart using the latest HTML5 technologies, with a pretty nifty animated effects using nothing but JavaScript, CSS, and a small sprinkling of maths!

13. AwesomeJS

preview_55_13

– AwesomeChartJS is a simple Javascript library that can be used to create charts based on the HTML 5 canvas element.

14. jsGraph

preview_55_14

– jsGraph is a portable & lightweight javascript library for rendering charts and graphs using only javascript and HTML5.

15. Facebook Privacy

preview_55_15

– A charting infographic developed in Prototype.js and uses a HTML5 canvas to draw the data.

16. ASK KEN

preview_55_16

– ASK KEN™ is sort of a Node-Link diagram that allows to visually navigate through interconnected topics provided by the Freebase Service. It takes advantage of the latest HTML5 features by using the canvas element for drawing.
17. CanvasXpress

preview_55_17

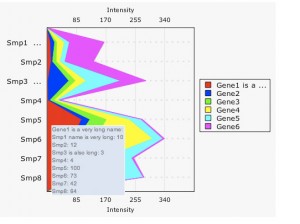
– CanvasXpress is a javascript library based on the canvas tag implemented in HTML5. It is a cross browser compatible library and works with all major browsers.

18. ZingChart

preview_55_18

– If OpenSoure or Free version charts is not enough to your project needs you can ZingChart, first charting library that renders charts and graphs in both HTML5 canvas and Flash.

Further Readings:

1. Canvas Cheat Sheet

The ultimate HTML5 Canvas element cheat sheet in PDF and PNG format.

2. How to draw with HTML5 Canvas

Explore the ins and outs of Canvas with Think Vitamin’s article. Demonstrating what is possible with examples and links.

3. Mozilla Canvas Tutorial

Explore HTML5 canvas with the given examples.

4. HTML5 Canvas: The Basics

Step-by-step explanation getting started with HTML5 Canvas element.

5. W3Schools HTML5 Canvas

W3Schools thorough explanation regarding HTML5 Canvas with basic examples.

6. HTML5, Flex and Silverlight Charts: A Test of Performance

A must read blog on testing the performance of HTML5 charts vs. Flex charts vs. Silverlight charts.

7. HTML5 Canvas Element Guide

A perfect guide on using HTML5 canvas element.

8. 5 Clever Uses of the Canvas Tag

5 Great HTML5 canvas tag implementations that are being used today on various websites and web apps.

9. Canvas Demos

A showcase of  applications, games, tools, and tutorials that uses HTML5 canvas tag. It is great source of inspiration

Step-by-Step Tutorials on Creating Charts and Graphs

1. Creating a Bar Chart with Canvas

2. A Snazzy Animated Pie Chart with HTML5 and jQuery

3. How to Easily Create Charts using jQuery and HTML5

4. Graphing Data in the HTML5 Canvas Element: A four part series

5. Creating Charts using jQuery and HTML5

Do you agree that HTML5 is really the future of the web? Tell us what you think! Feel free to comment below.

And it doesn’t matter if your site is built in HTML5, PHP or the .net framework – seasoned developers understand the importance of web hosting that is dependable. So take heed!

最佳免费Linux RADIUS服务器推荐

本文译自 iSystemAdmin 的 《What is RADIUS Server and best free RADIUS Server for Linux》。

看到radius这个词,我们都会想到圆心到圆周之间的长度(半径)。然而在计算机领域,它代表一个为连接到网络的计算机集中提供认证、授权和计费(Authentication, Authorization, Accounting  AAA)的网络协议。然而,事情不像你听上去的那么难。大多数时候,通讯不会用到所有AAA的功能,可能只会用到计费也可能只有认证。RADIUS会帮你完成所有这些事情,下面我们就开始介绍。

历史

RADUIS是远程用户拨号认证系统(Remote Authentication Dial IUser Service)。它由Livingston Enterprises公司在1991年首先开发。开发的初衷是满足验证和记账需要的一个通讯协议,后来Internet工程任务组(IETF)将其定为标准。ISP(信息服务提供商)和企业鉴于该协议有着广泛的支持以及具备可以同时管理Internet、内部网络无线网络和集成邮件服务的特性纷纷采用。这些网络可能需要与调制解调器数字用户环路(DSL)、无线接入点VPN网络端口,、web服务器等等[2]配合使用


什么是RADIUS服务器

通常RADIOUS服务器作为UNIX守护进程或是微软Windows的系统服务在后台运行。RADIUS服务通常有3个称作AAA的功能(这也就是为什么RADIUS服务器通常也被叫做AAA服务器):

1. 认证验证用户或设备的身份与可使用的网络服务

2. 授权依据认证结果开放网络服务给用户或设备,也可作为后续验证的前提条件

3. 记账记录用户对各种网络服务的用量,并提供给计费系统


工作原理:

RADIUS是一个工作在应用层的客户端/服务器协议,采用UDP协议传输。在通信行业,远程访问服务器Remote Access Server RAS)、虚拟专用网络Virtual Private Network VPN)服务器、基于端口验证的网络交换机网络接入服务器(NAS)都是控制网络接入的网关,它们都有一个RADIUS客户端模块可以和RADIUS服务器通信。起初,RADIUS协议采用1645和1646端口分别用作认证和记账,RADIUS服务器上运行的授权子进程不需要通讯端口。后来Internet号码分配机构(Internet Assigned Numbers Authority  IANA)为RADIUS协议分配了1812和1813端口,成为了现在RADIUS服务器的默认端口。


RADIUS安全性:

从安全的角度讲RADIUS并不是一个安全性很好的协议。在服务器与网络设备(RADIUS客户端)之间,除了用户或设备的密码其它都使用明文通信。在RADIUS服务器和客户端之间使用共享密钥会使得密码变得难以辨认。但是这仍然不是保护用户凭据的安全方法。所以,一般推荐在Radius服务器和客户端之间使用隧道技术(例如IPSec或VPN)提供保护。这个问题正在得到解决,其中RadSec声称已经解决了这个问题。

译注:

隧道技术(Tunneling):网络隧道技术指的是利用一种网络协议来传输另一种网络协议,它主要利用网络隧道协议来实现这种功能。

RadSec:是一种基于TCP和TLS传输RADIUS数据的协议。


Linux RADIUS服务器:

起初,RADIUS服务器是为UNIX及其变种开发的。后来,也有一些Windows版本出现。由于Livingstone是RADIUS协议的主要开发者,他们开发了第一个Livingstone RADIUS服务器,它是所有后来RADIUS服务器的鼻祖。Cistron RADIUS服务器是第二个RADIUS服务器,直到现在仍然被许多RADIUS部署方案采用。原本cistron的设计是采用所有的文本文件存储RADIUS词典和用户数据库。Cistron的两个主要变种是XT-RADIUS和ICRADIUS。

XT-RADIUS增加了很多脚本扩展cistron的功能。ICRADIUS直接使用MySQL作为数据词典、NAS和用户数据库,这使得系统管理变得更加轻松。如今,XT-RADIUS和ICRADIUS几乎和它们父辈cistron一样几乎销声匿迹。

Cistron的开发者Miquel van Smoorenburg后来决定编写一个模块化程度更高且免费的RADIUS服务器。他将其命名为FreeRADIUS,目前FreeRADIUS已经成为事实上的RADIUS 部署标准。


FreeRADIUS

FreeRADIUS是一个模块化、高性能的免费RADIUS套件,遵循GNU通用许可协议开发和发布。FreeRADIUS套件包含了一个RADIUS服务器,一个遵循BSD协议的RADIUS客户端函数库,一个PAM函数库,一个Apache模块以及众多的RADIUS相关工具和开发函数库。

FreeRADIUS是目前最受欢迎的开源RADIUS服务器并且在世界上被广泛部署。它是许多商业RADIUS产品和服务的基础,像是嵌入式系统,提供网络访问控制的RADIUS工具以及WiMAX。它满足了很多财富500强公司、电信公司以及Tier 1网络信息服务提供商的AAA需求,

译注:Tier 1网络:是指不向任何其它网络购买互联网穿透(IP Transit)服务或付费连接的网络。

正如之前提到的,FreeRADIUS是模块化的,服务器核心模块包支持LDAP、MySQL、PostgreSQL、 Oracle和许多其他数据库。它支持所有流行的EAP验证类型,包括PEAP(受保护的EAP)和EAP-TTLS(隧道TLS身份验证协议)。它还包含了超过100家厂家的数据字典,确保了对NAS设备的广泛支持。

译注:EAP(Extended Authentication Protocol 扩展协议认证):对ppp 协议中chap认证的扩展,比chap更有灵活性和更高的安全性,支持MD5、智能卡、可读卡等。

如果你需要安装和使用RADIUS,可以直接选择FreeRADIUS,下载链接是http://www.freeradius.org。希望不久之后我们的博客可以涉及更多Linux FreeRADIUS安装和配置的内容。


英文原文 iSystemAdmin  编译:伯乐在线 – 唐尤华

LNMP一键安装包-CentOS 5/6下自动编译安装Nginx,MySQL,PHP

适用环境:

  • 系统支持:CentOS-5 (32bit/64bit)、CentOS-6 (32bit/64bit)
  • 内存要求:≥128M

安装了什么:

  • 1、Nginx-1.2.0
  • 2、MySQL 5.5.24
  • 3、PHP 5.2.17或PHP 5.3.13
  • 4、phpmyadmin 3.5.1
  • 5、ZendOptimizer 3.3.9(可选,只适合PHP 5.2.17)
  • 6、xcache-2.0.0(可选)
  • 7、pure-ftpd-1.0.36(可选)

安全设置

  • 1、使用php-fpm chroot功能使网站与系统完全隔离,起到保护系统及其它虚拟主机的作用
  • 2、修复php-5.2.17 hash dos漏洞
  • 3、优化php.ini文件增强php安全性
  • 4、自动配置规则严格的防火墙
  • 5、使用ddos deflate预防简单的ddos和cc攻击
  • 6、fail2ban阻止暴力破解sshd或pureftpd等
  • 7、源码md5检测,保证源码的安全

如何安装:

  1. wget http://centos.googlecode.com/files/lnmp0.5.2.tar.gz
  2. tar xzf lnmp0.5.2.tar.gz && cd lnmp0.5.2 && chmod +x lnmp.sh && ./lnmp.sh

安装其它

1、执行脚本pureftpd.sh安装pureftpd。
2、执行脚本xcache.sh安装xcache。
3、执行脚本zend.sh安装ZendOptimizer
4、执行脚本nginx-upgrade.sh升级nginx
5、执行脚本php-upgrade.sh升级php(仅支持php-5.3.x系列的升级)
6、执行脚本iptables.sh配置防火墙
7、执行脚本fail2ban.sh安装防暴力破解软件
8、执行脚本ddos.sh (install|uninstall)安装或卸载ddos deflate

使用提示:

LNMP脚本使用

  1. lnmp add(del,list):创建(删除,列出)虚拟主机。
  2. lnmp ftp(add,del,list):创建(删除,列出)ftp用户。
  3. lnmp uninstall:一键卸载lnmp(卸载之前注意备份好数据!)。

程序目录

  1. mysql目录:   /usr/local/mysql
  2. mysql data目录:/usr/local/mysql/data
  3. php目录:     /usr/local/php
  4. nginx目录: /usr/local/nginx
  5. ddos defalte目录:/usr/local/ddos
  6. fail2ban目录    :/etc/fail2ban    :

进程管理

  1. nginx启动(停止|重启|重载配置文件):service nginx start(stop|restart|reload)
  2. mysql(停止|重启|重载配置文件):service mysqld start(stop|restart|reload)
  3. pure-ftpd(停止|重启|重载配置文件):service pure-ftpd start(stop|restart|reload)
  4. php-fpm(停止|重启|重载配置文件):service php-fpm start(stop|restart|reload)

配置文件路径

  1. nginx:/usr/local/nginx/conf
  2. mysql:/etc/my.cnf
  3. php:/etc/php.ini /etc/php.d/
  4. php-fpm:/usr/local/php/etc
  5. pure-ftpd:/etc/pure-ftpd.conf
  6. ddos deflate:/usr/local/ddos/ddos.conf

使用注意

1、mysql root密码存放在/root/.mysqlroot文件中,添加虚拟主机的时候需要调用。如果修改了root密码,请手动更新/root/.mysqlroot文件。
2、由于使用了chroot功能,所以连接mysql的时候只能使用tcp连接,即localhost改为127.0.0.1
3、php-cgi默认是3个,php-5.2.17到/usr/local/php/etc/php-fpm.conf找到对应的pool修改pm.max_children,php-5.3到/usr/local/php/etc/fpm.d里修改。

更新记录

    • 2012年5月29日:发布lnmp0.5.2

1、使用pure-ftpd代替vsftpd
2、增加防密码暴力破解组件fail2ban

    • 2012年5月24日:发布lnmp0.5.1

1、取消mysql-5.1的安装
2、精简安装前的输入
3、解决为vsftpd加载模块问题

    • 2012年5月11日:发布lnmp0.5

1、使用php-fpm chroot完全隔离系统与其它虚拟主机,保证系统及其它虚拟主机的安全。
2、升级php,mysql,phpmyadmin等软件。
3、增加内核优化。
4、新增PHP升级脚本。

    • 2012年3月29日:发布lnmp0.4

1、添加ddos deflate安装预防ddos和cc攻击。
2、升级mysql版本。
3、修改iptables规则增强系统安全。
4、优化php.ini文件增强php安全性。

    • 2012年2月3日:发布lnmp0.3.2

1、php-5.3.9出现严重安全漏洞,需要升级到php-5.3.10

    • 2012年2月2日:发布lnmp0.3.1

1、解决安装PHP时可能出现的undefined reference to `libiconv_open’错误。
2、升级php mysql版本。
3、为了安全隐藏php版本显示。
4、增加php sockets扩展。
5、修正设置时区有可能出现的问题。

    • 2012年1月10日:发布lnmp0.3

1、修正rc版本的几处错误

    • 2012年1月09日:发布lnmp0.3rc

1、增加安装错误检测,提高安装成功率。
2、优化lnmp删除虚拟主机功能。
3、增强卸载功能。
4、添加重装全部或单个软件功能。
5、增加安装进度显示,以便实时了解安装进程。
6、增加自动发送安装失败信息功能,帮助作者优化脚本。
7、自动更改dns服务器为8.8.8.8 8.8.4.4,解决某些网址无法解析的错误。
8、增加升级脚本,方便升级lnmp。

    • 2012年1月03日:发布lnmp0.2.4

1、修复php hash dos漏洞

    • 2011年12月31日:发布lnmp0.2.3

1、更新mysql,phpmyadmin,vsftpd等软件.
2、修复配置文件的一些错误.
3、修改卸载脚本以卸载lnmp更彻底.

    • 2011年12月08日:发布lnmp0.2.2

1、修复mysql5.5.18编译gbk字符集的错误
2、设置mysql5.5.18默认存储引擎为MyISAM,关闭存储引擎innodb,解决了启动mysql占用三百多M内存的问题。
3、增加自动设置域名301,如访问centos.bz转向www.centos.bz。

    • 2011年12月06日:发布lnmp0.2.1

1、修复nginx跨站问题。
2、调整网站目录结构。
3、使用logrotate轮询nginx日志。
4、隐藏nginx版本号。

    • 2011年12月04日:发布lnmp0.2

1、增加PHP-5.3.8和MySQL-5.5.18可选安装。
2、修复vsftpd在64位系统安装失败的问题。
3、增加nginx自动升级脚本。
4、为每个虚拟主机分配不同的用户,增强虚拟主机安全性。
5、修复CentOS-6系统PHP可能安装失败的问题

  • 2011年11月8日:发布lnmp0.1

Nginx的平滑重启和平滑升级

Nginx的平滑重启

如果改变了Nginx的配置文件(nginx.conf),想重启Nginx,可以发送系统信号给Nginx主进程的方式来进行。不过,在重启之前,要确认Nginx配置文件的语法是正确的,可通过如下命令测试配置文件是否正确:

/usr/local/nginx/sbin/nginx -t -c /usr/local/nginx/conf/nginx.conf

如果配置文件不正确,屏幕会提示配置文件的第几行出错:

nginx:[emerg] invalid number of arguments in “autoindex” directive in /usr/local/nginx/conf/nginx.conf:29

nginx:configuration file /usr/local/nginx/conf/nginx.conf test failed

如果配置文件正确,屏幕将提示以下两行信息:

the configuration file /usr/local/nginx/conf/nginx.conf syntax is ok

configuration file /usr/local/nginx/conf/nginx.conf test is successful


这时候,就可以平滑重启了:

对于Nginx 0.8.x之前的版本 kill -HUP `cat /usr/local/nginx/nginx.pid`
对于Nginx 0.8.x之后的版本 /usr/local/webserver/nginx/sbin/nginx -s reload


Nginx的平滑升级


当需要将正运行的Nginx升级,可以在不中断服务的情况下进行,具体步骤如下:

1、使用新的可执行程序替换旧的可执行程序。下载新的Nginx,重新编译到旧版本的安装路径中。重编译之前,先备份一下旧的可执行文件。


2、执行以下指令,他将存储有旧版本主进程ID的文件重命名为.oldbin:

kill -USR2 旧版本的Nginx主进程号

一般情况下是这样的:kill -USR2 `cat /usr/local/nginx/nginx.pid`

可以用 ls /usr/local/nginx/logs来查看是否改名

3、执行新版本的Nginx可执行程序。


ulimit -SHn 65535

/usr/local/nginx/sbin/nginx


4、此时新旧版本的Nginx会同时运行,共同处理请求。要逐步停止旧版本的Nginx,必须发送WINCH信号给旧的主进程。然后,他的工作进程将从容关闭。

kill -WINCH 旧版本的Nginx主进程号


5、一段时间后,旧的工作进程处理完了所有的请求后退出,仅由新的进程来处理输入请求了。可用下面的命令查看:

ps -ef | grep nginx


6、现在可以决定使用新版本还是恢复到旧版本:

kill -HUP 旧的主进程号 :Nginx在不重载配置文件的情况下启动他的工作进程

kill -QUIT 新的主进程号  :从容关闭其工作进程

kill -TERM 新的主进程号 :强制退出

kill 新的主进程号或旧的主进程号:如果因为某些原因新的工作进程不能退出,则向其发送kill信号


新的主进程退出后,旧的主进程会移除.oldbin后缀,恢复为他的.pid文件,这样,一切就都恢复为升级之前了。
如果尝试升级成功,而自己又希望保留新版本时,可发送QUIT信号给旧的主进程,使其退出而只留下新的进程运行:kill -QUIT 旧主进程号


附:Nginx的信号控制

Nginx支持以下几种信号:

TERM,INT 快速关闭

QUIT 从容关闭

HUP 平滑重启,重新加载配置文件

USR1 重新打开日志文件,在切割日志时用途较大

USR2 平滑升级克执行程序

WINCH 从容关闭工作进程

100个常用的VIM命令

Basics


:e filename Open filename for edition
:w Save file
:q Exit Vim
:w! Exit Vim without saving
Search


/word Search word from top to bottom
?word Search word from bottom to top
/jo[ha]n Search john or joan
/\< the Search the, theatre or then
/the\> Search the or breathe
/\< the\> Search the
/\< ¦.\> Search all words of 4 letters
/\/ Search fred but not alfred or frederick
/fred\|joe Search fred or joe
/\<\d\d\d\d\> Search exactly 4 digits
/^\n\{3} Find 3 empty lines
:bufdo /searchstr/ Search in all open files

Replace


:%s/old/new/g Replace all occurences of old by new in file
:%s/old/new/gw Replace all occurences with confirmation
:2,35s/old/new/g Replace all occurences between lines 2 and 35
:5,$s/old/new/g Replace all occurences from line 5 to EOF
:%s/^/hello/g Replace the begining of each line by hello
:%s/$/Harry/g Replace the end of each line by Harry
:%s/onward/forward/gi Replace onward by forward, case unsensitive
:%s/ *$//g Delete all white spaces
:g/string/d Delete all lines containing string
:v/string/d Delete all lines containing which didn’t containstring
:s/Bill/Steve/ Replace the first occurence of Bill by Steve in current line
:s/Bill/Steve/g Replace Bill by Steve in current line
:%s/Bill/Steve/g Replace Bill by Steve in all the file
:%s/\r//g Delete DOS carriage returns (^M)
:%s/\r/\r/g Transform DOS carriage returns in returns
:%s#<[^>]\+>##g Delete HTML tags but keeps text
:%s/^\(.*\)\n\1$/\1/ Delete lines which appears twice
Ctrl+a Increment number under the cursor
Ctrl+x Decrement number under cursor
ggVGg? Change text to Rot13

Case


Vu Lowercase line
VU Uppercase line
g~~ Invert case
vEU Switch word to uppercase
vE~ Modify word case
ggguG Set all text to lowercase
:set ignorecase Ignore case in searches
:set smartcase Ignore case in searches excepted if an uppercase letter is used
:%s/\<./\u&/g Sets first letter of each word to uppercase
:%s/\<./\l&/g Sets first letter of each word to lowercase
:%s/.*/\u& Sets first letter of each line to uppercase
:%s/.*/\l& Sets first letter of each line to lowercase

Read/Write files


:1,10 w outfile Saves lines 1 to 10 in outfile
:1,10 w >> outfile Appends lines 1 to 10 to outfile
:r infile Insert the content of infile
:23r infile Insert the content of infile under line 23

File explorer


:e . Open integrated file explorer
:Sex Split window and open integrated file explorer
:browse e Graphical file explorer
:ls List buffers
:cd .. Move to parent directory
:args List files
:args *.php Open file list
:grep expression *.php Returns a list of .php files contening expression
gf Open file name under cursor

Interact with Unix


:!pwd Execute the pwd unix command, then returns to Vi
!!pwd Execute the pwd unix command and insert output in file
:sh Temporary returns to Unix
$exit Retourns to Vi

Alignment


:%!fmt Align all lines
!}fmt Align all lines at the current position
5!!fmt Align the next 5 lines

Tabs


:tabnew Creates a new tab
gt Show next tab
:tabfirst Show first tab
:tablast Show last tab
:tabm n(position) Rearrange tabs
:tabdo %s/foo/bar/g Execute a command in all tabs
:tab ball Puts all open files in tabs

Window spliting


:e filename Edit filename in current window
:split filename Split the window and open filename
ctrl-w up arrow Puts cursor in top window
ctrl-w ctrl-w Puts cursor in next window
ctrl-w_ Maximise current window
ctrl-w= Gives the same size to all windows
10 ctrl-w+ Add 10 lines to current window
:vsplit file Split window vertically
:sview file Same as :split in readonly mode
:hide Close current window
:­nly Close all windows, excepted current
:b 2 Open #2 in this window

Auto-completion


Ctrl+n Ctrl+p (in insert mode) Complete word
Ctrl+x Ctrl+l Complete line
:set dictionary=dict Define dict as a dictionnary
Ctrl+x Ctrl+k Complete with dictionnary

Marks


mk Marks current position as k
˜k Moves cursor to mark k
d™k Delete all until mark k

Abbreviations


:ab mail mail@provider.org Define mail as abbreviation of mail@provider.org

Text indent


:set autoindent Turn on auto-indent
:set smartindent Turn on intelligent auto-indent
:set shiftwidth=4 Defines 4 spaces as indent size
ctrl-t, ctrl-d Indent/un-indent in insert mode
>> Indent
<< Un-indent

Syntax highlighting


:syntax on Turn on syntax highlighting
:syntax off Turn off syntax highlighting
:set syntax=perl Force syntax highlighting

系统调优之LINUX优化

所有的TCP/IP调优参数都位于/proc/sys/net/目录. 例如, 下面是最重要的一些调优参数, 后面是它们的含义:
1. /proc/sys/net/core/rmem_max — 最大的TCP数据接收缓冲
2. /proc/sys/net/core/wmem_max — 最大的TCP数据发送缓冲
3. /proc/sys/net/ipv4/tcp_timestamps — 时间戳在(请参考RFC 1323)TCP的包头增加12个字节
4. /proc/sys/net/ipv4/tcp_sack — 有选择的应答
5. /proc/sys/net/ipv4/tcp_window_scaling — 支持更大的TCP窗口. 如果TCP窗口最大超过65535(64K), 必须设置该数值为1
6. rmem_default — 默认的接收窗口大小
7. rmem_max — 接收窗口的最大大小
8. wmem_default — 默认的发送窗口大小
9. wmem_max — 发送窗口的最大大小
/proc目录下的所有内容都是临时性的, 所以重启动系统后任何修改都会丢失.
建议在系统启动时自动修改TCP/IP参数:
把下面代码增加到/etc/rc.local文件, 然后保存文件, 系统重新引导的时候会自动修改下面的TCP/IP参数:
echo 256960 > /proc/sys/net/core/rmem_default
echo 256960 > /proc/sys/net/core/rmem_max
echo 256960 > /proc/sys/net/core/wmem_default
echo 256960 > /proc/sys/net/core/wmem_max
echo 0 > /proc/sys/net/ipv4/tcp_timestamps
echo 1 > /proc/sys/net/ipv4/tcp_sack
echo 1 > /proc/sys/net/ipv4/tcp_window_scaling
TCP/IP参数都是自解释的, TCP窗口大小设置为256960, 禁止TCP的时间戳(取消在每个数据包的头中增加12字节), 支持更大的TCP窗口和TCP有选择的应答.
上面数值的设定是根据互连网连接和最大带宽/延迟率来决定.
注: 上面实例中的数值可以实际应用, 但它只包含了一部分参数.
另外一个方法: 使用 /etc/sysctl.conf 在系统启动时将参数配置成您所设置的值:
net.core.rmem_default = 256960
net.core.rmem_max = 256960
net.core.wmem_default = 256960
net.core.wmem_max = 256960
net.ipv4.tcp_timestamps = 0
net.ipv4.tcp_sack =1
net.ipv4.tcp_window_scaling = 1
—————————————————————————————————————————-
二、文件及文件系统调谐
块大小
使用较大的块大小将得到较好的性能。将ext2文件系统的块大小调整为4096byte而不是缺省的1024byte,可以减少文件碎片,另外,在ext2的文件系统中,为根目录保留了5%的空间,对一个大的文件系统,除非用作日志文件,5%的比例有些过多。可以使用命令”# mke2fs -b 4096 -m 1 /dev/hda6″将它改为1%并以块大小4096byte创建文件系统。如果系统用作邮件或者新闻服务器,使用较大的块大小,虽然性能有所提高,但会造成磁盘空间较大的浪费。比如文件系统中的文件平均大小为2145byte,如果使用4096byte的块大小,平均每一个文件就会浪费1951byte 空间。如果使用1024byte的块大小,平均每一个文件会浪费927byte空间。在性能和磁盘的代价上如何平衡,要看具体应用的需要。
调整缓冲区刷新参数
Linux内核中,包含了一些对于系统运行态的可设置参数。缓冲刷新的参数可通过
/proc/sys/vm/bdflush文件来完成,这个文件的格式是这样的:
# more /proc/sys/vm/bdflush
40 0 0 0 500 3000 60 0 0
第一个数:在”dirty”缓冲区达到多少的时候强制唤醒bdflush进程刷新硬盘,
第二个数:每次让bdflush进程刷新多少个dirty块。所谓dirty块是必须写到磁盘中的缓存块。接下的数:每次允许bd flush将多少个内存块排入空闲的缓冲块列表。
修改方法
# echo “100 128 128 512 5000 3000 60 0 0″>/proc/sys/vm/bdflush 并将这条命令加到/etc/rc.d/rc.local文件中去。
以上的设置加大了缓冲区大小,降低了bdflush被启动的频度,同时也增加了万一系统崩溃丢失数据的危险性。VFS的缓冲刷新是Linux文件系统高效的重要原因之一。
调整文件句柄数和i-节点数
在Linux内核2.4.x中需要修改源代码,然后重新编译内核才生效。编辑Linux内核源代码中的
include/linux/fs.h文件,将 NR_FILE 由8192改为 65536,将NR_RESERVED_FILES 由10 改为 128。编辑fs/inode.c 文件将 MAX_INODE 由16384改为262144。
一般情况下,最大打开文件数比较合理的设置为每4M物理内存256,比如256M内存可以设为16384,而最大的使用的i节点的数目应该是最大打开文件数目的3倍到4倍。
三、其它方面的调谐
调谐buffermem
文件buffermen和内核虚拟内存子系统密切相关。文件/proc/sys/vm/buffermem控制多大内存被用于缓冲区(百分数表示)。内核2.4的缺省值为:: “2 10 60″。可以按如下方法修改:
# echo “70 10 60″ >/proc/sys/vm/buffermem
并将之加到脚本文件/etc/rc.d/rc.local 中。或者在/etc/sysctl.conf文件中加入
vm.buffermem = 70 10 60
第一个参数 70意味着至少分配70%的内存用作缓冲区。后两个参数保持系统的默认值。第一个参数设置为多大合适,依赖于系统的内存大小和系统高负载时内存的使用情况(可用free监视)。
进程限制
Linux对于每个用户,系统限制其最大进程数。为提高性能,可以设置超级用户root的最大进程数为无限。编辑.bashrc文件(vi /root/.bashrc)增加行”ulimit -u unlimited”即可消除超级用户的进程限制。
核心和系统对用户进程其它的一些限制也可以通过ulimit命令来查看和更改。”ulimit -a” 用来显示当前的各种用户进程限制。一些更改用户限制的例子如下:
ulimit -n 4096 将每个进程可以打开的文件数目加大到4096,缺省为1024
ulimit -m 4096 限制每个进程使用的内存数。
优化gcc编译
将优化标志放在/etc/profile文件中。在pentium III级的处理器上使用以下优化标志将得到最优的应用程序:
CFLAGS=-O9 -funroll-loops -ffast-math -malign-double -mcpu=pentiumpro -march=pentiumpro -fomit-frame-pointer -fno-exceptions
再将如下行加到/etc/profile 更靠后的位置:
export PATH PS1 HOSTNAME HISTSIZE HISTFILESIZE USER LOGNAME MAIL INPUTRC CFLAGS LANG LESSCHARSET使用以上的优化,gcc或者egcs编译的程序将得到最佳的性能。
—————————————————————————————————————————-
/proc/sys/kernel/shmall
该文件是在任何给定时刻系统上可以使用的共享内存的总量(以字节为单位)。
缺省设置:2097152
/proc/sys/kernel/shmax
该文件指定内核所允许的最大共享内存段的大小(以字节为单位)。
缺省设置:33554432
/proc/sys/kernel/shmmni
该文件表示用于整个系统共享内存段的最大数目。
缺省设置:4096
/proc/sys/kernel/threads-max
该文件指定内核所能使用的线程的最大数目。
缺省设置:2048
/proc/sys/net/core/netdev_max_backlog
该文件指定了,在接口接收数据包的速率比内核处理这些包的速率快时,允许送到队列的数据包的最大数目。
缺省设置:300
/proc/sys/net/core/optmem_max
该文件指定了每个套接字所允许的最大缓冲区的大小。
/proc/sys/net/core/rmem_default
该文件指定了接收套接字缓冲区大小的缺省值(以字节为单位)。
/proc/sys/net/core/rmem_max
该文件指定了接收套接字缓冲区大小的最大值(以字节为单位)。
/proc/sys/net/core/wmem_default
该文件指定了发送套接字缓冲区大小的缺省值(以字节为单位)。
/proc/sys/net/core/wmem_max
该文件指定了发送套接字缓冲区大小的最大值(以字节为单位)。
/proc/sys/net/ipv4
所有 IPv4 和 IPv6 的参数都被记录在内核源代码文档中。请参阅文件 /usr/src/linux/Documentation/networking/ip-sysctl.txt。
/proc/sys/net/ipv6
同 IPv4。
/proc/sys/vm
/proc/sys/vm/buffermem
该文件控制用于缓冲区内存的整个系统内存的数量(以百分比表示)。它有三个值,通过把用空格相隔的一串数字写入该文件来设置这三个值。
用于缓冲区的内存的最低百分比
如果发生所剩系统内存不多,而且系统内存正在减少这种情况,系统将试图维护缓冲区内存的数量。
用于缓冲区的内存的最高百分比
缺省设置:2 10 60
/proc/sys/vm/freepages
该文件控制系统如何应对各种级别的可用内存。它有三个值,通过把用空格相隔的一串数字写入该文件来设置这三个值。
如果系统中可用页面的数目达到了最低限制,则只允许内核分配一些内存。
如果系统中可用页面的数目低于这一限制,则内核将以较积极的方式启动交换,以释放内存,从而维持系统性能。
内核将试图保持这个数量的系统内存可用。低于这个值将启动内核交换。
缺省设置:512 768 1024
/proc/sys/vm/kswapd
该文件控制允许内核如何交换内存。它有三个值,通过把用空格相隔的一串数字写入该文件来设置这三个值:
内核试图一次释放的最大页面数目。如果想增加内存交换过程中的带宽,则需要增加该值。
内核在每次交换中试图释放页面的最少次数。
内核在一次交换中所写页面的数目。这对系统性能影响最大。这个值越大,交换的数据越多,花在磁盘寻道上的时间越少。然而,这个值太大会因“淹没”请求队列而反过来影响系统性能。
缺省设置:512 32 8
/proc/sys/vm/pagecache
该文件与 /proc/sys/vm/buffermem 的工作内容一样,但它是针对文件的内存映射和一般高速缓存。
使内核设置具有持久性
这里提供了一个方便的实用程序,用于更改 /proc/sys 目录下的任何内核参数。它使您可以更改运行中的内核(类似于上面用到的 echo 和重定向方法),但它还有一个在系统引导时执行的配置文件。这使您可以更改运行中的内核,并将这些更改添加到配置文件,以便于在系统重新引导之后,这些更改仍然生效。
该实用程序称为 sysctl,在 sysctl(8) 的联机帮助页中,对这个实用程序进行了完整的文档说明。sysctl 的配置文件是 /etc/sysctl.conf,可以编辑该文件,并在 sysctl.conf(8) 下记录了该文件。sysctl 将 /proc/sys 下的文件视为可以更改的单个变量。所以,以 /proc/sys 下的文件 /proc/sys/fs/file-max 为例,它表示系统中所允许的文件句柄的最大数目,这个文件被表示成 fs.file-max。
这个示例揭示了 sysctl 表示法中的一些奇妙事情。由于 sysctl 只能更改 /proc/sys 目录下的变量,并且人们始终认为变量是在这个目录下,因此省略了变量名的那一部分(/proc/sys)。另一个要说明的更改是,将目录分隔符(正斜杠 /)换成了英文中的句号(点 .)。
将 /proc/sys 中的文件转换成 sysctl 中的变量有两个简单的规则:
去掉前面部分 /proc/sys。
将文件名中的正斜杠变为点。
这两条规则使您能将 /proc/sys 中的任一文件名转换成 sysctl 中的任一变量名。一般文件到变量的转换为:
/proc/sys/dir/file –> dir.file
dir1.dir2.file –> /proc/sys/dir1/dir2/file
可以使用命令 sysctl -a 查看所有可以更改的变量和其当前设置。
用 sysctl 还可以更改变量,它所做的工作与上面所用的 echo 方法完全一样。其表示法为:
sysctl -w dir.file=”value”
还是用 file-max 作为示例,使用下面两种方法中的一种将该值更改为 16384。
—————————————————————————————————————————–
LINUX系统调优记录:
解决 “dst cache overflow” 报警问题
OS:centos4.3
1.可以改变滑动窗口的大小 (默认应该就是“1”)
echo “1” > /proc/sys/net/ipv4/tcp_window_scaling
2.修改内核共享内存限制为256M,默认才2M
echo 268435456 >/proc/sys/kernel/shmall
echo 268435456 >/proc/sys/kernel/shmmax
3。可使用的代理端口
echo “1024 65000” > /proc/sys/net/ipv4/ip_local_port_range
4.禁止广播和ping入
echo “1” > /proc/sys/net/ipv4/icmp_echo_ignore_broadcasts
echo “1” > /proc/sys/net/ipv4/icmp_ignore_bogus_error_responses
5./proc/sys/net/ipv4/netfilter/ip_conntrack_max 改大到 268435456 默认只有65536
6.echo “1800” > /proc/sys/net/ipv4/netfilter/ip_conntrack_tcp_timeout_established
默认确立连接会在5天后失效,改为半小时后失效,减少ip_conntrack的有效连接数量。
7.echo 1 > /proc/sys/net/ipv4/tcp_syncookies
防范SYN DDOS攻击,打开TCPsyncookies,CENTOS4的内核是支持的。
8.echo 2048 > /proc/sys/net/ipv4/tcp_max_syn_backlog
SYN列队长度,不要设置太高,会消耗相应的内存。
9.echo 3 > /proc/sys/net/ipv4/tcp_synack_retries
SYN重试次数。
10.echo 3 > /proc/sys/net/ipv4/tcp_syn_retries
SYN重试次数。

Ubuntu server 安装与配置lnmp并安装wordpress

Ubuntu 10.04.1 LTS下安装与配置LNMP环境,所谓的LNMP就是Linux+Nginx+Mysql+PHP.

1.首先安装nginx

root@lnmp:/home/windonly# apt-get install nginx
root@lnmp:/home/windonly# service nginx start

目前官方源提供的版本是:0.7.65,通过访问80端口可以测试是否安装成功。

2.安装MySql

通过执行apt-get install mysql-server命令后自动下载mysql,然后安装提示配置好mysql root密码。


3.安装PHP5+php5-fpm

由于目前的官方的源里面没有php5-fpm的包,我们需要下载源代码编译,后面Google发现已经有人提供了镜像源,该镜像源需要验证KEY,不过我们可以无视它继续安装。

在 /etc/apt/sources.list 中加入
deb http://ppa.launchpad.net/jdub/devel/ubuntu maverick main
deb http://ppa.launchpad.net/brianmercer/php/ubuntu lucid main
deb-src http://ppa.launchpad.net/brianmercer/php/ubuntu lucid main

然后执行:
apt-get update

然后安装 php5-fpm
apt-get install php5-fpm 
service php5-fpm start

修改nginx配置文件来完成配置:

root@lnmp:/home/windonly# vi /etc/nginx/sites-enabled/default 

server {
        listen   80 ;
        listen   [::]:80 default ipv6only=on;   ## enable for ipv6
        server_name  localhost;

        #access_log  /var/log/nginx/localhost.access.log;

        index index.php index.htm index.html;
        root /var/www;
        expires 7d;
        location ~ \.php$ {
                fastcgi_pass 127.0.0.1:9000;
                fastcgi_index index.php;
                fastcgi_param APPLICATION_ENV production;
                include fcgi.conf;
                expires off;
        }
}

再配置fcgi.conf:
root@lnmp:/home/windonly# vi /etc/nginx/fcgi.conf 

fastcgi_param  GATEWAY_INTERFACE  CGI/1.1;
fastcgi_param  SERVER_SOFTWARE    nginx;

fastcgi_param  QUERY_STRING       $query_string;
fastcgi_param  REQUEST_METHOD     $request_method;
fastcgi_param  CONTENT_TYPE       $content_type;
fastcgi_param  CONTENT_LENGTH     $content_length;

fastcgi_param  SCRIPT_FILENAME    $document_root$fastcgi_script_name;
fastcgi_param  SCRIPT_NAME        $fastcgi_script_name;
fastcgi_param  REQUEST_URI        $request_uri;
fastcgi_param  DOCUMENT_URI       $document_uri;
fastcgi_param  DOCUMENT_ROOT      $document_root;
fastcgi_param  SERVER_PROTOCOL    $server_protocol;

fastcgi_param  REMOTE_ADDR        $remote_addr;
fastcgi_param  REMOTE_PORT        $remote_port;
fastcgi_param  SERVER_ADDR        $server_addr;
fastcgi_param  SERVER_PORT        $server_port;
fastcgi_param  SERVER_NAME        $server_name;

# PHP only, required if PHP was built with enable-force-cgi-redirect
fastcgi_param  REDIRECT_STATUS    200;

完成之后通过:
root@lnmp:/home/windonly# nginx -t
the configuration file /etc/nginx/nginx.conf syntax is ok
configuration file /etc/nginx/nginx.conf test is successful

来测试配置文件是否正确。
最后通过 service nginx reload 重启nginx

通过:
vi /var/www/index.php

然后访问这个页面来测试是否配置成功了。
4.配置PHP和MySql

通过 apt-get install php5-mysql 安装PHP访问MySql模块,需要重启下php5-fpm使其生效。

5.安装Wordpress

首先现在最新版本的wordpress: wget http://cn.wordpress.org/wordpress-3.0.1-zh_CN.zip 并解压(如果服务器上没装unzip就通过apt-get install unzip安装),先创建数据库:

mysql> create database myblog;
Query OK, 1 row affected (0.00 sec)

mysql> create user 'myblog'@'localhost' identified by 'myblog';
Query OK, 0 rows affected (0.00 sec)

mysql> grant all on myblog.* to 'myblog'@'localhost';
Query OK, 0 rows affected (0.00 sec)

然后就可以通过web页面安装与配置wordpress了。

6.如何实现Wordpress静态链接
windonly@linux:~$ sudo vi /etc/nginx/sites-enabled/default 

加入以下配置:

location / {
        index index.html index.php;
        if (-d $request_filename){
                rewrite ^/(.*)([^/])$ $1$2/ permanent;
        }
        if (-f $request_filename/index.php){
                rewrite (.*) $1/wordpress/index.php;
        }
        if (!-f $request_filename){
                rewrite (.*) /wordpress/index.php;
        }
}

然后重启nginx既可。

7.结束语

至此整个LNMP配置已经完成,虽然网上有很多一键包,但是只有通过自己手工配置一次才能熟悉整个配置流程,方便后期维护和优化。一直很纠结要不要去买一个VPS,每年1600的费用也是一笔相当大的开销啊。


#安装 eAccelerator
wget http://bart.eaccelerator.net/source/0.9.6.1/eaccelerator-0.9.6.1.tar.bz2
tar xvjf eaccelerator-0.9.6.1.tar.bz2
cd eaccelerator-0.9.6.1
cp control.php /var/www/control.php
sudo chown www:www /var/www/control.php
sudo phpize
sudo ./configure –enable-eaccelerator=shared
sudo make
sudo make install
sudo vi /etc/php5/fpm/php.ini

extension_dir = “/usr/lib/php5/20090626+lfs/”
extension = eaccelerator.so
eaccelerator.shm_size=”16″
eaccelerator.cache_dir=”/tmp/eaccelerator”
eaccelerator.enable=”1″
eaccelerator.optimizer=”1″
eaccelerator.check_mtime=”1″
eaccelerator.debug=”0″
eaccelerator.filter=””
eaccelerator.shm_max=”0″
eaccelerator.shm_ttl=”0″
eaccelerator.shm_prune_period=”0″
eaccelerator.shm_only=”0″
eaccelerator.compress=”1″
eaccelerator.compress_level=”9″
eaccelerator.allowed_admin_path=”/var/www/control.php”

#配置文件目录
/etc/nginx/nginx.conf
/etc/nginx/sites-enabled/default
/etc/php5/fpm/php.ini
/etc/php5/fpm/pool.d/www.conf