罗技 Logi MX 系列键盘布局切换方法

本方法适用于所有 MX 系列键盘,非 MX 系列没有尝试,不保证可用。

罗技的 MX 系列键盘通常有两个布局模式,最主要的区别就在于底部的 start 按键和 alt 按键。

通过按键的标记可以看到,start 键(即 Windows 徽标键)在 mac 布局下是 opt 键,而 alt 键在 mac 布局下是 cmd 键。

但是这里的按键布局,翻遍了说明都没有找到如何切换。通过搜索发现,跟键盘第一次连接的设备有关。如果键盘第一次连接 mac,则使用左侧的 mac 布局。如果连接的是 Windows,则使用右侧的 Windows 布局。

这导致对双系统用户极度不友好。切换系统时,会出现按键标记与实际功能不符的情况。于是经过多方搜索,找到了手动切换布局的方法:

切换到 Windows 布局:按住 FN + P 键 3 秒(Hold FN+P for 3 seconds)

切换到 mac 布局:按住 FN + O 键 3 秒(Hold FN+O for 3 seconds)

Notepad++ 安装版右键菜单创建失败

今天在装一台服务器的时候发现又遇到了安装 Notepad++ 没有成功创建右键菜单的问题,于是决定来研究一下究竟为啥。
在找了相关资料后,我发现 Notepad++ 的安装目录下有一个 DLL 文件专门处理邮件菜单的事情,同时很多人给了一个解决方案是运行这个批处理文件:

@Echo Off
title Notepad++右键菜单添加or卸载工具
SetLocal EnableDelayedExpansion
echo 1.添加Notepad++右键菜单
echo ------------------------
echo 2.卸载Notepad++右键菜单
echo ------------------------
Set /p u=请输入数字并按Enter确定:
If "%u%"=="1" Goto regnp++
If "%u%"=="2" Goto unregnp++
:regnp++
regsvr32 NppShell_06.dll
exit
:unregnp++
regsvr32 /u NppShell_06.dll
exit

但是在运行的时候我发现 DLL 注册并没有成功,提示有错误发生。于是打开事件查看器看到这么一行:

“C:\Program Files (x86)\Notepad++\NppShell_06.dll”的激活上下文生成失败。 找不到从属程序集 Microsoft.VC90.CRT,processorArchitecture="amd64",publicKeyToken="xxxxx",type="win32",version="9.0.21022.8"。 请使用 sxstrace.exe 进行详细诊断。

豁然开朗,原来安装的时候没有成功创建右键菜单的根本原因是缺少了 Microsoft.VC90.CRT 这个运行库,也就是 VC 2008 运行库。从微软网站下载安装之后就搞定啦~

附上下载链接:http://www.microsoft.com/zh-CN/download/details.aspx?id=26368

Ctrl与Caps Lock键的交换

Emacs和VIM之所以这样受程序员的喜爱,是因为两者都有高度的可定制性,以及丰富的快捷键组合。利用这些快捷键组合,让你能够手不离键盘,就能完成大多数的工作。其实,用鼠标操作神马的,效率是极其低下的……

话说Emacs中,用到最多的两个快捷键组合,就是Meta键和Ctrl键。对于我们普通的键盘,Meta键还好,离手很近。不过,对于Ctrl键,就离得比较远了…… 网上有网友推荐的做法,是用手掌去按Ctrl键,不过,这样的方法,对于普通键盘还不错,但是对于笔记本来说,也不太实用。

正规的Unix键盘的键位布局,Ctrl键应该是在现在标准键盘的Caps Lock位置的。这样,按起Ctrl键,就方便多了。

那要怎么交换这两个键的键位呢?重新买一个键盘? No!! 其实,也不用换键盘,我们完全可以用软件的方式来实现两个键位的交换。
下面是我从网上整理来的方法:

Win7下交换键位的设置

其实Win7下面,方法还比较多,一种是直接修改注册表,实现全局的替换,另外一种,是让两个键的交换,只在Emacs窗口激活的时候生效。至于哪个更好,完全根据你自己的需要。

局部替换大法

这种方法,需要用到一个辅助软件,那就是大名鼎鼎的Auto Hotkey,简称AHK

编辑一个脚本,输入如下内容,保存,reload,即可生效:
IfWinActive emacs; 判断当前激活的窗口是否是Emacs,这是根据窗口标题实现的,如果你的标题不一样,请替换一下

Control::Capslock; 把Control替换为Capslock

Capslock::Control; 把Capslock替换为Control

IfWinActive

全局替换大法

可以利用第三方工具,或者直接在注册表中修改键位映射关系

注册表位置:[HKEY_LOCAL_MACHINE\SYSTEM\CurrentControlSet\Control\Keyboard Layout] 如果没有此键,就新建一个

新建一个二进制值的Key,名叫:Scancode Map

输入如下的值:

00,00,00,00

00,00,00,00

03,00,00,00

3A,00,1D,00

1D,00,3A,00

00,00,00,00

前两行和最后一行,都是固定的,全部为0。第三行,表示你修改了几个键,其实我们只是改了两个键,不过最后那一行也要算进去,所以是3。

重点是在第四行和第五行。3A00,代表Caps Lock, 1D00,代表Ctrl。这一行,意思即为,将Caps Lock映射为Ctrl

第五行,就不用说了,意思刚好相反。

修改完毕后,重新登录Windows即可生效!

下面附上各个键位值的参考:

Escape 01 00

Tab 0F 00

Caps Lock 3A 00

Left Alt 38 00

Left Ctrl 1D 00

Left Shift 2A 00

Left Windows 5B E0

Right Alt 38 E0

Right Ctr l1D E0

Right Shift 36 00

Right Windows 5C E0

Backspace 0E 00

Delete 53 E0

Enter 1C 00

Space 39 00

Insert 52 E0

HOME 47 E0

End 4F E0

Num Lock 45 00

Page Down 51 E0

Page Up 49 E0

Scroll Lock 46 00

Mac OS下交换键位设置

Mac OS Lion下,非常简单,甚至不需要任何第三方软件,直接在键盘设置里面修改即可。当初我还google了一下文章,有的说需要装键盘驱动,有的说要用第三方软件,其实没那么麻烦,Lion已经有这个功能了……

C#模拟系统按键

摘自http://msdn.microsoft.com/zh-tw/library/ms171548(v=vs.110).aspx

首先,使用DllImport引入两个函数:

// Get a handle to an application window.
[DllImport("USER32.DLL", CharSet = CharSet.Unicode)]
public static extern IntPtr FindWindow(string lpClassName,
string lpWindowName);

// Activate an application window.
[DllImport("USER32.DLL")]
public static extern bool SetForegroundWindow(IntPtr hWnd);

然后首先使用FindWindow函数获取到需要按键的窗口句柄,以计算器为例。这里体现了这个方法的局限性,就是似乎不能触发全局快捷键。

// Get a handle to the Calculator application. The window class
// and window name were obtained using the Spy++ tool.
IntPtr calculatorHandle = FindWindow("CalcFrame","Calculator");

然后使用SetForegroundWindow函数将这个窗口调到最前。

SetForegroundWindow(calculatorHandle);

接下来就可以直接使用SendKeys.SendWait之类的发送按键了。

SendKeys.SendWait("111");
SendKeys.SendWait("*");
SendKeys.SendWait("11");
SendKeys.SendWait("=");

完整代码如下:

using System;
using System.Runtime.InteropServices;
using System.Drawing;
using System.Windows.Forms;
// Get a handle to an application window.
[DllImport("USER32.DLL", CharSet = CharSet.Unicode)]
public static extern IntPtr FindWindow(string lpClassName,
string lpWindowName);

// Activate an application window.
[DllImport("USER32.DLL")]
public static extern bool SetForegroundWindow(IntPtr hWnd);

// Send a series of key presses to the Calculator application.
private void button1_Click(object sender, EventArgs e)
{
// Get a handle to the Calculator application. The window class
// and window name were obtained using the Spy++ tool.
IntPtr calculatorHandle = FindWindow("CalcFrame","Calculator");

// Verify that Calculator is a running process.
if (calculatorHandle == IntPtr.Zero)
{
MessageBox.Show("Calculator is not running.");
return;
}

// Make Calculator the foreground application and send it
// a set of calculations.
SetForegroundWindow(calculatorHandle);
SendKeys.SendWait("111");
SendKeys.SendWait("*");
SendKeys.SendWait("11");
SendKeys.SendWait("=");
}

注意如果是命令行程序的话需要手动添加System.Windows.Forms引用,否则找不到SendKeys类。

Win7风格的文件夹选择对话框

.NET中默认的FolderBrowserDialog是一个很丑的XP风格的文件夹选择对话框,对用户极其不友好。微软估计也是想到了这个问题,所以提供了一套叫

Windows® API Code Pack for Microsoft® .NET Framework的东西,这里面实现了一个Win7风格的文件夹选择对话框,非常漂亮,而且比较友好。

下载地址及介绍:http://archive.msdn.microsoft.com/WindowsAPICodePack

百度网盘下载地址:http://pan.baidu.com/s/1i3606m5

本地组策略与安全策略的自动导入

本地组策略与安全策略的自动导入

   昨天接到一个需求,由于公司要求服务器要部署必需的一些安全策略,但是对于未加入域的服务器希望能有一个便捷的部署办法。

首先,提取出需要部署的策略中能通过组策略或安全策略实施的项如表所示(部分演示):

序号 要求
1 “密码必须符合复杂性要求”选择“已启动”
2 “密码最长存留期”设置为“90天”
3 “账户锁定阀值”设置为小于或等于 6次
4 “从远端系统强制关机”设置为“只指派给Administrtors组”
5 “关闭系统”设置为“只指派给Administrators组”
6 “取得文件或其它对象的所有权”设置为“只指派给Administrators组”
7 审核登录事件,设置为成功和失败都审核。
8 “审核策略更改”设置为“成功” 和“失败”都要审核
9 “审核对象访问”设置为“成功”和“失败”都要审核
10 “审核目录服务器访问”设置为“成功” 和“失败”都要审核
11 “审核目录服务器访问”设置为“成功” 和“失败”都要审核
12 “审核系统事件”设置为“成功” 和“失败”都要审核
13 “审核账户管理”设置为“成功” 和“失败”都要审核
14 “审核过程追踪”设置为 “失败”需要审核
15 “Microsoft网络服务器”设置为“在挂起会话之前所需的空闲时间”为15分钟。
16 启用屏幕保护程序,设置等待时间为“5分钟”,启用“在恢复时使用密码保护”。
17 所有驱动器均“关闭自动播放”

上表中前15项属于安全策略,第16项属于组策略中的计算机配置策略,第17项属于用户配置策略。下面仅对Windows 2003平台的操作进行了分析与测试。

    一、 对于安全策略,可以用以下步骤进行应用部署:

::在测试用机上,先使用gpedit.msc手工更改策略(如表中前15面),再用以下命令导出当前策略

secedit /export /cfg sec.inf

::用文本编辑器编辑sec.inf文件,去除不需要调整的内容,仅保留要定制策略

表中15条策略对应的inf文件内容如下:

[Unicode]
Unicode=yes
[Version]
signature=”$CHICAGO$”
Revision=1
[System Access]
MaximumPasswordAge = 90
PasswordComplexity = 1
LockoutBadCount = 6
[Event Audit]
AuditSystemEvents = 3
AuditLogonEvents = 3
AuditObjectAccess = 3
AuditPrivilegeUse = 3
AuditPolicyChange = 3
AuditAccountManage = 3
AuditProcessTracking = 2
AuditDSAccess = 3
[Registry Values]
machine/system/currentcontrolset/services/lanmanserver/parameters/autodisconnect=4,15
[Privilege Rights]
seremoteshutdownprivilege = *S-1-5-32-544
seshutdownprivilege = *S-1-5-32-544
setakeownershipprivilege = *S-1-5-32-544

::用命令生成一个sdb文件

secedit /configure /db  sec.sdb  /cfg sec.inf

::用命令把定制策略更新到目标服务器,不能用/overwrite参数,否则除定制策略外的其它策略丢失

secedit /configure /db sec.sdb

::刷新组策略

gpupdate /force

    二、其他组策略的应用

以前曾经研究过利用gpcvreg与gpscript命令行程序来应用组策略,并且写了autoit3脚本的UDF,这次正好可以利用。
使用gpedit.msc在测试机修改16/17两条策略,在不关闭gpedit.msc的同时用regedit查看HKEY_CURRENT_USER/Software/Microsoft/Windows/CurrentVersion/Group Policy Objects下,分析得到相应设置并存成Reg文件

machine.reg, 禁用所有驱动器自动播放

[HKEY_LOCAL_MACHINE/Software/Microsoft/Windows/CurrentVersion/Policies/Explorer]
“NoDriveTypeAutoRun”=dword:000000FF

user.reg,定制屏幕保护设置

[HKEY_CURRENT_USER/Software/Policies/Microsoft/Windows/Control Panel/Desktop]
“ScreenSaverIsSecure”=”1”
“ScreenSaveActive”=”1”
“ScreenSaveTimeOut”=”300”
“SCRNSAVE.EXE”=”scrnsave.scr”

三、批量应用脚本

有了sec.sdb、machine.reg及user.reg文件,然后利用以前写的poledit.au3 UDF ,只需要以下脚本就可以进行前文所列出的策略的自动应用了。


#RequireAdmin
#NoTrayIcon
#include "PolEdit.au3"

If FileExists("sec.sdb") Then RunWait(@ComSpec & " /c " & "secedit /configure /db sec.sdb", @ScriptDir, @SW_HIDE)
_RegWriteToPol("machine.reg", "MACHINE", 1)
_RegWriteToPol("user.reg")
_gpupdate()

Setting up awstats with apache 2 & geoip on debian-ubuntu

Awstats is a web log analyzer. It gives really useful statistics about traffic on your web sites.This log analyzer works as aCGI or from command line and shows you all possible information your log contains, in few graphical web Awstats Monthly Viewpages.

yesterday, it took me many hour to configure it on my server, I took help from many blogs to complete it.

Hope this can help someone.

1. Installing Awstats:

ab@web1:~$ sudo apt-get install awstats

This command will install awstats.Now we have to configure Apache.

2. Configuring Apache2:

Now make the following changes inawstats.conf file.

ab@web1:~$ sudo vi /etc/apache2/awstats.conf

Alias /awstatsclasses “/usr/share/awstats/lib/”
Alias /awstats-icon/ “/usr/share/awstats/icon/”
Alias /awstatscss “/usr/share/doc/awstats/examples/css”
ScriptAlias /cgi-bin/ /usr/lib/cgi-bin/
ScriptAlias /awstats/ /usr/lib/cgi-bin/
Options ExecCGI -MultiViews +SymLinksIfOwnerMatch

After, Making these changes, we have to include this file (/etc/apache2/awstats.conf) in to our apache.conf file, so we can access it over http.

ab@web1:~$ sudo vi /etc/apache2/apache2.conf

Include /etc/apache2/awstats.conf

Now, reload the apache.

ab@web1:~$  sudo /etc/init.d/apache2 reload

Now you can try to open http://www.mysite.com/awstats/awstats.pl but you will get this error:  Error: SiteDomain parameter not defined in your config/domain file. You must edit it for using this version of AWStats.

That means we have to configure Awstats.

3. Configuring Awstats:

By default awstats provides a default configuration file named /etc/awstats/awstats.conf. Copy this file to /etc/awstats/awstats.www.mysite.com.conf:

~$sudo cp /etc/awstats/awstats.conf /etc/awstats/awstats.www.mysite.com.conf

and edit the file:

~$sudo vi /etc/awstats/awstats.www.mysite.com.conf

and check for the following lines and edit those for your needs:

LogFile=”/var/log/apache2/access.log”
SiteDomain=”mysite.com”

This is all setted up, now you need to generate the first stats.

4. Generating the First Stats:

in order to generate the first stats, you need to call the script as root using the following command line:

~:$sudo -u www-data /usr/bin/perl /usr/lib/cgi-bin/awstats.pl -update -config=www.mysite.com

After finishing this you can try to open http://www.mysite.com/awstats/awstats.pl this will show you the stats.

Now for automatic update the stats you need to put the following command in your cron.

0 2 * * * www-data [ -x /usr/lib/cgi-bin/awstats.pl -a -f /etc/awstats/awstats.conf -a -r /var/log/apache/access.log ] && /usr/lib/cgi-bin/awstats.pl -config=mysite.com -update >/dev/null

GeoIP Information for AWStats

Improve country and city location information in your web analytics reports

Awstats showing country info

AWStats offers three different ways to provide Country level information about visitors (“hosts”) connecting to your site. By default, the host domain extension is used if you have performed reverse DNS look-up. While this results in human readable host names as well, reverse DNS lookup is time consuming. Alternatively, GeoIP plugins can be used. They match the host IP with a database of IP allocations which is already installed locally on your computer, significantly reducing the time needed to match a host to a location. There are two country level GeoIP databases available. AGeo::IPFree Perl module is available, but it does not appear that the database is being maintained. The better solution is MaxMind’s Geo::IP GeoLite Country open source version, said to be 97% accurate.

Download the current GeoLite Country, GeoLite City and Organization (AS Numbers)databases
wget http://geolite.maxmind.com/download/geoip/database/GeoLiteCountry/GeoIP.dat.gz
wget http://geolite.maxmind.com/download/geoip/database/GeoLiteCity.dat.gz
wget http://geolite.maxmind.com/download/geoip/database/asnum/GeoIPASNum.dat.gz

Move data files to directory and unzip.

mv GeoIP.dat.gz /usr/local/share/GeoIP/
gunzip /usr/local/share/GeoIP/GeoIP.dat.gz
mv GeoLiteCity.dat.gz /usr/local/share/GeoIP/
gunzip /usr/local/share/GeoIP/GeoLiteCity.dat.gz
mv GeoIPASNum.dat.gz /usr/local/share/GeoIP/
gunzip /usr/local/share/GeoIP/GeoIPASNum.dat.gz
Install the GeoIP program.

1. wget http://geolite.maxmind.com/download/geoip/api/c/GeoIP-1.4.5.tar.gz
tar -xvzf GeoIP-1.4.5.tar.gz
cd GeoIP-1.4.5
./configure
make
make check
sudo make install

2.wget http://geolite.maxmind.com/download/geoip/api/perl/Geo-IP-1.35.tar.gz
tar -xvzf Geo-IP-1.35.tar.gz
cd Geo-IP-1.35
perl Makefile.PL LIBS=’-L/usr/local/lib’
make
make test
sudo make install

Update your awstats.mysite.conf configuration file

Look for the following geoip LoadPlugin options in your AWStats configuration file. Update them with the full path to each of the two database files.

LoadPlugin=”geoip GEOIP_STANDARD /usr/local/share/GeoIP/GeoIP.dat”
LoadPlugin=”geoip_city_maxmind GEOIP_STANDARD /usr/local/share/GeoIP/GeoLiteCity.dat”
LoadPlugin=”geoip_org_maxmind GEOIP_STANDARD /usr/local/share/GeoIP/GeoIPASNum.dat”

Well, It’s done and now you can check the stats with country info.

Cheers!!

DH的虚拟主机上是有GeoIP.dat的,可以这样找到路径:

$ locate GeoIP.dat
/usr/local/share/GeoIP/GeoIP.dat
/usr/share/GeoIP/GeoIP.dat

安装库模块:

perl -MCPAN -e ‘install “Geo::IP”‘

perl -MCPAN -e ‘install “Geo::IP::PurePerl”‘

我找到两个,比了一下时间,/usr/local那个要更新一点,所以用这个。所以,像下边这样修改common.conf:

找到
# LoadPlugin=”geoip GEOIP_STANDARD /pathto/GeoIP.dat”
取消注释,改为
LoadPlugin=”geoip GEOIP_STANDARD /usr/local/share/GeoIP/GeoIP.dat”

这样做,就可以开启GeoIP功能了,也就是在IP栏的右边,显示出IP所在国家。

如果,你认为DH的GeoIP.dat数据比较老,想使用比较新的,可以直接从MaxMind下载。可以下载GeoIP.dat.gzGeoLiteCity.dat.gz,之后解压,放在某处。假设放在/home/yourname/awstats/目录下。

LoadPlugin=”geoip GEOIP_STANDARD /pathto/GeoIP.dat”
LoadPlugin=”geoip_city_maxmind GEOIP_STANDARD /pathto/GeoIPCity.dat”
把以上两句改为:
LoadPlugin=”geoip GEOIP_STANDARD /home/awstats/awstats/GeoIP.dat”
LoadPlugin=”geoip_city_maxmind GEOIP_STANDARD /home/yourname/awstats/GeoIPCity.dat”

这样,就可以有国家和城市两栏显示了。

但是,这个城市显示比较粗糙一点,还可以利用QQ的纯真库IP信息来显示,有人做了一个这样的插件,qqhostinfo。需要以下步骤:

1. 下载纯真版IP数据库,解压缩后,只使用QQWry.dat
2. 下载qqhostinof.pm
3. 下载分析QQWry.dat的脚本
4. 把以上文件都放在cgi-bin/plugins下
5. 修改qqwry.pl,把./QQWry.dat改为${DIR}/plugins/QQWry.Dat
6. 修改common.conf,加入LoadPlugin=”qqhostinfo”

经过以上设置就可以了,会在GeoIPCity右边出现Location栏,里边有很具体的地址信息。

在使用qqhostinfo的时候,需要安装Net::XWhois模块。发现DH的主机上已经装了这个模块。

如果在没有的虚拟主机上安装,由于没有管理员权限,所以,正常的安装过程在make install的时候会报错的。所以,可以这样:

$ make Makefile.PL PREFIX=/home/yourname/awstats/lib # 这样可以把最后的安装都放在这个目录里
$ make
$ make install

另外,如果对中文搜索引擎统计有更高需求的话,可以使用车东的TOP 8 Chinese local search engines。这东西是将近一年前的,适用于AWStats-6.6,对于6.7来说不太合适。我做了一个6.7的search_engines.pm.patch,可以对search_engines.pm打patch。不管在本地,还是在DH主机的shell里,可以

patch search_engines.pm search_engines.pm.patch


1.更新若干有用的模块:      

       ppm install Geo::IP::PurePerl
       ppm install Geography::Countries
       ppm install IP::Country 
       ppm install Geo-IPfree
       ppm install  Net-Xwhois 

2.GeoIP和qqhostinfo需要下载相关文件

GeoIP需要GeoIP.dat;qqhostinfo需要qqhostinfo.pm、qqwry.pl、QQWry.dat3个文件,把他们都放到cgi-bin的插件目录里面.

GeoIP.dat,qqhostinfo.pm、qqwry.pl、QQWry.dat3 打包CSDN下载:
http://download.csdn.net/detail/debugcs/4360307


3、插件的开启

        开启 GeoIP 反查模块
       LoadPlugin=”geoip GEOIP_STANDARD C:/Perl/lib/GeoIP.dat”
       开启 IP 反查的外挂
       LoadPlugin=”geoipfree”
  
       # 开启 decodeutfkeys 外挂,解决“用以搜索的关键词”乱码
       LoadPlugin=”decodeutfkeys”    
     
       设定IIS的log时间
       LoadPlugin=”timezone +8″好了,所以的设置都弄好了,awstats已经能够很好的工作了。
       # Plugin: qqhostinfo,显示访问者地区,下面的语句需要手工添加。
       LoadPlugin=”qqhostinfo” 

       # 开启HostInfo,这个是qqhostinfo插件的前提


       LoadPlugin=”hostinfo”
*  上面插件加载地址按需修改 

日志统计页面GeoIP显示效果:

It may not be able to give the same level of detail as a commercial package such as Urchin, but it provides more than enough detail for most purposes.
On Ubuntu you can install awstats via apt:
apt-get install awstats
This will install the base package however, if you want to lever its full power you will need to install a couple of extra Perl modules.
apt-get install libnet-ip-perl
If you would like to see which countries your visitors are based in then you should look at one of the IP to Country plugins which will give you a Geo IP lookup.
You can choose between either geoipfree or GeoIp.
Other useful plugins are:

  • Plugin: HostInfo – which gives you a popup whois window
  • Plugin: IPv6 – adds IPv6 support
  • Plugin: Tooltips – confused by all the information? This will take away the mystery :)

On rpm-based system there is a handy little perl script that walks you through the initial configuration. On Ubuntu you have to do it by hand, however most of the configuration is self-explanatory.
Simply copy the provided sample config to a new config file:
cp awstats.conf awstats.yoursite.tld.conf
NB: You will need a separate configuration file for each vhost you wish to examine.
Edit the conf file to match your site’s setup. Important things to pay attention to are any domain aliases, the location of the log files and any IPs you wish to ignore (eg. your own)
You can also decide which optional plugins you want to load. Simply add a line to invoke each one:
LoadPlugin="geoipfree"
LoadPlugin="ipv6"
LoadPlugin="Tooltips"

geoipfree requires an extra perl module. On ubuntu the package is called libgeo-ipfree-perl
You are almost ready!
You now need to configure Apache to allow access to your awstats pages.
Rather than messing about with my main Apache config file I found it neater to place the awstats specific information in an external file called awstats.conf:

Options None
AllowOverride None
Order allow,deny
Allow from all

Alias /awstatsicons/ /usr/share/awstats/icon/
ScriptAlias /cgi-bin/ /usr/lib/cgi-bin/

AllowOverride None
Options ExecCGI -MultiViews +SymLinksIfOwnerMatch
Order allow,deny
Allow from all


Then use an include directive in your main Apache config (apache2.conf):
Include /etc/apache2/awstats.conf
You then need to add it in to your vhost:
ScriptAlias /whereyouwanttoaccessit/ /usr/lib/cgi-bin/
If you navigate to:

http://www.yourdomain.tld/whereyouwanttoaccessit/awstats.pl?config=yourdomain.tld

You *should* be able to access your stats.
Of course you’ll need to actually generate the stats first:
/usr/lib/cgi-bin/awstats.pl -config=yourdomain.tld -update
I would recommend you run this from the command line once to create the first set of stats and then add a cronjob:
crontab -e
0,10,20,30,40,50 * * * * /usr/lib/cgi-bin/awstats.pl -config=yourdomain.tld -update >/dev/null
wq

This will update your stats every 10 minutes, which means that you’ll only have to update a few lines at a time. If your site is busy this makes sense :)
The last part of the line is important:
>/dev/null
By default cron emails the user each time it runs. You really don’t want 6 emails an hour telling you that Awstats has run :)

How to reset awstats

Just delete the files in /var/lib/awtstats (directory defined by DirData parameter)

sudo su - root
cd /var/lib/awstats
rm *
logout

Notes

  • you have to be root because for some reason, sudo rm -R awstats/* wouldn’t work.
  • if you get the message Never updated (See 'Build/Update' on awstats_setup.html page) whereas the awstats files are there in /var/lib/awtstats, it’s probably a permission problem on this folder.

学习Web应用漏洞最好的教程—-WebGoat

WebGoat是一个用于讲解典型web漏洞的基于J2EE架构的web应用,他由著名的WEB应用安全研究组织OWASP精心设计并不断更新,目前的版本已经到了5.0。WebGoat本身是一系列教程,其中设计了大量的web缺陷,一步步的指导用户如何去利用这些漏洞进行攻击,同时也指出了如何在程序设计和编码时避免这些漏洞。Web应用程序的设计者和测试者都可以在WebGoat中找到自己感兴趣的部分。
虽然WebGoat中对于如何利用漏洞给出了大量的解释,但是还是比较有限,尤其是对于初学者来说,但觉得这正是其特色之处:WebGoat的每个教程都明确告诉你存在什么漏洞,但是如何去攻破要你自己去查阅资料,了解该漏洞的原理、特征和攻击方法,甚至要自己去找攻击辅助工具,当你成功时,WebGoat会给出一个红色的Congratulation,让你很有成就感!(咱号称搞技术的不就需要这个吗?)

WebGoat甚至支持在其中加入自己的教程,具体方法可以查看其说明文档

WebGoat中包括的漏洞教程主要有

Cross-site Scripting (XSS)
Access Control
Thread Safety
Hidden Form Field Manipulation
Parameter Manipulation
Weak Session Cookies
Blind SQL Injection
Numeric SQL Injection
String SQL Injection
Web Services
Fail Open Authentication
Dangers of HTML Comments


建议在使用WebGoat时对照OWASP的文档来看,比较有用的是下面三个:

OWASP Testing Guide 3.0
OWASP Code Review Guide 1.1
OWASP Development Guide 2.0
如果你以前没有接触过OWASP,当你看到这些文档时,应该会有一种感觉叫做兴奋。


下面简单说一下安装方法(windows下):
先下载webscarab-current.zip(这个自带tomcat,还有一个下载方式是war文件,需要自己安装tomcat,建议使用第一个),地址为http://www.owasp.org/index.php/Category:OWASP_WebGoat_Project,解压到一个文件夹,运行webgoat.bat即可启动其自带的tomcat,通过访问http://localhost/WebGoat/attack,输入用户名guest,密码guest即可进入。如下图所示:
webgoat1

有一点值得注意的是默认Tomcat只开放在127.0.0.1的80端口,其他的机器没有办法访问,这也是为了安全考虑,因为WebGoat中的漏洞实在太多了。如果是拿来学习,建议还是将其开在0.0.0.0上,修改tomcat下conf中server-80.xml,将其中的所有127.0.0.1改为0.0.0.0并重新运行webgoat.bat即可。server-8080.xml也可以改,但是要运行webgoat_8080.bat才有效果,
知道有WebGoat这个好东东得益于一次和Fortify厂商的接触,Fortify也是OWASP的主要资助者,他们的程序跟踪分析器(PTA)和静态代码分析器(SCA)常常拿WebGoat来做演示。但是很可惜,没有保存Fortify的分析结果,Fortify也不提供个demo版,只好先拿IBM(收购自WatchFire)的AppScan来看看WebGoat中是否有那么多漏洞,下面是扫描结果:

WebGoat2-appscan


的确漏洞无数!好了,开始学习吧!

十款微软免费实用精品工具推荐

本期笔者为大家推荐10个微软官方发布的实用小工具,都是免费的,其中,不乏大家比较熟悉的Process Monitor、AutoRuns等等精品小程序,熟练使用这些小工具能够帮助大家更有能力处理Windows系统出现的各种问题,而且不花一毛钱。

1305941889572

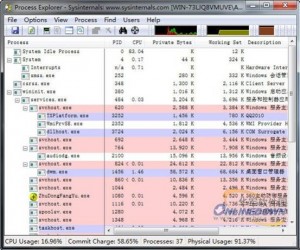
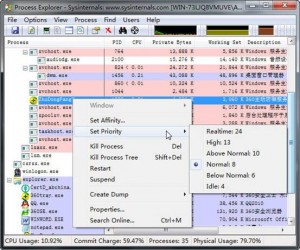
1. 增强型任务管理器Process Explorer

Process Explorer 是一款增强型的任务管理器,你可以使用它方便地管理你的程序进程,让使用者能了解看不到的在后台执行的处理程序,能显示目前已经载入哪些模块,分别是正在 被哪些程序使用着,还可显示这些程序所调用的进程以及所打开的句柄。Process Explorer最大的特色就是可以终止任何进程,甚至包括系统的关键进程!

1305941889732

Process Explorer不仅可以监视、暂停、终止进程,还可以查看进程调用的 DLL 文件,遇到不熟悉的进程可以直接在线搜索。Process Explorer还提供CPU 及内存使用情况的查看服务,通过内核层与用户层分明的波形图,让你在监视用户操作的同时,随时警惕硬件损耗。同时,该软件提供托盘提示服务,可以实时提示 系统资源占用情况。绝对是一个不可多得的系统维护能手。

1305941890746

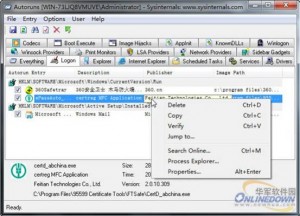
2. 系统启动项管理工具:Autoruns 

Autoruns是一款可以监控启动进程的小工具,相比Msconfig只能看到一部分涉及Windows启动的程序,Autoruns则可以获得 启动Windows时系统加载的程序与可执行文件的完整列表。当然,这只是Autoruns程序的一个小功能,通过Autoruns,您还可以获取正在运 行的Windows上关于系统进程的大部分信息,包括程序调用的进程、已知的Dll函数库、系统启动所加载的应用程序以及注册表进程等等。

1305941891367

启动项管理

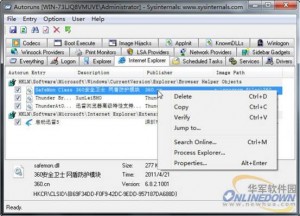
使用Autoruns不仅可以详尽列出开机自启动项目,还可以管理IE加载项、系统服务项等等。对于木马或者病毒这些恶意程序,使用Autoruns可以让其毫无藏身之地。目前,AutoRuns已经能够完美支持Windows7系统。有兴趣的朋友可以下载试试看。

1305941892918

IE插件管理

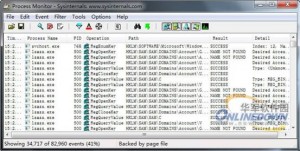
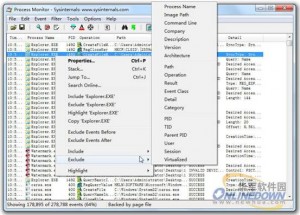
3. 微软系统监视工具:Process Monitor

Process Monitor是一款系统监视工具,总体来说,Process Monitor集成了Filemon和Regmon两款小工具,其中Filemon专门用来监视系统中的任何文件操作过程,而Regmon用来监视注册表 的读写操作过程。通过Process Monitor,用户可以对系统中的任何文件和注册表操作同时进行监视和记录,通过注册表和文件读写的变化,对于帮助诊断系统故障或是发现恶意软件、病毒 或木马来说,非常有用。

1305941893195

Process Monitor是一个高级版的Windows系统监视工具,说它高级是因为它所提供的功能,Windows是无法比拟的。它可以实时显示文件系统、注册表、进程/线程活动状态。通过详细的进程及注册表信息显示,可以帮助高级用户解决多种系统问题。

1305941895958

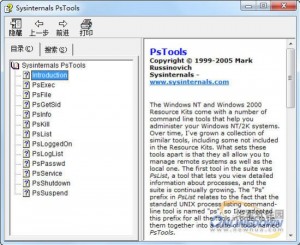
4. 精悍网管工具箱:PsTools

PsTools是一个命令行下的Windows NT/2000/XP/2003 远程或者局域系统管理工具包,包含系列工具如下:PsExec-远程运行程序;PsFile-显示远程打开的文件;PsGetSid-显示计算机或用户的 SID;PsKill-根据进程名或进程ID杀进程;PsInfo-显示系统有关信息;PsList-显示详细的进程信息;PsLoggedOn-显示通 过资源共享登陆到本地;PsLogList-导出日志文件;PsPasswd-更改用户密码;PsService-查看和控制服 务;PsShutdown-关闭或重启远程计算机;PsSuspend-终止进程。

1305941895454

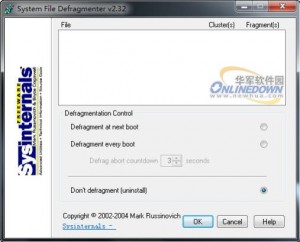
5. 虚拟内存自动整理工具:PageDefrag

PageDefrag是微软出品的虚拟内存碎片自动整理工具,可以大大提高用户的系统性能。该软件采用先进的技术向您提供商业碎片整理程序无法提供 的服务:即查看分页文件和注册表配置单元的碎片化情况,并且对它们进行碎片整理的能力。此外,它还对事件日志和 Windows 2000/XP 休眠文件(当休眠笔记本电脑时保存系统内存的地方)进行碎片整理。

1305941896708

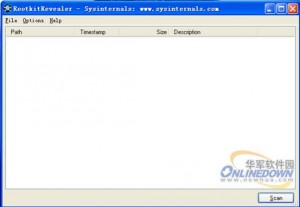
6. 流行Rootkit检测工具:RootkitRevealer

RootkitRevealer是一个流行的基于行为的 Rootkit 检测工具,Rootkit 是一种特殊类型的恶意程序。虽然Rootkit检测工具在不断增多,但是恶意程序的开发者也在不断寻找新的途径来掩盖他们的踪迹。 RootkitRevealer 能够帮助用户轻松侦测到大多数流行的企图隐藏它们的文件和注册表键的恶意程序。

1305941897263

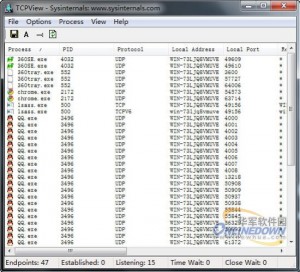
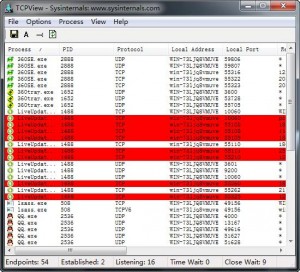
7. 端口和线程监控工具TCPView

TCPView是一款免费的端口和线程监控工具,可以列出当前所有TCP和UDP端口的进程清单,包括本地和远程地址的TCP连接。该软件操作简 单、使用方便、占用资源少。TCPView的主界面中显示了当前计算机打开的端口和线程,直接显示端口对应的程序图标,非常直观,一眼就能看出某个端口是 什么程序打开的。

1305941898660

对于那些系统本身打开的端口,由于一般用户并不太熟悉,可以通过检查线程的属性来判断。具体的操作是用右键点击这些线程,在弹出的菜单中选择 “process properties(进程属性)”,其中的“路径”项就是这个端口的所对应的程序在硬盘上的路径,通常系统文件都在C:WINDOWS system32目录下,如果出现和系统程序相似的名字,文件又不在系统目录,那么这些程序就有可能是假冒的系统程序,极有可能是木马。

1305941899976

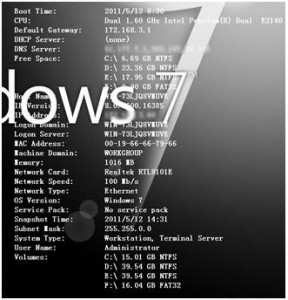
8.系统信息显示工具:BgInfo

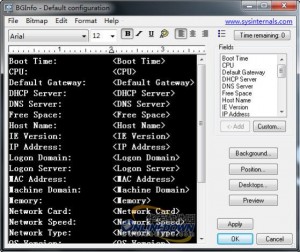
BGInfo是一款用于设置墙纸背景文本显示的软件,此软件本身可以探测一些有用的系统信息并能把这些有用文字显示在墙纸上,从此系统信息查看变得十分简单!

1305941900202

BGInfo可以在你的桌面上显示诸如开机时间、IP地址等信息,把当前的系统信息直接加入到桌面壁纸上,从而帮助用户实时掌握系统信息。

1305941901847

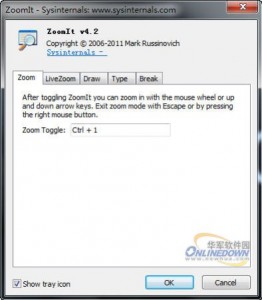
9. 投影演示辅助工具:ZoomIt

ZoomIt是一款非常实用的投影演示辅助工具。它源自Sysinternals公司,后来此公司被微软收购,因此,有些网友也称 ZoomIt为微软放大镜。ZoomIt体积小巧、完全免费、易于使用。通过快捷键可以很方便地调用ZoomIt三项功能:屏幕放大、屏幕注释、定时提 醒。

1305941902903

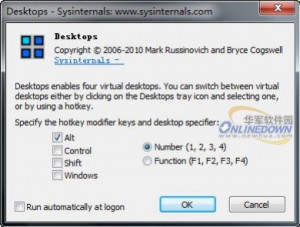
10. 微软虚拟桌面工具:Desktops 

Desktops是一款虚拟桌面工具,能够让用户同时使用4台虚拟桌面,可以读取邮件,浏览网页,还可以做其他事情。同时,用户可以创建或者切换Desktops,可以通过托盘图标打开桌面的预览和开关窗口,或者使用快捷键。

1305941903903

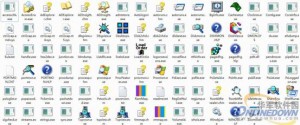
本期笔者为大家推荐了10个微软官方发布的实用小工具,都是免费的。其实,这些工具都包含在微软发布的免费工具程序集Sysinternals Suite中,该工具集中提供了包括上面介绍的十个工具在内的近70个实用工具。目前,Sysinternals Suite的最新版本是20110503,并且仍然在不断的更新和优化,用好Sysinternals Suite里的工具将更有能力处理Windows的各种问题,而且不花一毛钱。

1305941904753

由于Sysinternals Suite里面的小工具组件有很多,由于时间关系,笔者不可能对所有内置小工具一一进行详细的讲解。用户可以点击进入微软官方站点去查询详细信息。所有内置的小工具组件都可以单独拿出来运行,并且都是绿色化设计,用户只需点击同意按钮就可以直接运行。

1305941905705

本月更新的版本主要更新了3个小工具的版本。

— ZoomIt v4.2

— Process Explorer v14.11

— ProcDump v3.04

Sysinternals Suite 2011.05.03官方下载:

http://download.sysinternals.com/Files/SysinternalsSuite.zip

原文http://news.newhua.com/news/2011/0521/123046.shtml